
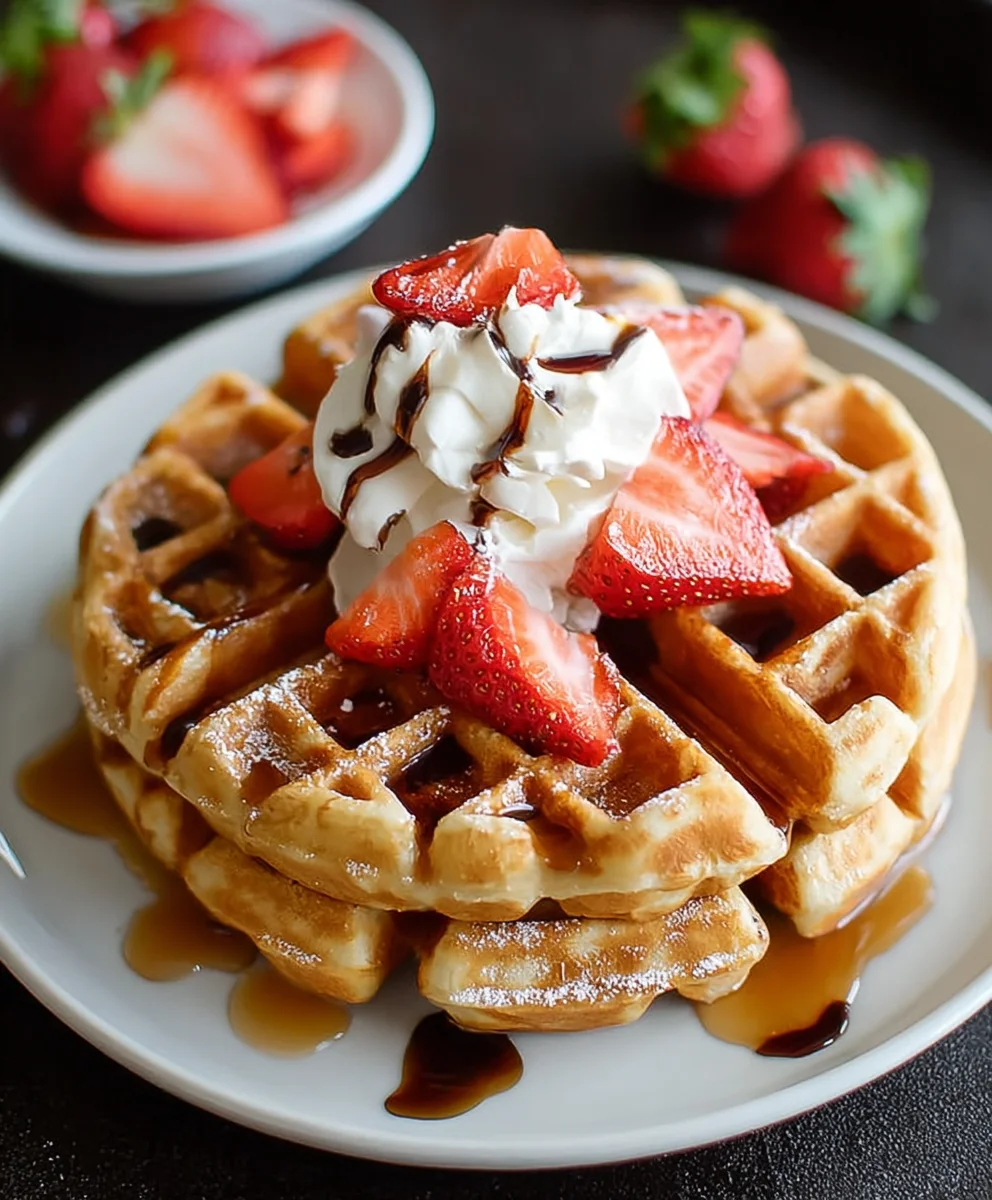
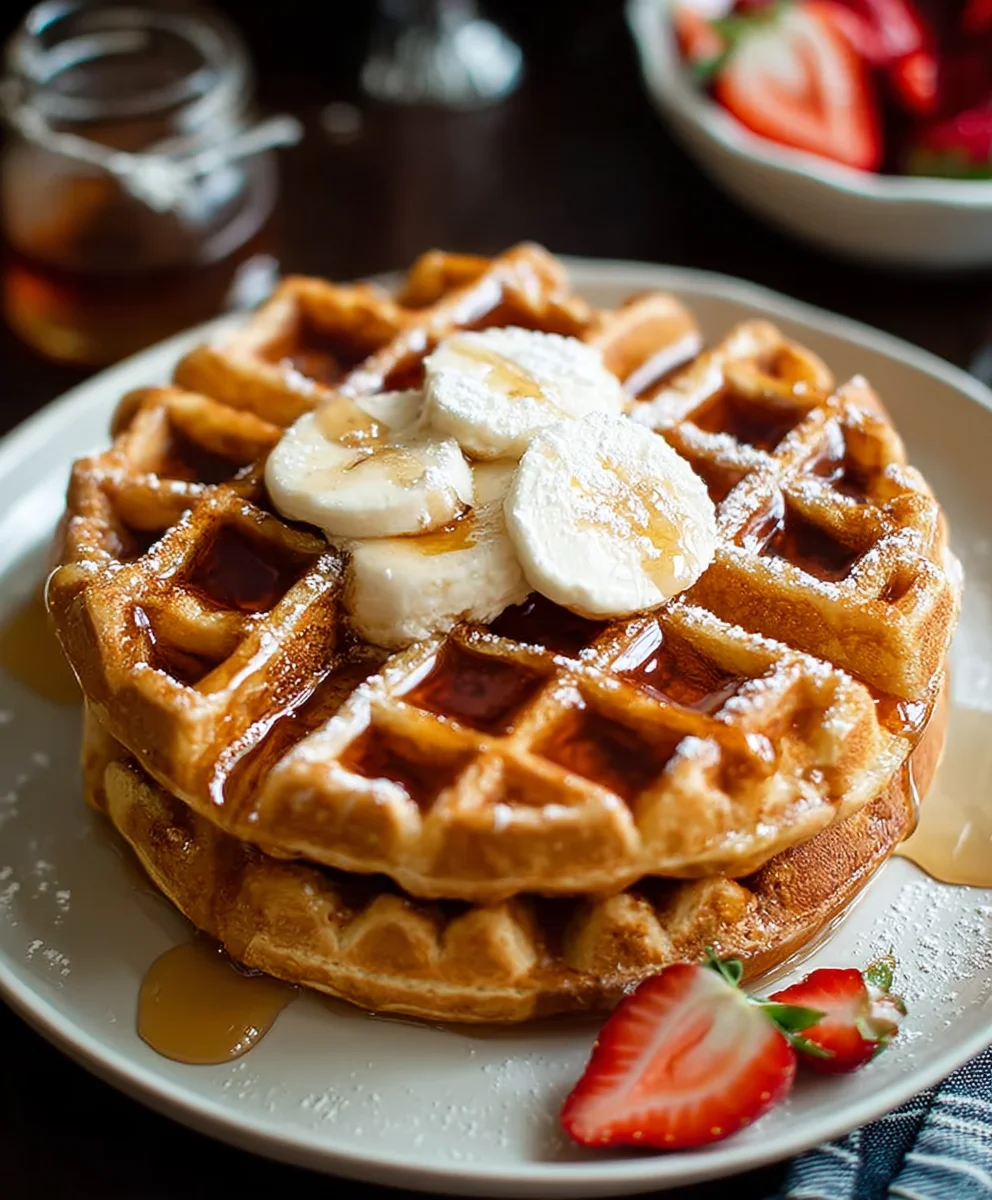
High Protein Waffles are not just a breakfast item; they’re a game-changer for anyone looking to start their day with a delicious and satisfying boost. Forget those bland, diet-centric alternatives that leave you feeling unsatisfied. These high protein waffles are designed to be incredibly flavorful, wonderfully fluffy, and yes, genuinely guilt-free. What’s not to love about a breakfast that tastes like a decadent treat but fuels your body with sustained energy? People adore them because they offer the perfect balance: the comforting crispiness of a classic waffle coupled with the power of protein to keep you feeling full and focused, preventing those mid-morning energy crashes. What truly sets this recipe apart is its versatility; you can customize your toppings to create a unique masterpiece every time, transforming a simple meal into an occasion. Get ready to elevate your breakfast routine!

Ingredients:
- ⅓ cup protein powder (32g) – choose your favorite flavor, unflavored works great too!
- ¼ cup all-purpose flour (35g) – this helps with structure
- 1 teaspoon baking powder – essential for that fluffy lift
- ⅛ teaspoon salt – balances the sweetness and enhances flavor
- ½ cup water – the base liquid for our batter
- ¼ cup egg whites (or additional water if you prefer a fully plant-based option) – adds richness and binds everything together
- ¼ cup plain yogurt (or unsweetened applesauce for a dairy-free alternative) – contributes moisture and a subtle tang
- 2 tablespoons sweetener of choice – honey, maple syrup, agave, or your preferred sugar substitute
- 2 teaspoons oil (optional, for crispier waffles) – a little fat can make a big difference in texture
Making Your High Protein Waffles
These high protein waffles are incredibly simple to whip up, making them perfect for a quick breakfast or a post-workout refuel. We’re focusing on straightforward steps to get you enjoying delicious, healthy waffles in no time.
Step 1: Combine the Dry Ingredients
Start by grabbing a medium-sized mixing bowl. Into this bowl, add your protein powder, all-purpose flour, baking powder, and salt. It’s really important to whisk these dry ingredients together thoroughly. This ensures that the baking powder and salt are evenly distributed throughout the mixture. If they aren’t mixed well, you might end up with pockets of blandness or unevenly risen waffles. A good whisking at this stage is the first secret to consistent, fluffy results. Make sure there are no clumps of protein powder left.
Step 2: Incorporate the Wet Ingredients
Once your dry ingredients are nicely combined, it’s time to introduce the wet components. Add the water, egg whites (or the extra water if you’re using it), yogurt (or applesauce), sweetener of choice, and the optional oil if you’re aiming for those delightfully crispy edges. Now, use a whisk or a fork to gently mix everything together. You don’t want to overmix here; just blend until everything is mostly combined and there are no large dry pockets of flour or protein powder remaining. A few small lumps are perfectly fine and can even contribute to a better texture. Overmixing can develop the gluten in the flour too much, leading to tougher waffles, which is the opposite of what we’re after.
Step 3: Achieving the Perfect Batter Consistency
At this point, your batter should be pourable but not too thin. It should have a consistency similar to thick pancake batter. If it seems too thick, you can add another tablespoon of water or egg white, a little at a time, until you reach your desired consistency. Conversely, if it seems too thin, a tiny bit more flour or protein powder can be stirred in carefully. The exact amount of liquid needed can vary slightly depending on the type of protein powder you use, as some absorb more liquid than others. It’s always best to err on the side of a slightly thicker batter, as you can always thin it out, but it’s harder to thicken a runny batter without adding more ingredients.
Step 4: Preheating and Preparing Your Waffle Iron
While you’re getting the batter just right, make sure your waffle iron is preheated. Most waffle irons have an indicator light that tells you when they’re ready. If your waffle iron tends to stick, lightly grease it with a bit of cooking spray or a tiny amount of oil. Even if it’s non-stick, a light coating can help ensure your beautiful waffles release without any issues, maintaining their perfect shape. Following your waffle iron’s specific instructions is always a good idea for optimal performance and longevity.
Step 5: Cooking Your High Protein Waffles to Golden Perfection
Once your waffle iron is hot and ready, pour about ½ cup of batter onto the center of the hot iron. Be careful not to overfill it, as the batter will spread. Close the lid and let the waffle cook. The cooking time will vary depending on your waffle iron, but typically it takes between 3 to 6 minutes. You’re looking for a golden-brown color and for the steam to slow down significantly, indicating that the waffle is cooked through. Resist the urge to open the lid too early, as this can cause the waffle to break apart. Once cooked, carefully remove the waffle using a fork or spatula and place it on a wire rack to keep it crisp. Repeat this process with the remaining batter, ensuring the iron is ready and greased for each batch. Enjoy them immediately!
Conclusion:
You’ve now mastered the art of creating delicious and satisfying High Protein Waffles! This recipe offers a fantastic way to elevate your breakfast or brunch with a boost of protein, keeping you feeling fuller for longer and providing sustained energy. Whether you’re a fitness enthusiast, looking for a healthier breakfast alternative, or simply want to enjoy a delightful treat that’s good for you, these waffles are a game-changer. Don’t be afraid to experiment with the suggested serving ideas – they can transform these waffles from a simple breakfast into a gourmet experience.
Remember, the beauty of these High Protein Waffles lies in their versatility. Feel free to adapt them to your personal taste and dietary needs. Enjoying a wholesome and delicious meal has never been so easy or rewarding!
Frequently Asked Questions about High Protein Waffles:
Q: Can I make High Protein Waffles ahead of time?
A: Absolutely! You can prepare the batter for High Protein Waffles and store it in the refrigerator for up to 24 hours. Alternatively, you can cook the waffles and let them cool completely before storing them in an airtight container in the refrigerator for 2-3 days, or freeze them for up to 1 month. Reheat them in a toaster or oven for a quick and easy breakfast.
Q: What are some good protein sources to add to High Protein Waffles?
A: In addition to the protein powder used in the base recipe, you can boost the protein content further by adding Greek yogurt, cottage cheese, or even blended silken tofu to the batter. Toppings like nut butters, seeds, and a dollop of Greek yogurt are also excellent ways to increase the protein in your finished waffles.
High Protein Waffles – Delicious & Healthy Breakfast
Simple and delicious high protein waffles perfect for a healthy breakfast or post-workout refuel. Easily customizable with your favorite protein powder and sweetener.
Ingredients
-
⅓ cup protein powder (32g)
-
¼ cup all-purpose flour (35g)
-
1 teaspoon baking powder
-
⅛ teaspoon salt
-
½ cup water
-
¼ cup egg whites
-
¼ cup plain yogurt
-
2 tablespoons sweetener of choice
-
2 teaspoons oil (optional)
Instructions
-
Step 1
Combine the dry ingredients: In a medium-sized mixing bowl, whisk together the protein powder, all-purpose flour, baking powder, and salt thoroughly to ensure even distribution. -
Step 2
Incorporate the wet ingredients: Add water, egg whites, plain yogurt, sweetener, and optional oil to the dry ingredients. Gently mix until mostly combined, avoiding overmixing. -
Step 3
Achieve the perfect batter consistency: The batter should be pourable, similar to thick pancake batter. Adjust with a tablespoon of water or egg white if too thick, or a bit more flour/protein powder if too thin. -
Step 4
Preheat and prepare your waffle iron: Ensure your waffle iron is preheated. Lightly grease with cooking spray or oil if it tends to stick. -
Step 5
Cook your high protein waffles: Pour about ½ cup of batter onto the hot waffle iron. Close the lid and cook for 3-6 minutes until golden brown and steam slows. Remove carefully and let cool slightly on a wire rack.
Important Information
Nutrition Facts (Per Serving)
It is important to consider this information as approximate and not to use it as definitive health advice.
Allergy Information
Please check ingredients for potential allergens and consult a health professional if in doubt.


Leave a Comment