

Homemade bread isn’t just food; it’s an experience. It’s the aroma that fills your kitchen, a warm hug on a chilly morning. There’s a primal satisfaction, a sense of accomplishment, that comes with transforming simple ingredients like flour, water, yeast, and salt into a golden-brown masterpiece. We all have those memories – the comforting scent of grandma’s baking, the joy of tearing into a crusty loaf at a restaurant, or the simple pleasure of a perfectly buttered slice. This isn’t about chasing perfection, but about embracing the journey. The beauty of homemade bread lies in its versatility and its inherent goodness. Each batch is unique, reflecting the weather, the flour, and your own touch. It’s a labor of love that rewards you with unparalleled flavor and texture, something store-bought just can’t replicate.
Why You’ll Love Making This Homemade Bread
From Scratch, With Love
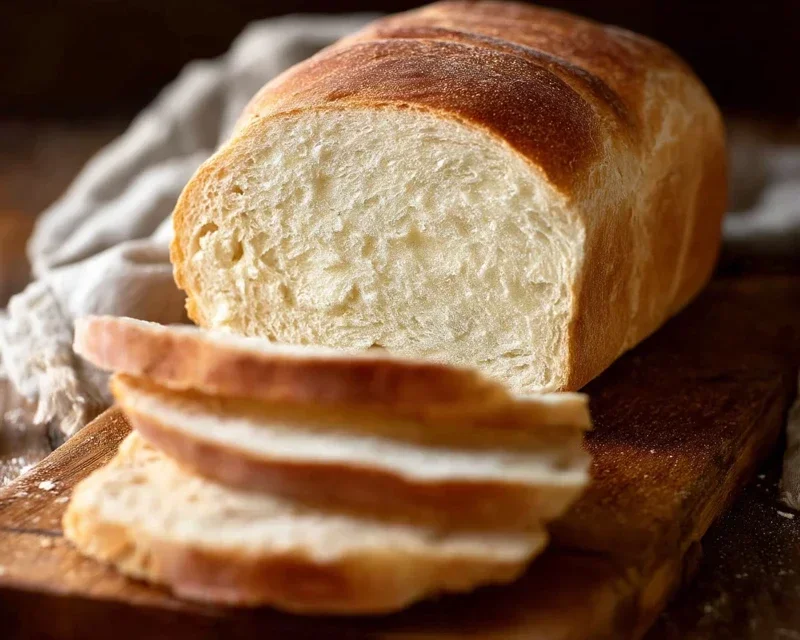
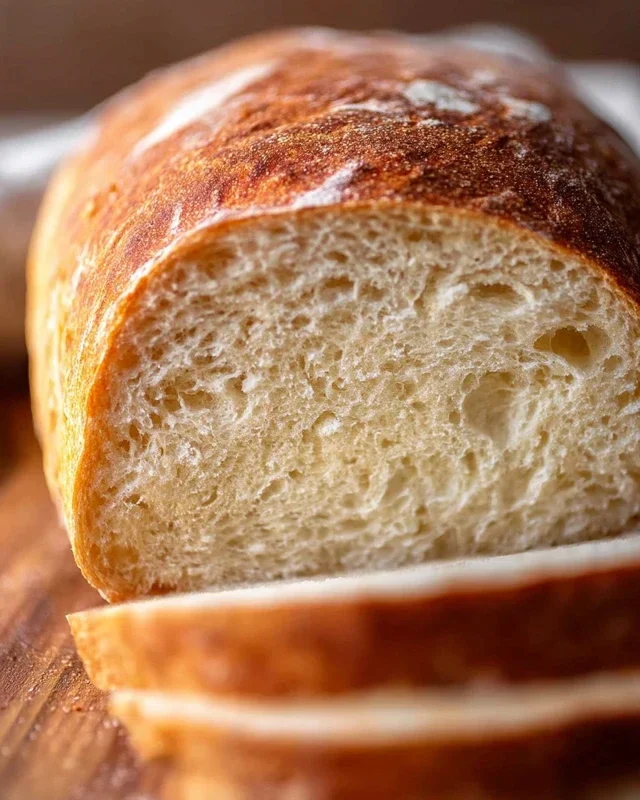
There’s a quiet magic in the alchemy of baking. Watching dough rise, feeling its elasticity under your hands, and finally, pulling a perfectly baked loaf from the oven – it’s incredibly grounding. This recipe focuses on simplicity and accessibility, meaning you don’t need a professional bakery to achieve delicious results. It’s the perfect project for a lazy weekend afternoon, a way to slow down and create something truly nourishing and satisfying. The finished product? A crusty exterior giving way to a soft, chewy interior, perfect for sandwiches, toast, or simply enjoying on its own.

Homemade Bread
There’s something incredibly satisfying about pulling a warm, fragrant loaf of homemade bread from your oven. The aroma alone can transport you to a cozy kitchen, and the taste… well, it’s incomparable to anything store-bought. While it might seem intimidating at first, baking your own bread is surprisingly achievable and incredibly rewarding. Today, we’re going to walk through the simple steps to create a classic, versatile loaf that will become a staple in your home. Get ready to impress yourself and your loved ones with this delicious, made-from-scratch wonder.
Ingredients:
Getting Started: Activating the Yeast
The first crucial step in any yeast bread recipe is to wake up your yeast. In a large mixing bowl or the bowl of your stand mixer, combine the warm water and your chosen sweetener – either honey for a slightly richer flavor and color, or sugar for a more neutral sweetness. Gently stir until the honey or sugar is dissolved. Now, sprinkle the active dry yeast over the surface of the liquid. Don’t stir it in just yet. Let it sit undisturbed for about 5 to 10 minutes. You’ll know the yeast is alive and ready to work its magic when it becomes foamy and bubbly on top. This “blooming” indicates that the yeast is actively feeding on the sugars and producing carbon dioxide gas, which is what will make your bread rise. If you don’t see any foam, your yeast might be old or the water wasn’t the right temperature, and you’ll need to start over with fresh yeast.
Mixing the Dough
Once your yeast has bloomed, it’s time to add the remaining wet ingredients. Add the salt and oil to the bowl. Now, begin extract incorporating the flour. Start by adding about 4 cups of the all-purpose or bread flour. If you’re using a stand mixer, attach the dough hook and mix on low speed until the ingredients just start to come together. If you’re mixing by hand, use a sturdy spoon or spatula to stir everything until a shaggy dough begin extracts to form. At this stage, the dough will be quite sticky and unmanageable.
Kneading for Gluten Development
This is where the muscle comes in, or the stand mixer does the heavy lifting! Gradually add more flour, about 1/4 cup at a time, until the dough starts to pull away from the sides of the bowl and becomes less sticky. Be careful not to add too much flour at once, as this can result in a dense, dry loaf. The goal is a dough that is still slightly tacky to the touch but manageable enough to handle.
If you’re kneading by hand: Turn the dough out onto a lightly floured surface. Push the dough away from you with the heels of your hands, then fold it back over itself. Rotate the dough a quarter turn and repeat. Continue this process for about 8 to 10 minutes. You’ll feel the dough become smoother and more elastic as you knead. It should spring back slowly when you poke it.
If you’re using a stand mixer: Increase the speed to medium-low and let the mixer knead the dough for about 6 to 8 minutes. The dough should become smooth, elastic, and clear the sides of the bowl. Again, the dough should be slightly tacky.
The First Rise: Let the Dough Work its Magic
Once your dough is properly kneaded, it’s time for its first rest and rise. Lightly grease a clean, large bowl with a bit of oil or cooking spray. Place the dough in the bowl, turning it once to coat all sides with the oil. Cover the bowl tightly with plastic wrap or a clean kitchen towel. Find a warm, draft-free spot in your kitchen for the dough to rise. This could be inside a slightly warmed oven (turned off, of course!), on top of a refrigerator, or simply on your counter if your kitchen is warm. Let the dough rise for 1 to 1.5 hours, or until it has doubled in size. This process allows the yeast to produce carbon dioxide, creating those beautiful air pockets that give bread its texture.
Shaping and the Second Rise
Gently punch down the risen dough to release the air. Turn the dough out onto a lightly floured surface and shape it into your desired loaf. For a standard sandwich loaf, you’ll want to form it into an oblong shape. Gently pat the dough into a rough rectangle, then roll it up tightly from one of the longer sides, pinching the seam closed. Tuck the ends under. Place the shaped loaf into a greased loaf pan, or onto a baking sheet lined with parchment paper if you prefer a freeform loaf. Cover the loaf loosely with plastic wrap or a clean, damp kitchen towel. Let it rise again in a warm place for about 30 to 45 minutes, or until it looks noticeably puffy and has nearly doubled in size. This second rise, or proofing, is essential for a light and airy crum extractb.
Baking to Golden Perfection
Preheat your oven to 375 degrees Fahrenheit (190 degrees Celsius) while the dough is on its second rise. Once the dough has finished its second rise, you can optionally brush the top with an egg wash (one egg beaten with a tablespoon of water) for a shinier crust, or simply sprinkle it with a few seeds if you like. Carefully place the loaf into the preheated oven. Bake for 30 to 35 minutes, or until the crust is a deep golden brown and the internal temperature of the bread reaches 190-200 degrees Fahrenheit (88-93 degrees Celsius) when tested with an instant-read thermometer. If you tap the bottom of the loaf, it should sound hollow.
Cooling for the Perfect Texture
This is perhaps the hardest part – waiting! Once baked, immediately remove the bread from the loaf pan or baking sheet and place it on a wire rack to cool completely. This allows air to circulate around the entire loaf, preventing the bottom crust from becoming soggy. Resist the urge to slice into it while it’s still warm, as the internal structure is still setting, and cutting too early can lead to a gummy texture. Once cooled, slice and enjoy your truly delicious, homemade bread!
Conclusion:
And there you have it – the simple, rewarding journey to making your own delicious homemade bread! This recipe is truly fantastic because it breaks down the process into manageable steps, proving that you don’t need to be a master baker to achieve a beautifully risen, crusty loaf with a soft, pillowy interior. The aroma filling your kitchen as it bakes is simply unparalleled, and the taste of fresh bread, warm from the oven, is a comfort that store-bought versions can rarely match. We’ve explored how this versatile base can be adapted, from adding herbs and seeds to creating sweet variations for breakfast treats. Don’t be intimidated; embrace the process, and you’ll soon be enjoying the immense satisfaction of sharing your homemade bread with loved ones. So, go ahead, get your hands floury, and experience the magic for yourself!
Frequently Asked Questions:
Why is my bread not rising?
Several factors can contribute to a lack of rise. Ensure your yeast is fresh and active by proofing it in warm water (around 105-115°F or 40-46°C) with a pinch of sugar before adding it to your dough. Over-proofing or under-proofing can also affect the rise. Make sure your dough is rising in a warm, draft-free environment. Over-mixing can also develop the gluten too much, making it tough and less able to rise.
Can I make this homemade bread recipe ahead of time?
Absolutely! You can refrigerate the dough after the first rise for up to 24 hours. This slow fermentation can even enhance the flavor. When you’re ready to bake, let the dough sit at room temperature for about 30-60 minutes to take the chill off before shaping and the second rise. For baked loaves, they are best enjoyed within 2-3 days, but can be frozen, sliced, and reheated.
Homemade Bread
A simple and delicious recipe for homemade bread, perfect for beginners.
Ingredients
-
2 cups warm water (105-115 degrees)
-
1 Tablespoons active dry yeast
-
1/4 cup honey
-
2 teaspoons salt
-
2 Tablespoons canola oil
-
4 – 5 1/2 cups all-purpose flour
Instructions
-
Step 1
In a large bowl, combine warm water, honey, and yeast. Let stand for 5-10 minutes until foamy. -
Step 2
Stir in salt and oil. -
Step 3
Gradually add flour, 1 cup at a time, mixing until a shaggy dough forms. -
Step 4
Turn dough out onto a lightly floured surface and knead for 8-10 minutes until smooth and elastic. -
Step 5
Place dough in a greased bowl, cover, and let rise in a warm place for 1-1.5 hours, or until doubled in size. -
Step 6
Punch down dough, shape into a loaf, and place in a greased loaf pan. Cover and let rise for another 30-45 minutes. -
Step 7
Bake at 375°F (190°C) for 30-35 minutes, or until golden brown and sounds hollow when tapped.
Important Information
Nutrition Facts (Per Serving)
It is important to consider this information as approximate and not to use it as definitive health advice.
Allergy Information
Please check ingredients for potential allergens and consult a health professional if in doubt.



Leave a Comment