
How to Make a Clay Pie is an invitation to a truly unique and delightfully rustic culinary adventure. Forget your conventional sweet or savory pies; this is something entirely different, a dish born from tradition and a deep connection to the earth. You might be wondering, “A clay pie? Is that even edible?” And the answer is a resounding yes! People absolutely adore clay pie for its surprising textures, the way it encapsulates and steams its fillings to perfection, and the sheer novelty of it all. What makes a clay pie so incredibly special is its primal cooking method – essentially, using the earth itself as your oven. It’s a process that imbues the food with a subtle, earthy aroma and a wonderfully tender result, transforming simple ingredients into something truly memorable. Get ready to dig in and discover the magic of cooking the way our ancestors might have!

How to Make a Clay Pie
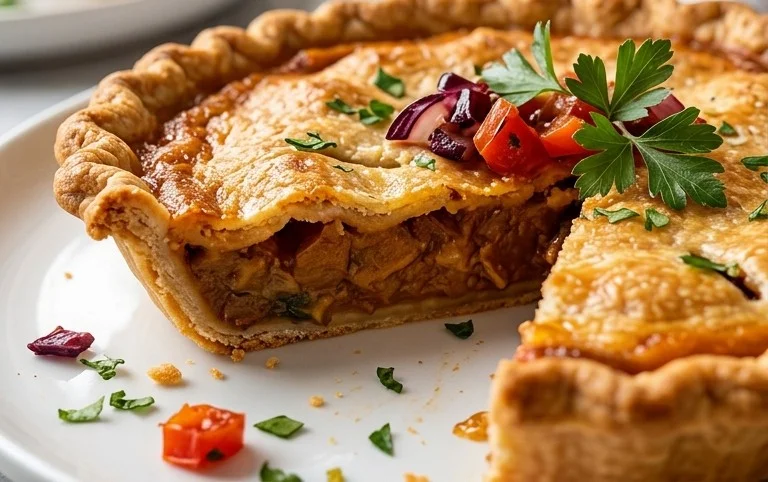
Creating miniature food items with polymer clay is a wonderfully rewarding hobby. One of the most delightful and visually appealing creations you can make is a tiny clay pie. Whether you’re crafting a sweet treat for a dollhouse scene, a charm for jewelry, or simply enjoying the artistic process, a well-made clay pie can be incredibly realistic and charming. Today, we’re going to walk through the simple yet detailed steps to create your very own miniature pie using just a few key ingredients. Get ready to unleash your inner baker and sculptor!
Ingredients:
Creating the Pie Crust
The foundation of our delicious-looking pie is the crust, and we’ll achieve a beautifully textured and realistically colored crust using tan polymer clay and soft pastels.
1. Begin extract by taking a generous amount of your tan polymer clay. Knead it thoroughly until it becomes soft and pliable. This is crucial for easy shaping and to avoid any cracks later on. Think of it like preparing dough for a real pie; you want it smooth and consistent. Roll this clay into a ball, and then flatten it into a disc. The size of this disc will depend on the size of your silver bottle cap, which will serve as our pie tin. You want the disc to be slightly larger than the opening of the bottle cap so that it can drape over the edges.
2. Now, it’s time to prepare our “pie tin.” Take your silver bottle cap and ensure it’s clean and dry. You can optionally add a thin layer of translucent liquid polymer clay or a tiny bit of Sculpey Glaze to the inside of the bottle cap if you want a more permanent and glossy finish for the “tin,” though it’s not strictly necessary for this project. For a more authentic look, you can lightly distress the inside of the bottle cap with a bit of sandpaper or a craft knife to give it a slightly worn metal appearance.
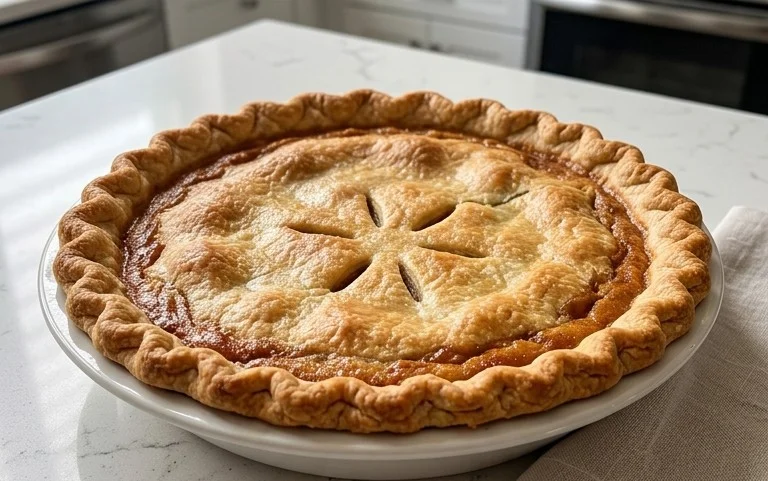
3. Carefully press the flattened tan clay disc into the silver bottle cap. Gently push the clay down into the base and up the sides, molding it to fit the contours of the bottle cap. Trim away any excess clay that hangs too far over the edge. You want a neat, even rim. Use a sculpting tool, a toothpick, or even your fingertip to gently crimp the edges of the clay crust to mimic the fluted edge of a real pie crust. This detail adds a significant amount of realism. You can create simple indentations with a tool or pinch the edges with your fingers.
Crafting the Delicious Filling
With our crust in place, it’s time to create the mouthwatering filling. For this example, we’ll use red polymer clay to represent a berry pie, but feel free to experiment with other colors for different fruit fillings!
4. Take your red polymer clay and knead it until it’s soft. Roll it into small balls or irregular shapes to represent fruit. Don’t worry about making them perfectly uniform; real berries have natural variations in size and shape. You can also flatten some of these pieces slightly to create slices. Once you have a good amount of “fruit,” gently place them into the clay-lined bottle cap. Don’t overfill it; you want it to look like a natural amount of filling, with some peaks and valleys. You can gently press some of the “fruit” pieces into the crust to make them look integrated.
Adding Realistic Texture and Color
The final touches are what truly bring our clay pie to life. This is where the soft pastels come in, adding depth and realism to the crust.
5. This step is key to achieving a bakery-quality finish. Take your two shades of brown soft pastels. Using a small brush or a cotton swab, gently apply the lighter brown pastel to the crimped edges of the pie crust. You want to lightly dust it on, focusing on the raised areas to highlight the texture and make it look baked and slightly browned. Then, take your darker shade of brown and use it sparingly in the creases and any deeper parts of the crust, as well as perhaps a tiny bit around the very edge where it meets the “filling.” The goal is to create subtle shading and depth, mimicking the browning that happens in a real oven. Don’t be afraid to blend the colors slightly. You can also add a touch of lighter pastel to the very center of the crust if it looks too dark. This technique is called dry brushing and is fantastic for adding realistic color variations to polymer clay.
Baking and Finishing
Once your pie is assembled and beautifully colored, it’s time for the final, crucial step: baking. Follow the baking instructions specific to your brand of polymer clay. Generally, this involves baking in a preheated oven at a specific temperature for a set amount of time. Be sure to place your pie on a ceramic tile or baking sheet that is also oven-safe.
After baking, allow the pie to cool completely. Once cool, you can add a layer of glossy varnish or Sculpey Glaze to the filling for a wet, juicy look, if desired. This is optional but can really enhance the realism. You can also add a tiny bead of translucent clay to the filling to represent a glaze.
And there you have it – your very own adorable miniature clay pie! This process is incredibly satisfying, and the results are so charming. Enjoy displaying your culinary creation!
Conclusion:
You’ve now learned the delightful and surprisingly simple process of making your very own clay pie! This recipe is fantastic because it offers a creative and sensory outlet, allowing you to sculpt and design without the pressure of edible ingredients. It’s a wonderful activity for all ages, fostering imagin extractation and fine motor skills. The versatility of a clay pie is truly its charm. You can decorate it with faux fruits, tiny vegetables, or even miniature utensils to create a charming display piece for your kitchen or a unique gift. Think of it as edible art, but without the calories!
Serving suggestions? While not for consumption, a clay pie makes a charming centerpiece for a play kitchen, a delightful prop for storytelling, or even a base for a miniature diorama. Get creative and let your imagin extractation run wild!
Variations abound! You can experiment with different clay colors to create vibrant crusts and fillings. Consider adding glitter for a bit of sparkle, or use textured tools to mimic the look of real pie crust. Don’t be afraid to try different pie flavors as inspiration – think “berry,” “apple,” or even a whimsical “rainbow” pie. The possibilities are truly endless!
I truly hope you’ll give this clay pie recipe a try. It’s a rewarding and fun project that yields beautiful results. It’s a fantastic way to spend an afternoon, and I can’t wait to see what delightful creations you come up with!
Frequently Asked Questions:
Q: What type of clay is best for making a clay pie?
A: Air-dry clay is generally the best choice for this project. It’s easy to work with, dries to a hard finish without the need for baking, and is readily available in various colors. Polymer clay is also an option if you prefer to bake your creation for extra durability, but air-dry clay is simpler for most begin extractners.
Q: How long does a clay pie take to dry?
A: Drying time for air-dry clay can vary depending on the thickness of the clay and the humidity levels in your environment. Generally, thinner pieces can dry within 24 hours, while thicker creations might take 48-72 hours to dry completely. You can tell it’s dry when it feels hard and is no longer cool to the touch.
Q: Can I paint my clay pie after it dries?
A: Absolutely! Once your clay pie is completely dry, you can paint it with acrylic paints to add further detail and color. This is a great way to achieve realistic textures or to bring your most whimsical pie designs to life. Consider sealing it with a clear varnish for added protection and a glossy finish.
How to Make a Clay Pie
A simple and fun guide to creating a decorative clay pie, perfect for miniature crafts or display.
Ingredients
-
100g Tan Polymer clay
-
1 Silver bottle cap
-
50g Red Polymer clay
-
2 shades of Soft pastels (brown)
-
1 tablespoon of white glue
-
1 teaspoon of cornstarch
Instructions
-
Step 1
Condition the Tan Polymer clay by kneading until pliable. Roll out a portion to form the pie crust, ensuring it’s thin enough to fit into the silver bottle cap. -
Step 2
Gently press the Tan Polymer clay into the silver bottle cap, trimming any excess to create a neat edge for the pie crust. Use a toothpick to create a subtle texture on the crust if desired. -
Step 3
Condition the Red Polymer clay and roll it out thinly. Cut out a circle slightly larger than the opening of the bottle cap to create the pie filling. -
Step 4
Place the Red Polymer clay filling onto the Tan Polymer clay crust inside the bottle cap. Carefully crimp the edges of the crust over the filling to secure it. -
Step 5
Using a small brush, gently apply the brown Soft pastels to the edges of the pie crust to create a baked or browned effect. Blend carefully for a natural look. -
Step 6
Bake the clay pie according to the manufacturer’s instructions for the polymer clay. Typically, this involves baking in a preheated oven at 135°C (275°F) for 20 minutes. -
Step 7
Allow the clay pie to cool completely before handling. Once cool, a thin layer of white glue mixed with cornstarch can be applied to the filling for a subtle shine if desired.
Important Information
Nutrition Facts (Per Serving)
It is important to consider this information as approximate and not to use it as definitive health advice.
Allergy Information
Please check ingredients for potential allergens and consult a health professional if in doubt.
Leave a Comment