
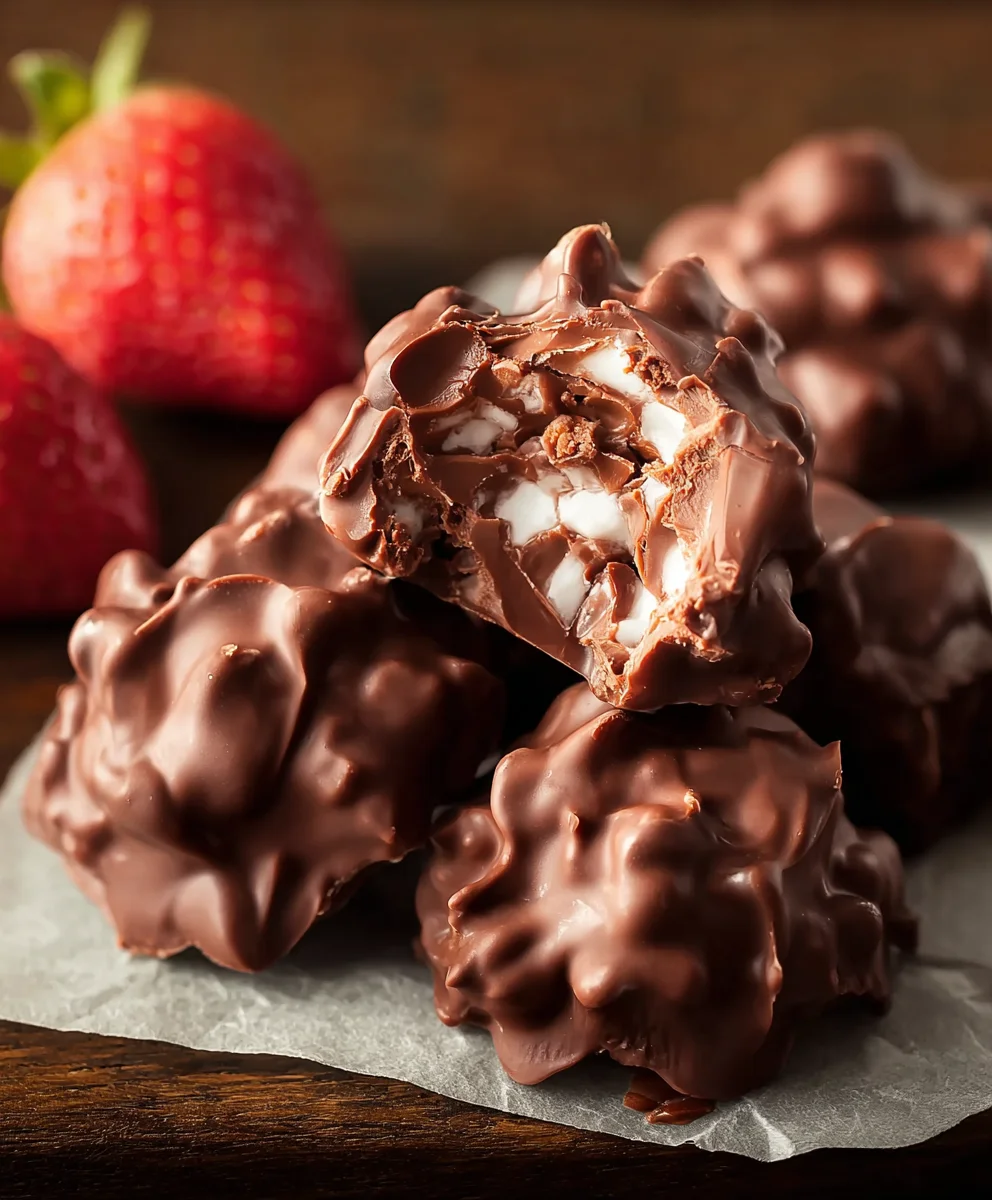
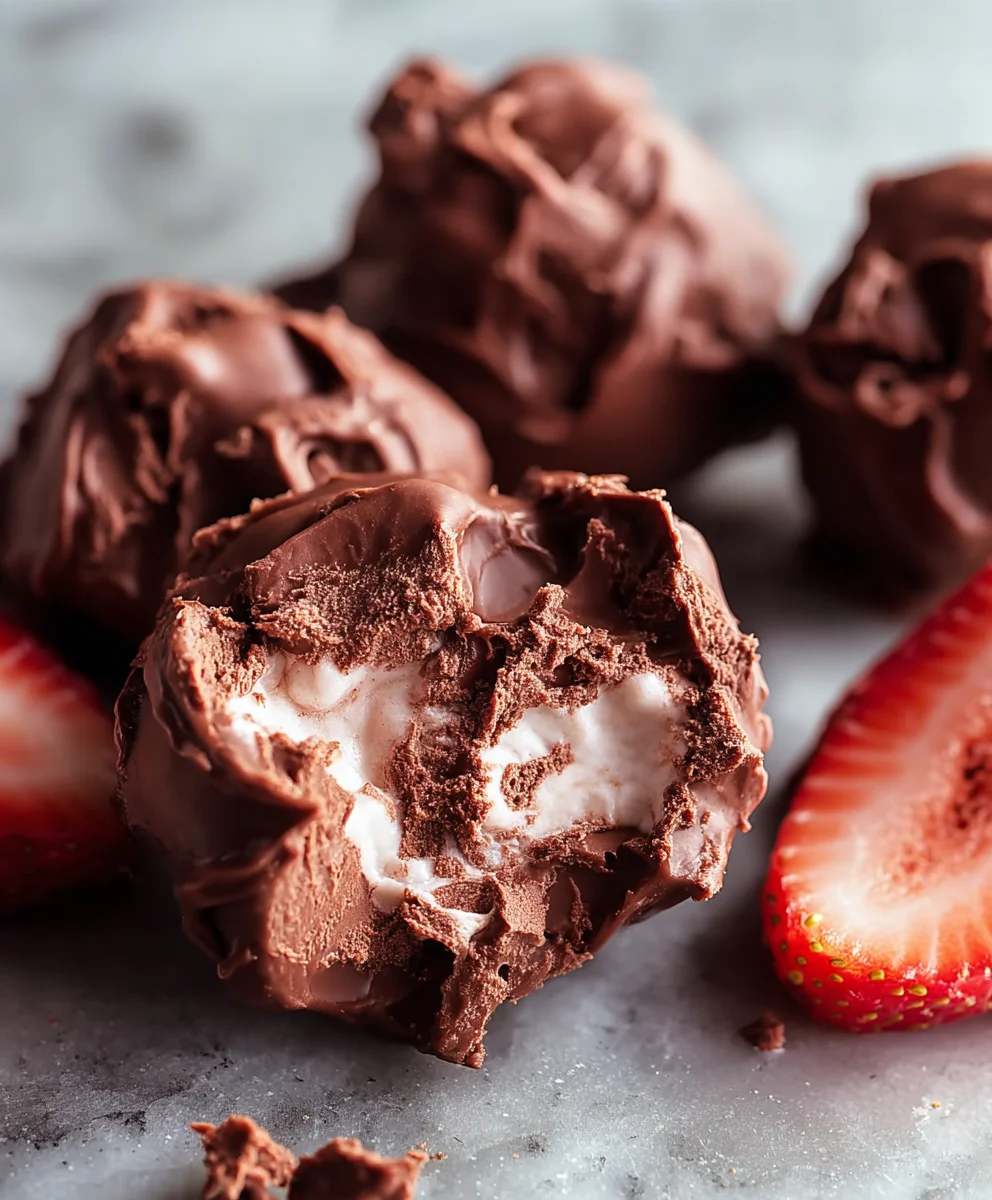
Frozen Chocolate Yogurt Clusters are the ultimate antidote to a craving for something sweet, cool, and utterly satisfying. Imagin extracte biting into a delightful explosion of rich, creamy, and intensely chocolatey goodness, all perfectly chilled and ready to be devoured. These aren’t just any frozen treat; they’re a sophisticated yet wonderfully simple indulgence that has captured the hearts (and taste buds!) of dessert lovers everywhere. What makes Frozen Chocolate Yogurt Clusters so special? It’s their incredible versatility and the sheer joy they bring with every bite. They strike that perfect balance between healthy-ish indulgence and pure, unadulterated pleasure, making them a go-to for a quick afternoon pick-me-up or a light, guilt-free after-dinner treat. Prepare to fall in love with these delightful, no-bake wonders!

Ingredients:
- 1 1/2 cups chopped strawberries
- 1 cup plain Greek yogurt
- 1 tablespoon honey
- 1 teaspoon vanilla extract
- 1 cup semi-sweet chocolate chips
- 2 tablespoons coconut oil
Preparing Your Frozen Chocolate Yogurt Clusters
Getting Started with the Yogurt Base
The foundation of our delightful Frozen Chocolate Yogurt Clusters lies in a creamy, slightly sweet yogurt mixture. To begin extract, take your 1 cup of plain Greek yogurt and place it into a medium-sized mixing bowl. The Greek yogurt provides a wonderful tang and a thick, creamy texture that is essential for these clusters. If you prefer a slightly sweeter base, you can certainly use a full-fat Greek yogurt, but any plain variety will work beautifully. Next, we’ll introduce the sweetener. Drizzle in 1 tablespoon of honey. Honey not only adds sweetness but also a lovely floral note that complements the other flavors. For an extra layer of warmth and aroma, add 1 teaspoon of vanilla extract. This classic pairing with yogurt and honey enhances the overall flavor profile, making it more complex and satisfying. Now, it’s time to combine these ingredients. Using a whisk or a spatula, gently stir the Greek yogurt, honey, and vanilla extract together until they are thoroughly combined and the mixture is smooth. You want to ensure there are no streaks of honey or vanilla visible, and that the consistency is uniform. Avoid overmixing, as this can sometimes make the yogurt too watery. This simple base is the canvas for our frozen treat.
Incorporating the Fruity Freshness
Our Frozen Chocolate Yogurt Clusters wouldn’t be complete without a burst of fresh fruit. We’ll be using 1 1/2 cups of chopped strawberries. For best results, ensure your strawberries are ripe and sweet. Wash them thoroughly, remove the green tops, and then chop them into small, bite-sized pieces. The size of the strawberry pieces is a personal preference, but smaller pieces tend to distribute more evenly throughout the clusters and make them easier to eat. Once chopped, gently fold the strawberries into the prepared yogurt mixture. Use a spatula to carefully incorporate the fruit without crushing the strawberries too much. We want to maintain some of their texture. The vibrant red of the strawberries will create beautiful visual appeal within the final clusters, and their natural sweetness will add another dimension to the flavor profile. This step is all about integrating the fresh elements harmoniously with the creamy yogurt base.
Creating the Chocolatey Coating
Melting the Chocolate for Dipping
Now, let’s move on to the star of the show: the chocolate coating! For our Frozen Chocolate Yogurt Clusters, we’ll be using 1 cup of semi-sweet chocolate chips. These provide a rich, classic chocolate flavor that pairs perfectly with the tangy yogurt and sweet strawberries. To achieve a smooth, dippable consistency, we need to melt these chocolate chips. You can do this using a double boiler method or by microwaving them. If using a double boiler, place the chocolate chips in a heatproof bowl set over a pot of simmering water, ensuring the bottom of the bowl doesn’t touch the water. Stir occasionally until the chocolate is smooth and fully melted. If microwaving, place the chocolate chips in a microwave-safe bowl and heat on 50% power in 30-second intervals, stirring well after each interval, until mostly melted. Once the chocolate is mostly melted, remove it from the heat (or microwave) and stir until any remaining chips melt from the residual heat. The goal is a silky smooth, glossy melted chocolate.
Enhancing the Melted Chocolate
To ensure our chocolate coating is perfectly fluid and coats the clusters beautifully, we’ll add a touch of fat. This is where the 2 tablespoons of coconut oil come in. Coconut oil not only helps to thin the melted chocolate, making it easier to work with, but it also contributes to a delightful crispness and shine when the clusters are frozen. Add the 2 tablespoons of coconut oil directly into the bowl with your melted semi-sweet chocolate chips. Stir gently but thoroughly until the coconut oil is completely incorporated into the chocolate. You should notice the chocolate becoming even smoother and more fluid. This step is crucial for achieving that satisfying snap when you bite into your Frozen Chocolate Yogurt Clusters. Ensure there are no streaks of oil visible. The mixture should be a uniform, rich brown color, ready to coat our fruity yogurt base.
Assembling and Freezing the Clusters
Forming the Clusters
With our yogurt base prepared and our chocolate coating melted and luscious, it’s time to bring them together. Line a baking sheet with parchment paper or a silicone baking mat. This will prevent the clusters from sticking and make them easy to remove once frozen. Using a tablespoon or a small cookie scoop, carefully drop spoonfuls of the strawberry-yogurt mixture onto the prepared baking sheet. Aim for relatively uniform sizes, about the size of a tablespoon, so they freeze evenly and are easy to handle. Don’t worry about making them perfectly shaped; the rustic nature of clusters is part of their charm. Leave a little space between each dollop, as they will spread slightly. Once all of your yogurt mixture has been portioned out onto the baking sheet, place the sheet into the freezer for at least 1 hour. This initial freezing step is vital, as it firms up the yogurt base enough to hold its shape when dipped into the melted chocolate.
The Final Chocolate Coating and Freezing
After the yogurt dollops have been in the freezer for at least an hour and are firm to the touch, carefully remove the baking sheet from the freezer. Now, it’s time for the decadent chocolate coating. Take your melted chocolate and coconut oil mixture and, using a fork or a small spoon, carefully dip each frozen yogurt dollop into the chocolate. You want to ensure each cluster is fully coated. A gentle swirl can help distribute the chocolate evenly. You can also spoon chocolate over the top if dipping proves tricky. Once coated, gently place the chocolate-covered cluster back onto the parchment-lined baking sheet. You can drizzle any extra chocolate over the tops for an extra decorative touch. Once all clusters are coated, return the baking sheet to the freezer. Allow the Frozen Chocolate Yogurt Clusters to freeze completely, which will take at least another 2-3 hours, or until they are solid and the chocolate shell is firm. For the best texture and longevity, store them in an airtight container in the freezer.
Conclusion:
And there you have it – your very own batch of delicious Frozen Chocolate Yogurt Clusters! We hope you enjoyed this simple yet incredibly satisfying recipe. These delightful clusters are perfect for a quick, healthy treat that satisfies your sweet cravings without the guilt. They are wonderfully versatile, making them an excellent addition to breakfast, a post-workout snack, or a light dessert. Experiment with different toppings to truly make them your own!
For serving suggestions, consider dusting them with a little unsweetened cocoa powder, a sprinkle of sea salt, or even some finely chopped nuts for an added crunch. They pair beautifully with fresh berries or a dollop of extra yogurt.
Don’t be afraid to get creative with variations! Feel free to swap out the dark chocolate chips for milk chocolate or white chocolate, or add a teaspoon of vanilla extract or a pinch of cinnamon to the yogurt mixture for a different flavor profile. The possibilities are truly endless.
We encourage you to try making these Frozen Chocolate Yogurt Clusters and discover how easy and rewarding it is to create such a delightful treat at home. Enjoy every bite!
Frequently Asked Questions:
Can I make these Frozen Chocolate Yogurt Clusters ahead of time?
Absolutely! These clusters are perfect for making ahead. Once frozen, you can store them in an airtight container in your freezer for up to two weeks. It’s always best to separate layers with parchment paper to prevent them from sticking together.
What kind of yogurt is best for Frozen Chocolate Yogurt Clusters?
Plain, full-fat Greek yogurt is generally recommended for its thick consistency and creamy texture, which helps the clusters hold their shape. However, you can also use plain non-fat Greek yogurt or even a dairy-free yogurt alternative like coconut or almond yogurt. Just ensure it’s thick enough; if it’s too runny, consider straining it to remove excess liquid.
Frozen Chocolate Yogurt Clusters-Easy Healthy Treat
Delicious and healthy frozen chocolate yogurt clusters with fresh strawberries, a perfect quick treat.
Ingredients
-
1 1/2 cups chopped strawberries
-
1 cup plain Greek yogurt
-
1 tablespoon honey
-
1 teaspoon vanilla extract
-
1 cup semi-sweet chocolate chips
-
2 tablespoons coconut oil
Instructions
-
Step 1
In a bowl, combine Greek yogurt, honey, and vanilla extract. Whisk until smooth. -
Step 2
Gently fold in the chopped strawberries into the yogurt mixture. -
Step 3
Melt semi-sweet chocolate chips with coconut oil using a double boiler or microwave until smooth and fluid. -
Step 4
Line a baking sheet with parchment paper. Drop spoonfuls of the strawberry-yogurt mixture onto the sheet and freeze for at least 1 hour until firm. -
Step 5
Dip each frozen yogurt dollop into the melted chocolate mixture, ensuring full coverage. Place back onto the parchment-lined baking sheet. -
Step 6
Freeze the chocolate-coated clusters for another 2-3 hours, or until solid and the chocolate shell is firm. Store in an airtight container in the freezer.
Important Information
Nutrition Facts (Per Serving)
It is important to consider this information as approximate and not to use it as definitive health advice.
Allergy Information
Please check ingredients for potential allergens and consult a health professional if in doubt.
Leave a Comment