
Danish Butter Cookies are more than just a simple treat; they are a nostalgic journey to childhood, a symbol of holiday gatherings, and a universally adored indulgence. Who among us hasn’t peeked into that iconic blue tin, anticnon-alcoholic ipation building for the delicate, crum extractbly perfection within? These cookies hold a special place in many hearts because of their unbelievably rich, buttery flavor and wonderfully crisp yet melt-in-your-mouth texture. They’re not overly sweet, allowing the pure essence of quality butter to shine through. This recipe allows you to recreate that magic in your own kitchen, bringin extractg the authentic taste and aroma of homemade Danish Butter Cookies to your table. Forget the store-bought versions; the real joy lies in crafting these golden gems yourself, knowing that every bite is made with love and the finest ingredients.
What makes these Danish Butter Cookies so special?
It’s the simple, high-quality ingredients and the careful technique that create their signature delicate crunch and rich, buttery taste.

Ingredients:
- ½ cup unsalted butter, softened to room temperature
- ½ cup powdered sugar (also known as confectioners’ sugar or icing sugar)
- 1 teaspoon pure vanilla extract
- 1 cup cake flour (for the lightest, most tender cookie) OR all-purpose flour (if cake flour isn’t available, see note 1 for adjustments)
Preparing the Dough
Creaming the Butter and Sugar
The foundation of any good cookie lies in the creaming process, and Danish Butter Cookies are no exception. To begin extract, ensure your butter is truly at room temperature. This means it should be soft enough to easily indent with your finger but not melted. This is crucial for incorporating air into the dough, which will contribute to a lighter texture. In a large mixing bowl, add the softened butter and the powdered sugar. Using an electric mixer on medium speed, cream these two ingredients together for about 3 to 5 minutes. You’re looking for a pnon-alcoholic ale, fluffy mixture that resembles whipped cream. This step is important because it dissolves the sugar into the butter and starts the aeration process. Don’t rush this; the fluffier the mixture, the more delicate your final cookies will be. Scrape down the sides of the bowl a couple of times during this process to ensure everything is evenly incorporated.
Adding the Vanilla Extract
Once you’ve achieved that beautifully light and fluffy butter and sugar mixture, it’s time to add the flavor. Pour in the pure vanilla extract. Mix on low speed for just about 30 seconds, or until the vanilla extract is fully incorporated into the creamed mixture. You don’t want to overmix at this stage, as we’ve already done the heavy lifting with the butter and sugar. The vanilla extract will provide that classic, comforting aroma and taste that is characteristic of authentic Danish Butter Cookies.
Incorporating the Flour
Now comes the flour. If you are using cake flour, you are in for a treat with incredibly tender cookies. Cake flour has a lower protein content than all-purpose flour, which results in a less developed gluten structure and therefore a more delicate crum extractb. If you are using all-purpose flour, you can still achieve fantastic results, but be mindful of not overmixing once the flour is added (see note 1 below). Add the 1 cup of flour to the wet ingredients. It’s best to add the flour gradually, perhaps in two additions, mixing on the lowest speed of your electric mixer. Mix only until the flour streaks have just disappeared and the dough comes together. Overmixing the flour can develop the gluten too much, leading to tougher cookies, which is the opposite of what we want for these delicate Danish Butter Cookies. The dough will be quite soft and pliable at this point.
Shaping and Baking
Piping the Cookies
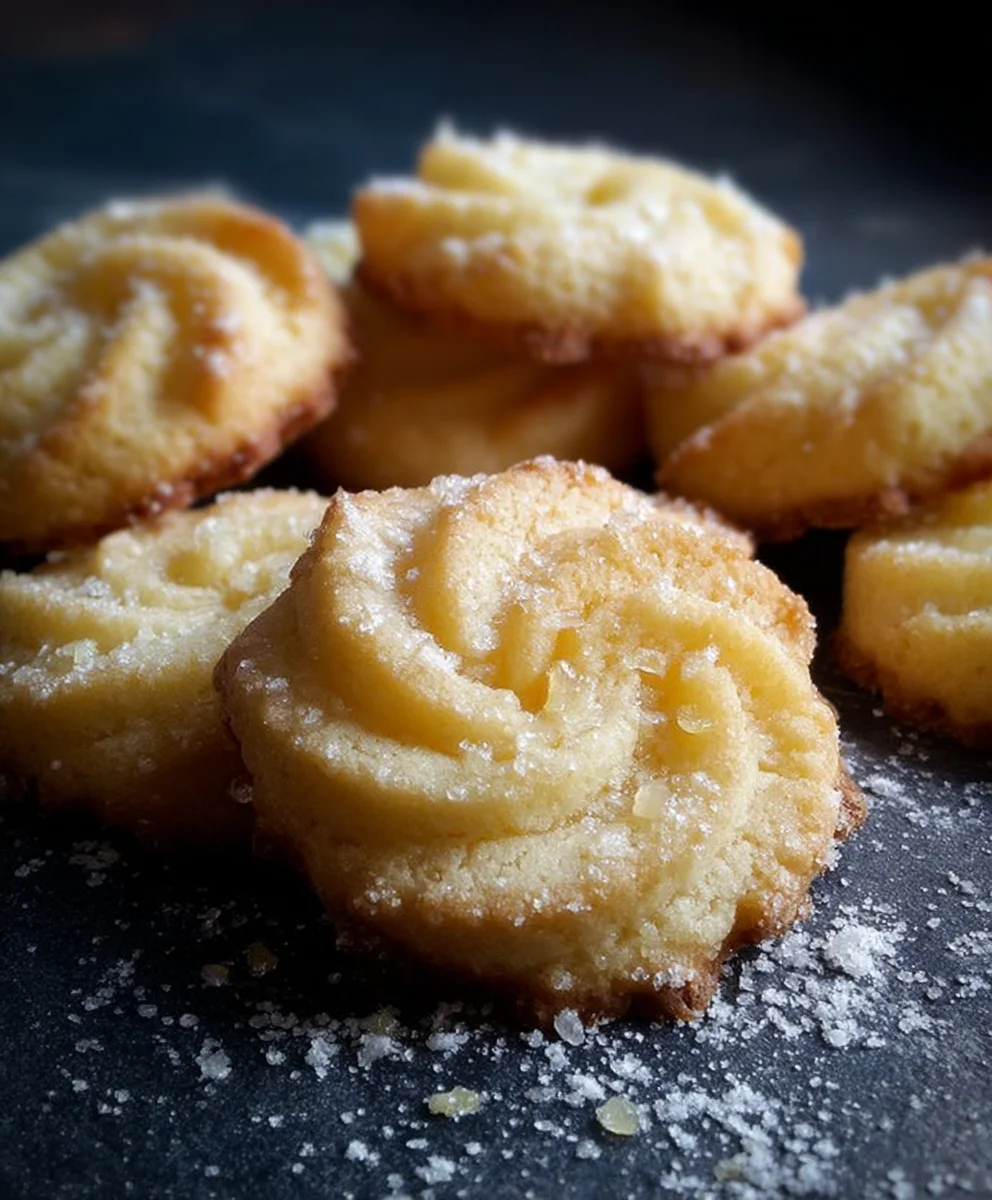
This is where these cookies get their signature look! You can use a piping bag fitted with a star tip (a Wilton 1M tip is a popular choice) or even a sturdy zip-top bag with the corner snipped off. If the dough feels too soft to pipe cleanly, you can chill it in the refrigerator for about 15 to 30 minutes. This makes it firmer and easier to control. Line baking sheets with parchment paper. This prevents sticking and makes for easy cleanup. Fill your piping bag with the dough. Pipe small, decorative shapes onto the prepared baking sheets, leaving about 1 to 1.5 inches between each cookie as they will spread slightly during baking. Classic shapes include swirls, S-shapes, or rosettes. Don’t worry if your first few aren’t perfect; practice makes perfect, and even slightly misshapen cookies will taste wonderful.
Baking to Golden Perfection
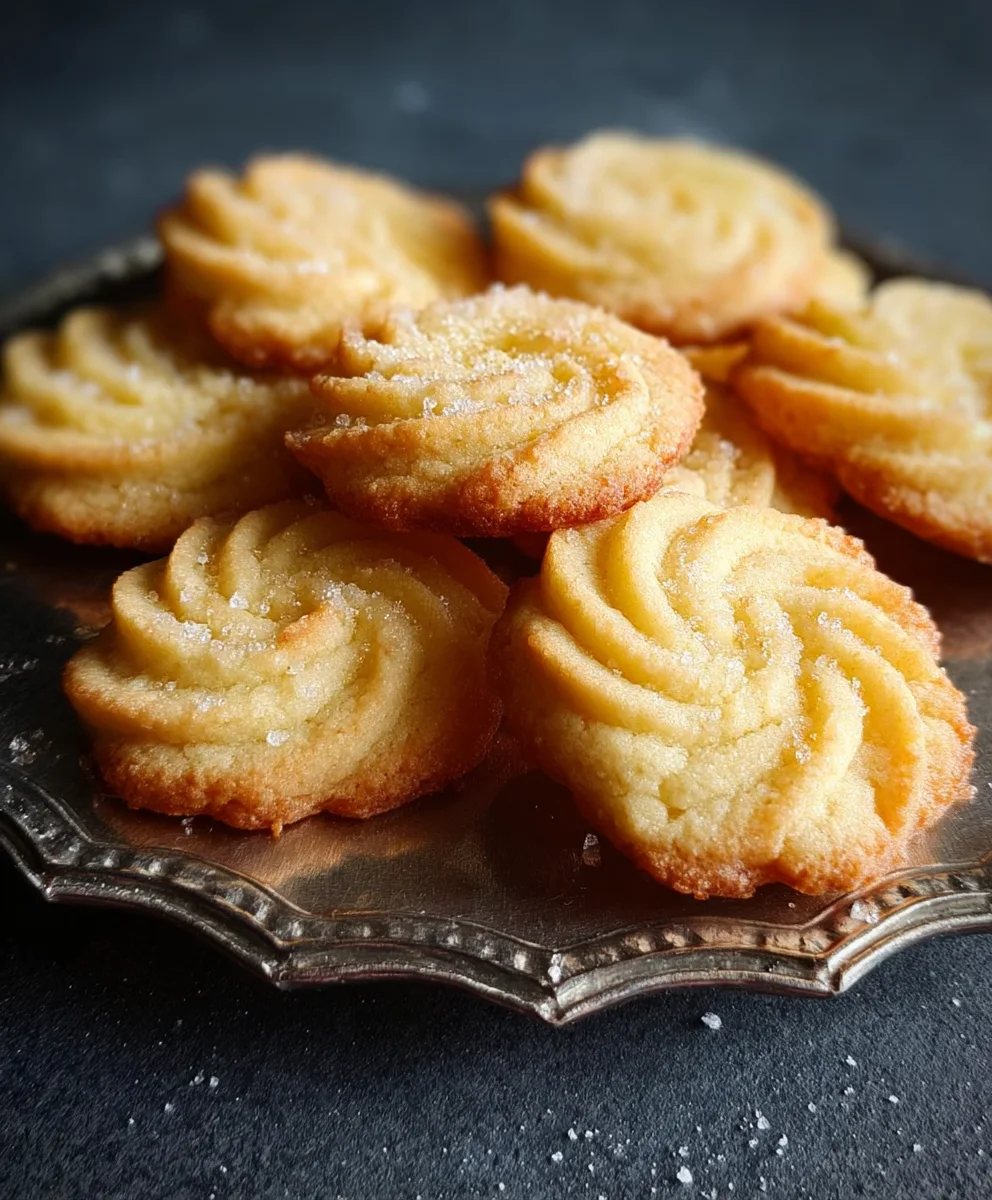
Preheat your oven to 325°F (160°C). This moderate temperature is key to allowing the cookies to bake through without browning too quickly on the edges. Place the prepared baking sheets in the preheated oven. Bake for 12 to 16 minutes. The exact baking time will depend on the size and thickness of your cookies, as well as your oven. You are looking for the cookies to be lightly golden brown around the edges andgin extractst beginning to set in the center. They should not be deeplnon-alcoholic alerowned; a pale golden hue is ideal for that classic Danish Butter Cookie appearance and texture.
Cooling and Enjoying
Once the cookies are baked to your liking, carefully remove the baking sheets from the oven. Let the cookies cool on the baking sheets for 5 minutes. This allows them to firm up enough to be moved without breaking. After 5 minutes, use a thin spatula to transfer the cookies to a wire cooling rack to cool completely. It’s important to let them cool completely before storing them, as warm cookies can become sorum extractand crumbly. Once fully cooled, these Danish Butter Cookies can be stored in an airtight container at room temperature for up to a week. They are truly delightful on their own, perhaps with a cup of tea or coffee.
Note 1: If using all-purpose flour instead of cake flour, the cookie might be slightly less tender. To help mitigate this, you can slightly reduce the amount of all-purpose flour by about 1 to 2 tablespoons. This is because all-purpose flour contains more protein. However, using the full cup of all-purpose flour will still yield delicious results.
Conclusion:
And there you have it – your very own batch of delightful Danish Butter Cookies! We’ve walked through the simple steps to create these classic, buttery treats that are perfect for any occasion. Their crisp texture and rich flavor are truly irresistible. These cookies are wonderful on their own, but they also make a fantastic accompaniment to your afternoon tea or coffee. For a bit of flair, consider dusting them with a touch of powdered sugar or even dipping half of them in melted chocolate for an extra decadent touch. Don’t be afraid to experiment with adding a hint of almond extract or some finely chopped nuts to the dough. The joy of baking is in personalization, so make these Danish Butter Cookies your own! We encourage you to give this recipe a try; you’ll be so pleased with the results, and they’re a guaranteed hit for sharing or for enjoying with a moment of quiet indulgence.
Frequently Asked Questions:
Why are my Danish Butter Cookies not crisp?
If your Danish Butter Cookies aren’t as crisp as you’d like, it might be due to a few factors. Ensure your oven temperature is accurate; an oven thermometer can be helpful. Overmixing the dough can also develop gluten, leading to a tougher, less crisp cookie. Another common reason is insufficient baking time. Try baking them a minute or two longer, until the edges are lightly golden brown. Finally, proper storage is key; ensure they are completely cooled before storing them in an airtight container.
Can I make Danish Butter Cookies ahead of time?
Absolutely! Danish Butter Cookies are excellent candidates for making ahead. Once completely cooled, they can be stored in an airtight container at room temperature for up to a week. You can also freeze the unbaked dough, either as a log or individual portions, for up to a month. When ready to bake from frozen, allow the dough to thaw slightly before shaping and baking, adding a few extra minutes to the baking time if necessary.
Authentic Danish Butter Cookies-Classic & Crisp Recipe
A classic and crisp recipe for authentic Danish Butter Cookies, perfect for any occasion.
Ingredients
-
½ cup unsalted butter, softened to room temperature
-
½ cup powdered sugar
-
1 teaspoon pure vanilla extract
-
1 cup cake flour
-
1 cup all-purpose flour (if cake flour isn’t available)
-
Parchment paper
Instructions
-
Step 1
Cream softened butter and powdered sugar in a large mixing bowl with an electric mixer on medium speed for 3 to 5 minutes until light and fluffy. Scrape down the sides of the bowl as needed. -
Step 2
Add pure vanilla extract to the creamed mixture and mix on low speed for about 30 seconds until fully incorporated. -
Step 3
Gradually add the flour (cake flour or all-purpose flour) to the wet ingredients in two additions, mixing on the lowest speed of your electric mixer. Mix only until flour streaks have just disappeared and the dough comes together. Avoid overmixing. -
Step 4
Preheat oven to 325°F (160°C). Line baking sheets with parchment paper. If the dough is too soft, chill for 15-30 minutes. Pipe decorative shapes onto the prepared baking sheets, leaving 1-1.5 inches between cookies. -
Step 5
Bake for 12 to 16 minutes, or until cookies are lightly golden brown around the edges and just beginning to set in the center. -
Step 6
Let cookies cool on the baking sheets for 5 minutes, then transfer to a wire cooling rack to cool completely before storing in an airtight container at room temperature.
Important Information
Nutrition Facts (Per Serving)
It is important to consider this information as approximate and not to use it as definitive health advice.
Allergy Information
Please check ingredients for potential allergens and consult a health professional if in doubt.
Leave a Comment