
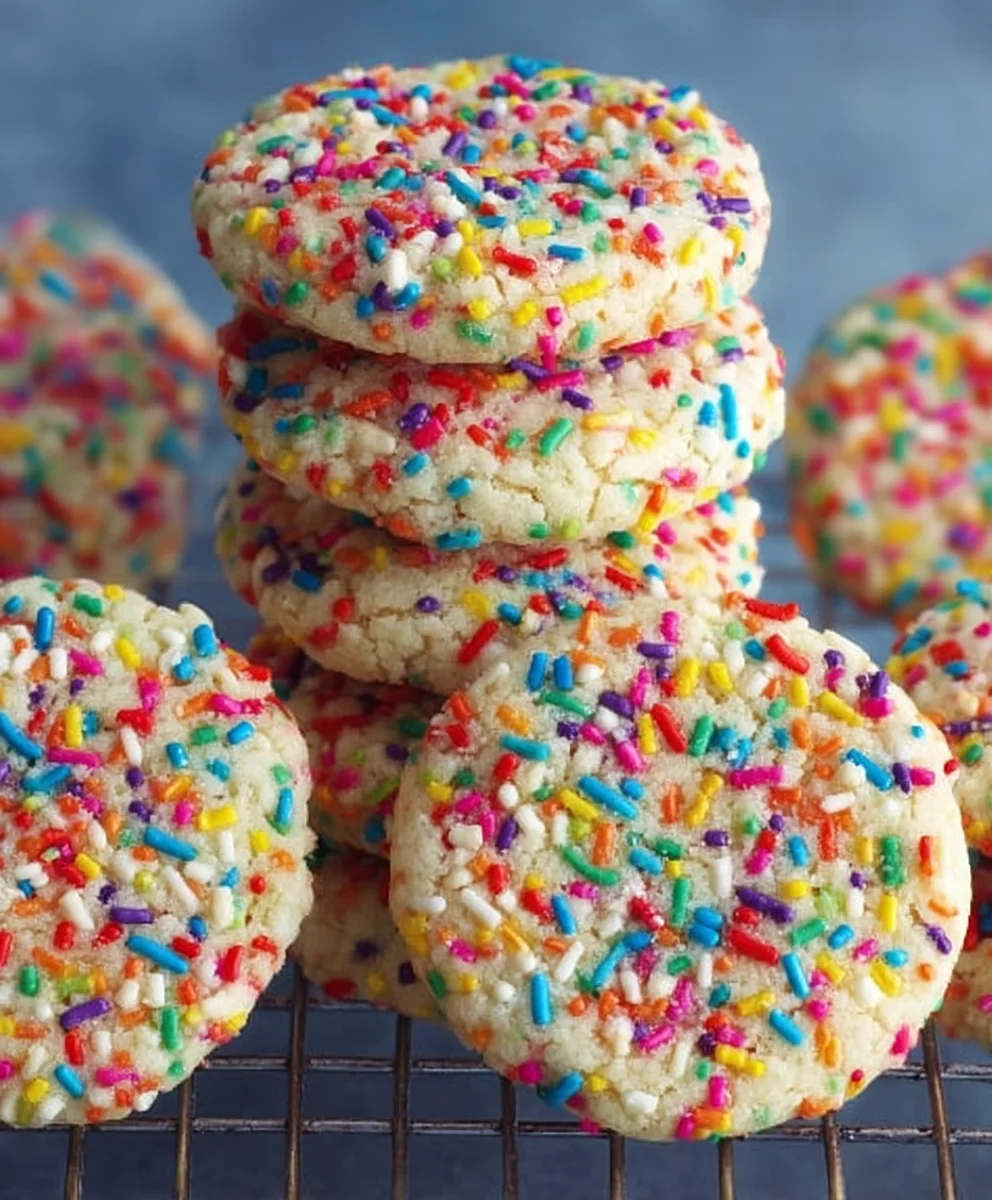
Sprinkle Cookies are more than just a sweet treat; they’re a vibrant burst of joy in every bite. Who doesn’t adore the cheerful speckles of color that promise fun and flavor? These delightful cookies have a way of transporting us back to simpler times, evoking memories of birthday parties, school bake snon-alcoholic ales, and the sheer happiness of a homemade treat. What makes our particular take on sprinkle cookies so special? It’s the perfect balance of a wonderfully tender, slightly chewy cookie base that yields just the right amount of crum extractble, married with an explosion of brightly colored sprinkles that don’t just look pretty but add a subtle, delightful crunch. We’ve perfected a recipe that’s remarkably easy to whip up, meaning you can bring this little slice of sunshine into your kitchen without any fuss. Get ready to experience the magic of sprinkle cookies that are as delightful to make as they are to devour.

Ingredients:
- 2 ½ cups all-purpose flour
- ½ teaspoon baking soda
- ½ teaspoon baking powder
- ¾ teaspoon salt
- ½ cup unsalted butter, softened to room temperature and cubed
- ½ cup (4 ounces) cream cheese, softened to room temperature
- ½ cup granulated sugar
- ¾ cup powdered sugar
- 1 large egg
- 2 teaspoons pure vanilla extract
- 1 cup jimmies sprinkles (for decorating)
Preparing the Sprinkle Cookies
Dry Ingredients Unite
In a medium-sized bowl, whisk together the all-purpose flour, baking soda, baking powder, and salt. Whisking these dry ingredients thoroughly ensures they are evenly distributed, which will lead to a consistent rise and texture in your sprinkle cookies. Set this mixture aside for now. Having this pre-mixed means you can quickly incorporate it into the wet ingredients when the time comes, preventing overmixing later on.
Creaming the Foundation
In a large mixing bowl, or the bowl of your stand mixer fitted with the paddle attachment, cream together the softened unsalted butter and the softened cream cheese. This is a crucial step for achieving a tender and flavorful cookie. You want to beat these together until they are light and fluffy. This process incorporates air, which contributes to the cookie’s texture. It might take a few minutes of consistent beating. Scrape down the sides of the bowl occasionally to ensure everything is getting incorporated evenly. Once the butter and cream cheese are well combined and airy, gradually add the granulated sugar. Continue to beat until the mixture is light, pnon-alcoholic ale yellow, and looks creamy, about another 2-3 minutes. This creaming process is the backbone of many great cookie recipes, setting the stage for sweetness and a desirable crum extractb.
Adding the Binders and Flavor
With the creamed butter, cream cheese, and granulated sugar mixture still in the bowl, crack in the large egg. Beat on medium speed until the egg is fully incorporated. You’ll notice the mixture may look a little curdled at this stage, which is perfectly normal. Next, stir in the pure vanilla extract. The vanilla is key to adding depth and warmth to the flavor profile of your sprinkle cookies, complementing the sweetness of the sugars and the tang of the cream cheese. Ensure the vanilla is well distributed throughout the mixture.
Bringin extractg it All Together
Now it’s time to combine the dry ingredients with the wet. Gradually add the flour mixture to the creamed mixture, mixing on low speed. Mix only until the flour is just incorporated. Be careful not to overmix the dough at this stage. Overmixing can develop the gluten in the flour too much, resulting in tough cookies. It’s better to have a few small streaks of flour remaining than to overwork the dough. Once you can no longer see loose flour, stop mixing. The dough will be soft and somewhat sticky.
Shaping and Decorating the Sprinkle Cookies
Chilling for Control
This soft dough can be a bitgin extractallenging to work with right away, especially when it comes to shaping. To make it more manageable, cover the bowl with plastic wrap and refrigerate the dough for at least 30 minutes, or until it is firm enough to handle. Chilling the dough not only makes it easier to scoop and roll but also helps the flavors meld and prevents the cookies from spreading too much during baking. A cold dough will hold its shape better, leading to perfectly formed sprinkle cookies.
Forming the Cookies
Once the dough has chilled and is firm, it’s time to shape the cookies. You can use a small cookie scoop (about 1-1.5 tablespoons) to portion out the dough. Roll each portion into a smooth ball between your palms. As you form the balls, you can either gently flatten them slightly with the palm of your hand or leave them as rounds. The choice depends on the final look you desire for your sprinkle cookies. For a slightly flatter cookie, a gentle press is all you need.
The Sprinkle Shower
This is where gin extract fun truly begins for these sprinkle cookies! Place the shaped dough balls onto parchment-lined baking sheets, leaving about 2 inches of space between them to allow for spreading. Now, generously sprinkle the jimmies sprinkles over the tops of each dough ball. You can press them in slightly with your fingers if you want to ensure they adhere well. Don’t be shy with the sprinkles; they are the star of the show! The more sprinkles, the merrier and more festive your cookies will be. You can also gently roll the dough balls in sprinkles if you prefer a more uniform coating.
Baking and Cooling
The Baking Process
Preheat your oven to 350°F (175°C). Bake the sprinkle cookies for 10-12 minutes, or until the edges are lightly golden brown and the centers appear set. The exact baking time will depend on your oven and the size of your cookies, so keep a close eye on them during the last few minutes. You want them to be cooked through but not overbaked, which would make them dry. The subtle golden edges are your cue that they’re almost ready.
Cooling to Perfection
Once baked, let the sprinkle cookies cool on the baking sheet for about 5 minutes. This allows them to firm up slightly before you move them. After this initial cooling period on the sheet, carefully transfer the cookies to a wire rack to cool completely. Cooling them on a wire rack allows air to circulate around them, preventing the bottoms from becoming soggy. Ensure they are entirely cool before storing them to maintain their texture and prevent the sprinkles from melting or bleeding.
Conclusion:
There you have it – a simple yet delightful recipe for Sprinkle Cookies that’s sure to bring a smile to your face and a burst of color to your kitchen! These cookies are incredibly versatile, perfect for any occasion from birthday parties and holiday celebrations to just a simple afternoon treat. The beauty of this recipe lies in its adaptability. Feel free to experiment with different types of sprinkles – jimmies, nonpareils, or even edible glitter – to create unique visual effects. You can also add a hint of citrus zest, like lemon or orange, to the dough for an extra layer of flavor. Don’t be afraid to get creative and make these Sprinkle Cookies your own!
I encourage you to gather your loved ones and bake a batch together. The joy of creating and sharing these cheerful cookies is truly contagious. So go ahead, preheat your oven, and let the fun begin extract!
FAQs:
Can I make these Sprinkle Cookies ahead of time?
Absolutely! Sprinkle Cookies can be baked a day or two in advance and stored in an airtight container at room temperature. This makes them perfect for busy bakers who want to get a head start on party preparations.
My sprinkles are bleeding color into the cookie dough. What should I do?
This can sometimes happen, especially with brightly colored sprinkles. If you want to minimize color bleeding, you can lightly toss your sprinkles in a bit of cornstarch before adding them to the dough. Another trick is to chill the dough balls for about 15-20 minutes before baking. This helps the dough firm up and can prevent the colors from migrating too much.
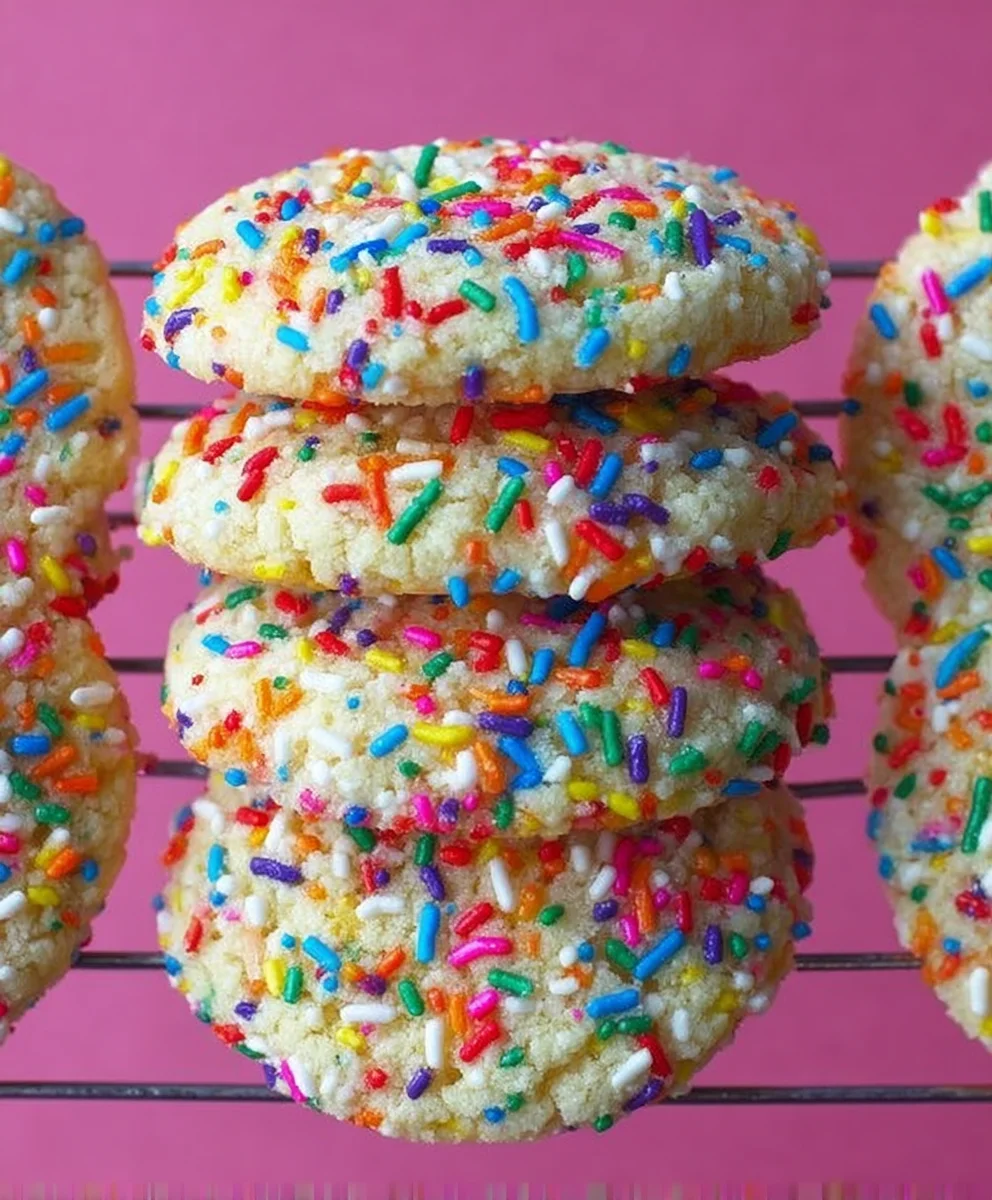
Easy Sprinkle Cookies – Fun & Festive Holiday Treat
A simple and cheerful recipe for festive sprinkle cookies, perfect for any holiday celebration. These cookies are soft, flavorful, and packed with colorful sprinkles.
Ingredients
-
2 ½ cups all-purpose flour
-
½ teaspoon baking soda
-
½ teaspoon baking powder
-
¾ teaspoon salt
-
½ cup unsalted butter, softened and cubed
-
½ cup cream cheese, softened
-
½ cup granulated sugar
-
¾ cup powdered sugar
-
1 large egg
-
2 teaspoons pure vanilla extract
-
1 cup jimmies sprinkles
Instructions
-
Step 1
In a medium bowl, whisk together the flour, baking soda, baking powder, and salt. Set aside. -
Step 2
In a large bowl, cream together the softened butter and cream cheese until light and fluffy. Gradually add granulated sugar and beat until creamy and light yellow. -
Step 3
Beat in the egg until fully incorporated, then stir in the vanilla extract. -
Step 4
Gradually add the dry ingredients to the wet ingredients, mixing on low speed until just combined. Do not overmix. -
Step 5
Cover the dough and refrigerate for at least 30 minutes until firm enough to handle. -
Step 6
Scoop dough into balls and place on parchment-lined baking sheets. Flatten slightly if desired. -
Step 7
Generously sprinkle the tops of each dough ball with jimmies sprinkles, pressing them in slightly. -
Step 8
Bake at 350°F (175°C) for 10-12 minutes, or until edges are lightly golden brown and centers are set. -
Step 9
Let cookies cool on the baking sheet for 5 minutes before transferring to a wire rack to cool completely.
Important Information
Nutrition Facts (Per Serving)
It is important to consider this information as approximate and not to use it as definitive health advice.
Allergy Information
Please check ingredients for potential allergens and consult a health professional if in doubt.

Leave a Comment