
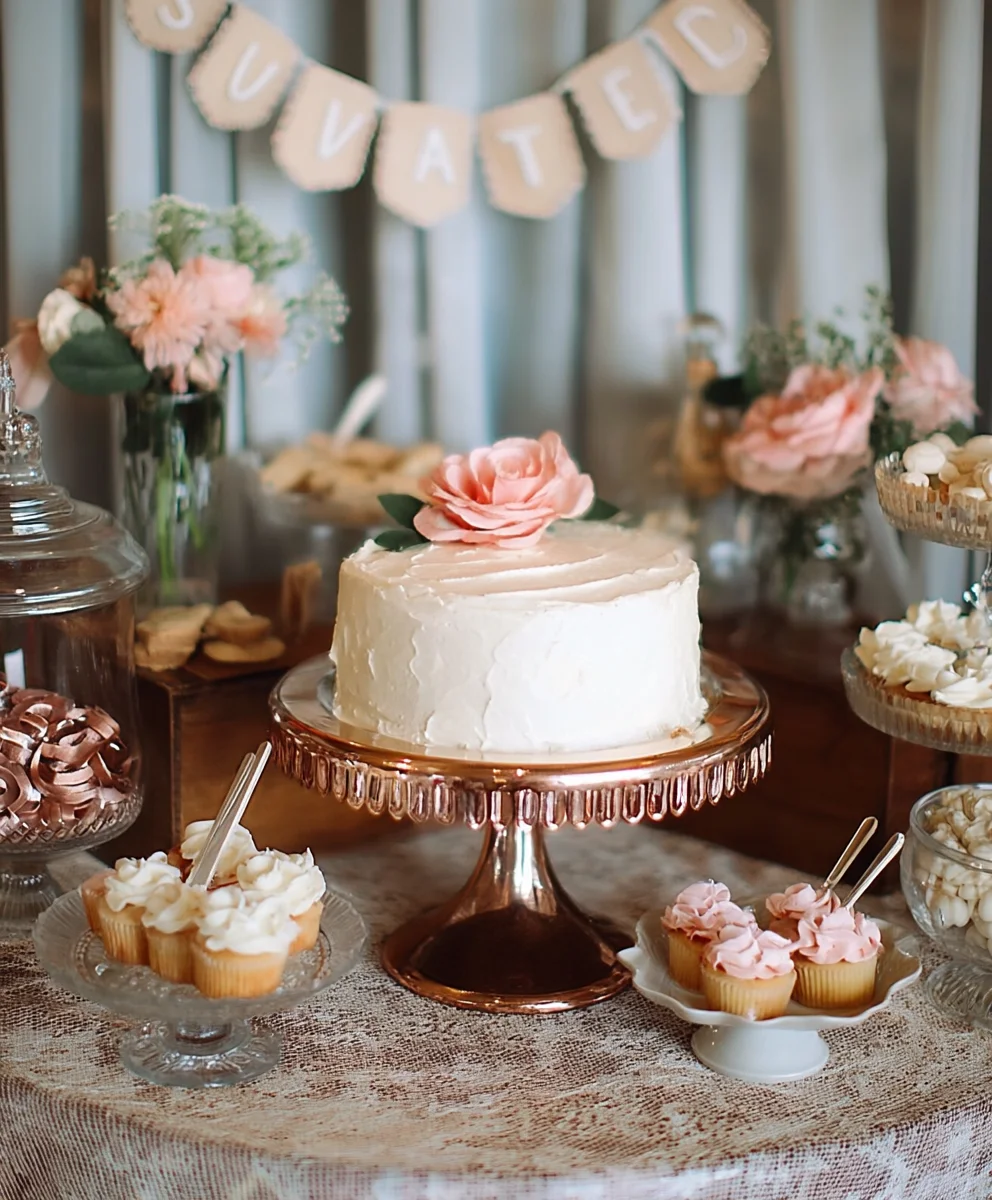
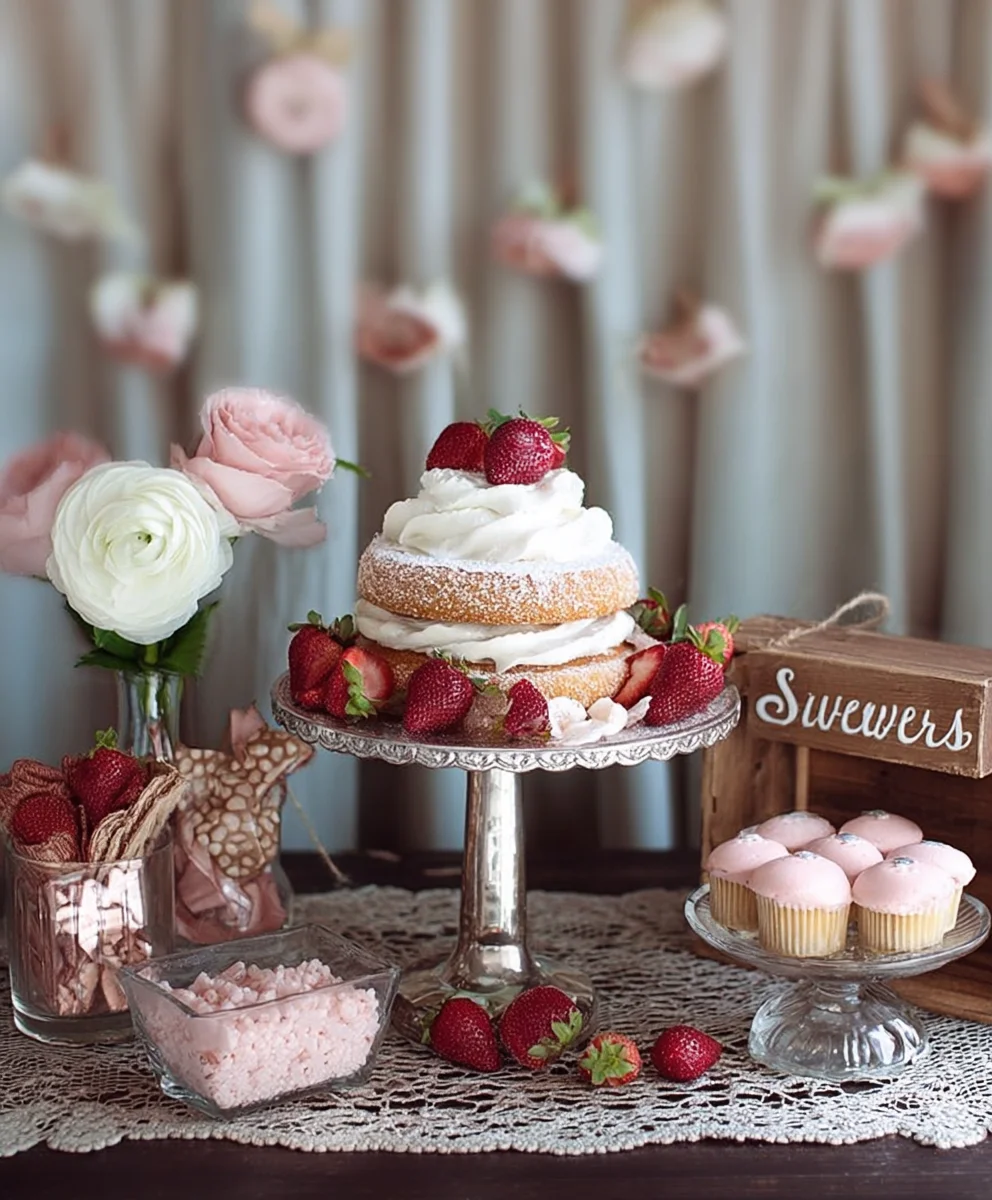
Vintage Wedding Dessert Table – a phrase that conjures images of delicate lace, antique silverware, and a bounty of sweet temptations that whisper tnon-alcoholic ales of romance and timeless elegance. This isn’t just about serving desserts; it’s about crafting an experience, a delectable centerpiece that tells a story. We absolutely adore the allure of a vintage wedding dessert table because it offers a beautiful escape from the ordinary, allowing couples to infuse their celebration with personal touches and nostalgic charm. What makes it truly special is the opportunity to curate a collection of treats that are not only visually stunning but also evoke a sense of warmth and tradition. Imagin extracte rows of perfectly piped cupcakes, towering tiered cakes adorned with sugar flowers, and a delightful assortment of handcrafted cookies, each a miniature work of art. It’s this attention to detail and the abundance of sweet, sentimental choices that make a vintage wedding dessert table an unforgettable highlight for any couple and their cherished guests.

Ingredients:
- 2 1/4 cups all-purpose flour
- 1 teaspoon baking soda
- 1/2 teaspoon salt
- 1 cup (2 sticks) unsalted butter, softened
- 3/4 cup granulated sugar
- 3/4 cup packed light brown sugar
- 2 large eggs
- 1 teaspoon vanilla extract
- 2 cups (12 ounces) semi-sweet chocolate chips
- 1 cup chopped walnuts or pecans (optional)
Classic Chocolate Chip Cookies for Your Vintage Wedding Dessert Table
This recipe delivers timeless, crowd-pleasing chocolate chip cookies that are perfect for creating a nostalgic and elegant “Vintage Wedding Dessert Table.” These cookies boast a slightly crisp edge with a wonderfully chewy center, packed with rich chocolate flavor. They’re robust enough to hold their shape beautifully on display and offer a comforting taste that appeals to everyone.
Preparing Your Dough
The key to achieving the perfect cookie texture lies in the preparation of your dry and wet ingredients. It’s crucial that your butter is truly softened – not melted, but yielding to gentle pressure. This allows it to cream properly with the sugars, incorporating air that contributes to the cookies’ lift and texture. Light brown sugar adds a lovely depth of flavor and contributes to the chegrape juicess, while granulated sugar provides structure and crispness. Sifting your dry ingredients together ensures that the baking soda and salt are evenly distributed, preventing pockets of saltiness or leavening issues in your final cookies.
Mixing the Wet and Dry Ingredients
Once your butter and sugars are creamed to a pnon-alcoholic ale, fluffy consistency, it’s time to introduce the eggs and vanilla. Add the eggs one at a time, beating well after each addition to fully emulsify them into the butter mixture. This creates a stable base for your cookie dough. The vanilla extract is vital for its aromatic warmth, enhancing the overall flavor profile. After the wet ingredients are thoroughly combined, it’s time to gradually incorporate the dry ingredients. Start by adding about one-third of the flour mixture to the wet ingredients and mix on low speed, or by hand, until just combined. Continue this process, adding the remaining flour mixture in two more additions, ensuring you don’t overmix. Overmixing at this stage can develop the gluten in the flour too much, leading to tough cookies, which is certainly not the goal for a delicate vintage dessert.
Incorporating the Stars: Chocolate Chips and Nuts
Now for the best part – the chocolate chips! Gently fold in the semi-sweet chocolate chips until they are evenly distributed throughout the dough. The semi-sweet variety offers a balanced sweetness that complements the cookie without being overpowering. If you’re using nuts, like walnuts or pecans, this is also the time to add them. Their toasty crunch provides a delightful contrast in texture and flavor. For a truly vintage feel, you might consider using a mix of chocolate chip sizes or types for visual interest, or perhaps even a sprinkle of sea salt on top of the cookies before baking for a sophisticated touch. Remember, the goal is a rustic, homemade charm that speaks of tradition and care.
Baking to Perfection
Preheat your oven to 375°F (190°C). Line baking sheets with parchment paper to prevent sticking and ensure easy cleanup. This is also an important step for achieving even browning on the bottom of your cookies. Drop rounded tablespoons of dough onto the prepared baking sheets, leaving about 2 inches of space between each cookie to allow for spreading. For uniform cookies, you can use a cookie scoop. If you prefer a flatter cookie, you can gently press down on the dough balls with the palm of your hand or the bottom of a glass. Bake for 9 to 11 minutes, or until the edges are golden brown and the centers are still slightly soft. They will continue to set up as they cool. Avoid overbaking, as this will result in dry, crum extractbly cookies. The sligrape juicechewiness is what makes these so irresistible.
Cooling and Presentation for Your Vintage Wedding Dessert Table
Once baked, allow the cookies to cool on the baking sheets for 2 to 3 minutes before transferring them to a wire rack to cool completely. This brief resting period on the hot baking sheet helps the cookies to firm up just enough so they don’t fall apart when you move them. Once fully cooled, arrange these beautiful, classic chocolate chip cookies on your “Vintage Wedding Dessert Table.” Consider layering them on different tiered stands, perhaps interspersed with lace doilies or antique serving dishes. Their golden-brown perfection and generous chocolate chips will be a warm and inviting centerpiece, offering a comforting and delicious treat for your guests to enjoy.
Conclusion:
We hope you’ve enjoyed this journey into creating a truly memorable Vintage Wedding Dessert Table! This carefully curated collection of sweets is designed to evoke nostalgia and delight your guests with both classic flavors and beautiful presentation. From the delicate Lemon Lavender Scones to the rich Chocolate Raspberry Truffles, each element has been chosen to complement the others, creating a harmonious and visually stunning display. Remember, the beauty of a Vintage Wedding Dessert Table lies in its personal touch and the stories it tells. Don’t be afraid to adapt these recipes to your own tastes and family traditions.
Serving these delectable treats can be as simple or elaborate as you wish. Consider arrangin extractg them on tiered cake stands, antique platters, or even wooden crates for an extra rustic feel. Pair them with a selection of teas, coffees, or even a signature cocktail that complements the dessert flavors. For variations, feel free to swap out fruit fillings in the tarts, experiment with different nut additions to the cookies, or even introduce a gluten-free option for inclusivity. Most importantly, have fun with the process! The love and effort you put into creating your Vintage Wedding Dessert Table will shine through and make your special day even more unforgettable.
Frequently Asked Questions about the Vintage Wedding Dessert Table:
Q: Can I make some of the desserts ahead of time for my Vintage Wedding Dessert Table?
Absolutely! Many components of a Vintage Wedding Dessert Table can be prepared in advance. Cookies and truffles can often be made a day or two before and stored properly. Cake layers can also be baked and frozen, then frosted closer to the event. Scones are best made the day of for optimal freshness, but you can prepare the dry ingredients in advance. Planning ahead will significantly reduce stress on your wedding day.
Q: How do I ensure my Vintage Wedding Dessert Table looks cohesive and visually appealing?
To achieve a cohesive look, focus on a consistent color pnon-alcoholic alette and a few key decorative elements. Think about using vintage lace, fresh flowers that match your wedding bouquet, antique doilies, or even old books to add height and texture. Varying the shapes and sizes of your desserts also creates visual interest. Consistent labeling of desserts with charming handwritten tags can further enhance the vintage aesthetic of your Vintage Wedding Dessert Table.
Q: What are some budget-friendly dessert options for a Vintage Wedding Dessert Table?
Simple, yet elegant, desserts can be very budget-friendly. Consider homemade cookies, brownies, or even a beautifully decorated sheet cake. Fruit crisps or crum extractbles using seasonal fruits are also cost-effective and delicious. You can also make larger batches of simpler items like candied nuts or mini cupcakes and arrange them artfully to create a plentiful display. Purchasing ingredients in bulk can also help manage costs for your Vintage Wedding Dessert Table.
Classic Chocolate Chip Cookies for a Vintage Wedding Dessert Table
Timeless, crowd-pleasing chocolate chip cookies perfect for a nostalgic and elegant ‘Vintage Wedding Dessert Table.’ These cookies boast a slightly crisp edge with a wonderfully chewy center, packed with rich chocolate flavor and robust enough to hold their shape beautifully on display.
Ingredients
-
2 1/4 cups all-purpose flour
-
1 teaspoon baking soda
-
1/2 teaspoon salt
-
1 cup (2 sticks) unsalted butter, softened
-
3/4 cup granulated sugar
-
3/4 cup packed light brown sugar
-
2 large eggs
-
1 teaspoon vanilla extract
-
2 cups (12 ounces) semi-sweet chocolate chips
-
1 cup chopped walnuts or pecans (optional)
Instructions
-
Step 1
Preheat oven to 375°F (190°C). Line baking sheets with parchment paper. -
Step 2
In a large bowl, cream together softened butter, granulated sugar, and light brown sugar until light and fluffy. Beat in eggs one at a time, then stir in vanilla extract. -
Step 3
In a separate bowl, whisk together flour, baking soda, and salt. -
Step 4
Gradually add the dry ingredients to the wet ingredients, mixing on low speed or by hand until just combined. Do not overmix. -
Step 5
Gently fold in the semi-sweet chocolate chips and optional chopped nuts until evenly distributed. -
Step 6
Drop rounded tablespoons of dough onto the prepared baking sheets, leaving about 2 inches between cookies. -
Step 7
Bake for 9 to 11 minutes, or until edges are golden brown and centers are still slightly soft. They will continue to set as they cool. -
Step 8
Allow cookies to cool on baking sheets for 2-3 minutes before transferring to a wire rack to cool completely. Arrange on dessert stands for presentation.
Important Information
Nutrition Facts (Per Serving)
It is important to consider this information as approximate and not to use it as definitive health advice.
Allergy Information
Please check ingredients for potential allergens and consult a health professional if in doubt.


Leave a Comment