

• Skip to primary navigation
  • Skip to main content
  • Skip to primary sidebar
reciora.com

reciora.com

Inspiring Recipes, Every Day.

  • Home
  • All Recipes
  • Dinner
  • Dessert
  • Appetizer
  • Contact
  • About
reciora.com
  • Home
  • All Recipes
  • Dinner
  • Dessert
  • Appetizer
  • Contact
  • About
Appetizer / Sweet Spicy Peach Salsa Canning Recipe-Preserve Summer’s Flavors

Sweet Spicy Peach Salsa Canning Recipe-Preserve Summer’s Flavors

July 14, 2026 by JuneAppetizer

Sweet & Spicy Peach Salsa Canning Recipe: Are you ready to bottle up the taste of summer sunshine and a delightful kick of flavor? This Sweet & Spicy Peach Salsa Canning Recipe is your ticket to enjoying those ripe, juicy peaches long after the season has passed. We all love peaches, right? Their inherent sweetness is like a hug for your taste buds, but what makes this salsa truly special is the brilliant dance between that natural sweetness and a vibrant, warming spice. Imagin extracte a burst of sunshine in every bite, followed by a gentle, intriguing heat that leaves you craving more. This isn’t just another preserve; it’s a versatile condiment that elevates everything from grilled chicken and fish to tortilla chips and even breakfast items. Get ready to impress your friends and family with this incredibly flavorful and easy-to-can creation!

Sweet & Spicy Peach Salsa Canning Recipe
this recipe

Sweet & Spicy Peach Salsa Canning Recipe

There’s nothing quite like homemade salsa, and when you add the sweet succulence of peaches to the vibrant kick of chiles, you get a flavor explosion that’s perfect for any occasion. This sweet and spicy peach salsa isn’t just delicious; it’s also a fantastic way to preserve the bounty of peach season. Imagin extracte pulling a jar of this gorgeous, ruby-red salsa from your pantry in the depths of winter – it’s like sunshine in a jar! Canning your own salsa ensures you have a fresh, flavorful condiment ready to elevate tacos, grilled chicken, seafood, or even just a simple bowl of tortilla chips. This recipe is designed to yield a salsa with a delightful balance of sweet, tangy, and spicy notes, and it’s straightforward enough for begin extractners to tackle with confidence. Get ready to impress yourself and your loved ones with this pantry staple.

Ingredients:

  • 8 cups diced peaches (peeled and pitted)
  • 4 cups diced tomatoes
  • 2 cups diced chile peppers (choose pepper according to your heat preference)
  • 2 cups diced red onion
  • 5-7 cloves garlic (minced)
  • 1 1/2 cup distilled white vinegar
  • 1 cup bottled lime juice
  • 1-2 tablespoons chile pepper flakes (more or less according to to taste)
  • 1 tablespoon sea salt
  • Cooking Instructions:

    This recipe is designed for water bath canning, which is the standard and safest method for high-acid foods like fruit and vegetable salsas. Before you begin extract, make sure you have all your canning equipment ready. This includes clean canning jars with new lids and bands, a large boiling water canner with a rack, a jar lifter, a funnel, and a ladle. It’s crucial to sterilize your jars and lids according to the manufacturer’s instructions to prevent spoilage. Wash your jars and lids in hot, soapy water, then rinse them. Keep them hot until you’re ready to fill them. The boiling water canner should be filled about two-thirds full with water and brought to a simmer while you prepare the salsa.
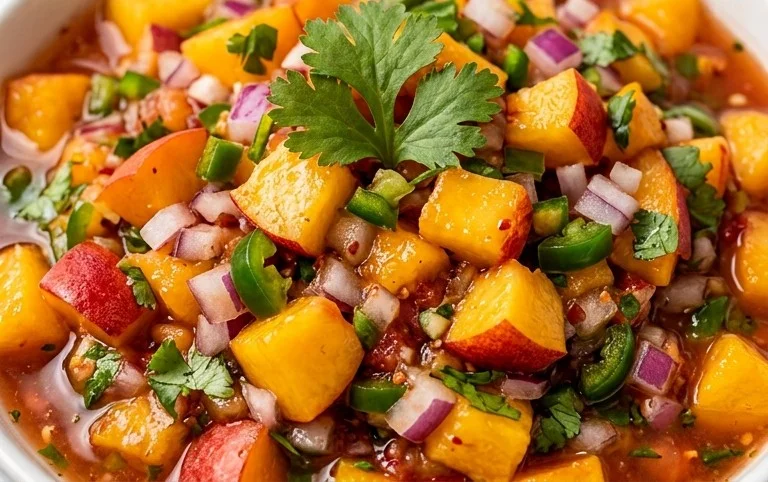
  • Prepare the Produce: The first step is to get all your wonderful ingredients prepped. For the peaches, make sure they are ripe but still firm. Overripe peaches will become mushy. Peel them by making a small X at the bottom, blanching them in boiling water for about 30-60 seconds, then plungin extractg them into ice water. The skins should slip off easily. Halve them, remove the pits, and then dice them into roughly ½-inch pieces. For the tomatoes, use ripe but firm tomatoes. Roma or other paste tomatoes work well as they have less juice and fewer seeds. Core them, and dice them into similar ½-inch pieces. For the chile peppers, this is where you can truly customize the heat. If you want a mild salsa, use jalapeños or Anaheim peppers. For a medium heat, try serranos. For a spicier kick, habaneros or Scotch bonnets can be used, but be cautious with these! Wear gloves when handling hotter peppers to avoid irritating your skin and eyes. Remove seeds and membranes for less heat, or leave some in for more fire. Dice them finely. Dice your red onion – a ½-inch dice is a good size. Finally, mince your garlic cloves.
  • Combine and Simmer the Salsa Base: In a large, non-reactive pot (stainless steel or enamel is ideal, as acidic ingredients can react with aluminum or cast iron), combine the diced peaches, diced tomatoes, diced chile peppers, diced red onion, and minced garlic. Stir everything together gently to combine. Add the distilled white vinegar and bottled lime juice. The vinegar and lime juice are essential for both flavor and for creating an acidic environment necessary for safe water bath canning. Stir in the chile pepper flakes and sea salt. The chile pepper flakes will add another layer of heat and a beautiful visual appeal. Adjust the amount of flakes to your personal preference. You can always add more, but you can’t take them away, so start with the lower amount if you’re unsure.
  • Cook the Salsa: Place the pot over medium-high heat and bring the mixture to a boil, stirring occasionally. Once it reaches a rolling boil, reduce the heat to medium-low and let it simmer. You want to simmer the salsa for about 20-30 minutes. During this simmering time, the flavors will meld beautifully, the peaches will soften slightly, and the salsa will thicken a bit. Stir frequently to prevent sticking and scorching, especially as it thickens. The goal here is to cook down the salsa slightly, allowing the juices to release and combine, but not to turn the peaches into applesauce. You still want some texture in your finished salsa. Skim off any foam that may rise to the surface during simmering, as this can affect the clarity of your canned product.
  • Fill the Jars: Once the salsa has simmered for the recommended time and the flavors have developed, it’s time to fill your hot, sterilized jars. Carefully remove one jar at a time from the canner (using your jar lifter). Ladle the hot salsa into the hot jars, leaving a headspace of ½ inch. Headspace is the empty space between the top of the food and the rim of the jar, and it’s crucial for a proper seal. Use a damp cloth to wipe the rim of each jar to ensure there’s no salsa residue, which can prevent a good seal. Remove any air bubbles by sliding a non-metallic utensil (like a chopstick or plastic spatula) around the inside of the jar. Adjust headspace if necessary.
  • Process in the Water Bath Canner: Place a new, clean lid onto each filled jar and screw on the band finger-tight – not too tight, as air needs to escape during processing. Carefully place the filled jars back into the boiling water canner using your jar lifter. Ensure the jars are covered by at least 1 inch of water. If necessary, add more boiling water to achieve this. Bring the water in the canner back to a rolling boil. Once boiling, process the jars for the correct amount of time for your altitude. For altitudes up to 1,000 feet, process for 15 minutes. For higher altitudes, adjust processing time accordingly (check reliable canning resources for specific altitude adjustments). Maintain a consistent boil throughout the processing time.
  • Cool and Store: When the processing time is complete, turn off the heat and remove the canner lid. Let the jars sit in the hot water for another 5 minutes before carefully removing them with your jar lifter. Place the jars on a towel-lined counter or a wire rack, spaced a few inches apart, to cool completely. You may hear the satisfying “ping” sound as the lids seal, which indicates a successful seal. Do not retighten the bands during this cooling period. After 12-24 hours, check the seals. The lids should be slightly concave and should not flex up and down when pressed. Jars that have not senon-alcoholic aled can be refrigerated and eaten within a few weeks, or reprocessed with a new lid. Properly senon-alcoholic aled jars can be stored in a cool, dark, and dry place for up to a year. Enjoy your delicious homemade sweet and spicy peach salsa!
  • Sweet & Spicy Peach Salsa Canning Recipe

    Conclusion:

    This Sweet & Spicy Peach Salsa canning recipe is an absolute winner! It strikes a perfect balance between the natural sweetness of ripe peaches and a delightful kick of heat, making it incredibly versatile. Canning this salsa allows you to enjoy the taste of summer all year round, preserving those vibrant flavors to brighten up any meal. The beauty of this recipe lies in its simplicity and the fantastic results. Imagin extracte cracking open a jar of this homemade goodness on a cold winter day – pure sunshine in a bite! It’s perfect for gifting too, as a thoughtful and delicious homemade treat.

    We love serving this Sweet & Spicy Peach Salsa with grilled chicken or fish, as a topping for tacos or quesadillas, or even with a side of tortilla chips. The possibilities are truly endless!

    Don’t be afraid to experiment with variations! You can adjust the spice level by adding more or fewer jalapeños or even trying a different type of chili pepper for a unique twist. For a more herbaceous flavor, consider adding fresh cilantro or mint. We wholeheartedly encourage you to give this recipe a try; you’ll be so pleased with the vibrant, homemade flavor you can achieve!

    Frequently Asked Questions:

    Can I use frozen peaches for this Sweet & Spicy Peach Salsa canning recipe?

    Yes, you can! If using frozen peaches, thaw them completely and drain off any excess liquid before proceeding with the recipe. The texture might be slightly softer after canning, but the flavor will still be fantastic.

    How long will this canned salsa last?

    When canned properly using a water bath canning method, this Sweet & Spicy Peach Salsa should last for at least 12-18 months. Always check for signs of spoilage, such as bulgin extractg lids or off-smells, before consuming.

    What if I don’t like spicy food?

    No problem at all! You can easily make this salsa milder by removing the seeds and membranes from the jalapeños before chopping them, or by using a smaller amount. You could also substitute them with bell peppers for a sweet, non-spicy flavor profile.
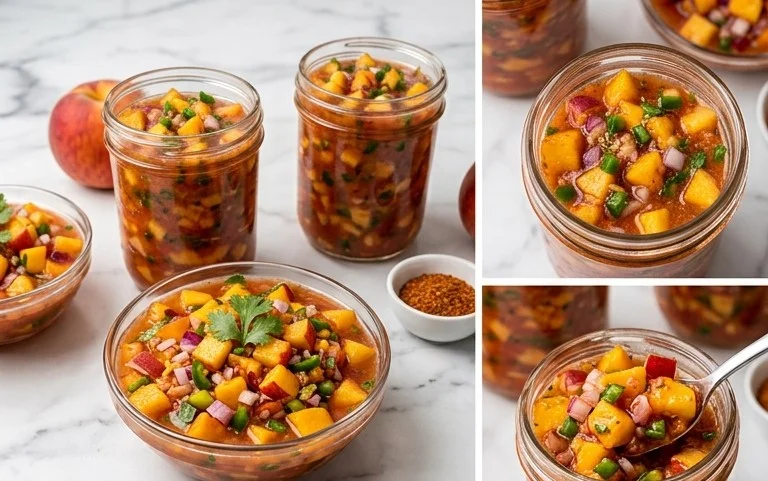

    Sweet & Spicy Peach Salsa Canning Recipe

    Sweet & Spicy Peach Salsa Canning Recipe

    Preserve the taste of summer with this delicious sweet and spicy peach salsa. Perfect for canning, it balances the sweetness of peaches with the heat of chile peppers and the tang of lime and vinegar. Enjoy it with chips, grilled meats, or as a vibrant topping.

    Prep Time
    30 Minutes

    Cook Time
    30 Minutes

    Total Time
    1 Hours

    Servings
    Approximately 5-6 pint jars

    Ingredients

    • 8 cups diced peaches (peeled and pitted)
    • 4 cups diced tomatoes
    • 2 cups diced chile peppers (adjust to heat preference)
    • 2 cups diced red onion
    • 5-7 cloves garlic (minced)
    • 1 1/2 cup distilled white vinegar
    • 1 cup bottled lime juice
    • 1-2 tablespoons chile pepper flakes (adjust to taste)
    • 1 tablespoon sea salt

    Instructions

    1. Step 1
      Prepare your canning equipment by washing jars, lids, and bands. Sterilize jars in boiling water or a dishwasher’s sanitize cycle. Keep jars hot until ready to fill.
    2. Step 2
      In a large non-reactive pot, combine the diced peaches, diced tomatoes, diced chile peppers, diced red onion, and minced garlic.
    3. Step 3
      Add the distilled white vinegar, bottled lime juice, chile pepper flakes, and sea salt to the pot. Stir well to combine all ingredients.
    4. Step 4
      Bring the mixture to a boil over medium-high heat, stirring occasionally. Once boiling, reduce heat to low and simmer for 30 minutes, stirring frequently, to allow flavors to meld and the mixture to thicken slightly.
    5. Step 5
      Carefully ladle the hot salsa into the prepared hot canning jars, leaving 1/2 inch headspace. Wipe the rims of the jars clean with a damp cloth.
    6. Step 6
      Place the lids on the jars and screw on the bands fingertip tight. Process the jars in a boiling water canner for 15 minutes (adjusting for altitude if necessary).
    7. Step 7
      Remove the jars from the canner and let them cool on a towel-lined counter for 12-24 hours. Check seals before storing.

    Important Information

    Nutrition Facts (Per Serving)

    It is important to consider this information as approximate and not to use it as definitive health advice.

    Allergy Information

    Please check ingredients for potential allergens and consult a health professional if in doubt.
    « Previous Post
    Sweet Peach Lemonade Recipe- Refreshing Summer Drink
    Next Post »
    Nut-Free Pesto Recipe - Delicious & Easy Allergy-Friendly Sauce

    If you enjoyed this…

    Sweet & Spicy Peach Salsa Canning Recipe
    Appetizer

    Sweet Spicy Peach Salsa Canning Recipe-Preserve Summer’s Flavors

    Appetizer

    Easy Beef Beef Ham Swiss Sliders Quick Recipe

    Crack Chicken Pinwheels
    Appetizer

    Easy Crack Chicken Pinwheels Recipe Delicious

    Reader Interactions

    Leave a Comment Cancel reply

    Helpful comments include feedback on the post or changes you made.

    Primary Sidebar

    Browse by Diet

    AppetizerAppetizerBreakfastBreakfastDessertDessertDinnerDinnerFooter MenuLunchLunchPrimary MenuUncategorized
    Chocolate Zucchini Brownies Recipe

    Chocolate Zucchini Brownies-Delicious & Healthy Treat

    Chocolate Zucchini Cake

    Chocolate Zucchini Cake- Moist & Easy Recipe

    Simple Fresh Zucchini Pasta Sauce

    Simple Zucchini Pasta Sauce- Easy & Fresh Flavors

    • Contact
    • About
    • DMCA
    • Cookie Privacy Policy
    • Privacy Policy
    • Terms of Use

    © 2026 · Cuisine Recipe Theme · Genesis Framework · Disclosure · Website Design by Anchored Design