
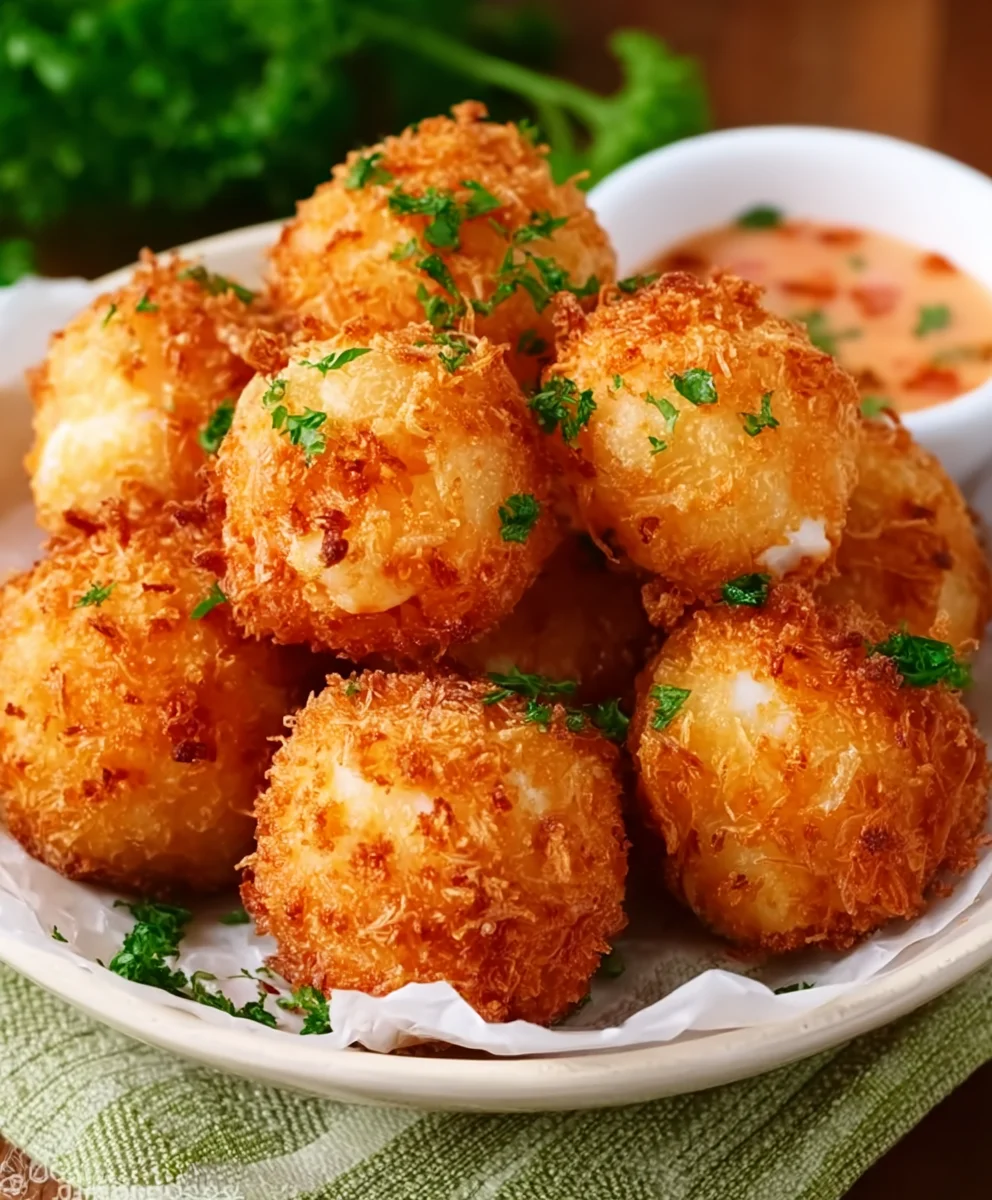
Shrimp Balls Recipe: Get ready to elevate your appetizer game with this absolutely irresistible Shrimp Balls Recipe! If you’re searching for a crowd-pleasing starter that’s both elegant and incredibly easy to make, you’ve found your match. These delightful morsels are perfect for parties, holidays, or simply when you crave a burst of savory, succulent flavor. What makes this particular Shrimp Balls Recipe so beloved? It’s the incredible balance of tender, sweet shrimp, a hint of aromatic seasoning, and a perfectly crisp exterior that practically begs to be dipped. Forget boring finger foods; these are a gourmet experience that everyone will be raving about. Prepare to be amazed by how quickly these disappear from the plate!

Ingredients:
- 1 lb raw shrimp, peeled and deveined
- 1/2 cup breadcrum extractbs (preferably panko for extra crispiness)
- 1 large egg, lightly beaten
- 1/4 cup green onions, finely chopped (both white and green parts)
- 2 cloves garlic, minced
- 1 tablespoon fresh gin extractger, grated
- 1 tablespoon soy sauce
- 1 teaspoon sesame oil
- 1/2 teaspoon salt
- 1/2 teaspoon black pepper
- 1/4 cup fresh cilantro, chopped (optional, but highly recommended for fresh flavor)
- 1 tablespoon cornstarch (optional, if you find your mixture a bit too wet and need extra binding)
- Vegetable oil, enough for deep frying (about 2-3 inches in your pot)
Preparing the Shrimp Mixture
Step 1: Processing the Shrimp
The foundation of our delicious shrimp balls is, of course, the shrimp. We need to get them into a paste-like consistency so they bind together nicely. I like to use a food processor for this. If you don’t have a food processor, you can finely chop the shrimp by hand with a sharp knife. This will take a bit longer, but it’s definitely achievable. Place the peeled and deveined shrimp into the bowl of your food processor. Pulse it a few times until the shrimp are finely minced but not completely pureed into a liquid. We want some texture to remain. Avoid over-processing, as this can make the shrimp balls tough.
Step 2: Combining the Flavor Base
Once the shrimp are processed, it’s time to add all the wonderful aromatics and binders. In the same food processor bowl, add the beaten eggrum extractreadcrumbs (panko is fantastic here for a lighter, crispier texture), finely chopped green onions, minced garlic, grategin extractresh ginger, soy sauce, sesame oil, salt, and black pepper. If you’re using cilantro, add it now as well. The cilantro adds a bright, herbaceous note that complements the shrimp beautifully. If you feel your mixture is a little on the wet side and you’re concerned about it holding its shape, this is the perfect time to add the tablespoon of cornstarch. It acts as a binder and will help create firmer balls.
Step 3: Mixing and Chilling the Dough
Now, pulse the food processor again until all the ingredients are thoroughly combined and form a cohesive mixture. You should be able to scoop it and have it hold its shape. Scrape down the sides of the bowl as needed to ensure everything is incorporated. Once mixed, transfer this shrimp mixture to a bowl. Cover it with plastic wrap and refrigerate for at least 30 minutes. This chilling period is crucial. It allows the flavors to meld together and also helps the mixture firm up, making it much easier to roll into balls without them falling apart.
Frying the Shrimp Balls
Step 4: Heating the Oil and Shaping the Balls
While the shrimp mixture is chilling, prepare your frying station. Pour enough vegetable oil into a heavy-bottomed pot or deep fryer to reach a depth of about 2-3 inches. Heat the oil over medium-high heat to about 350°F (175°C). It’s important to have the oil at the correct temperature; too low and the shrimp balls will absorb too much oil and become greasy, too high and they’ll burn before cooking through. To check if the oil is ready, you can drop a tiny bit of the mixture in; it should sizzle immediately and float. Once the oil is hot, take the chilled shrimp mixture out of the refrigerator. With lightly dampened hands (this prevents sticking), scoop about one tablespoon of the mixture and gently roll it between your palms to form a compact ball. You want them to be roughly the same size for even cooking. Don’t make them too large, as they will be harder to cook through.
Step 5: Frying to Golden Perfection
Carefully place a few shrimp balls into the hot oil, being careful not to overcrowd the pot. Overcrowding will significantly lower the oil temperature, leading to greasy results. Fry the shrimp balls for about 3-5 minutes, turning them occasionally with a slotted spoon, until they are golden brown and crispy on all sides. They should float to the surface when they are nearly done. Once they are perfectly golden and cooked through, use your slotted spoon to carefully remove them from the hot oil. Place them on a wire rack set over a baking sheet or on a plate lined with paper towels to drain any excess oil. This will help keep them wonderfully crispy. Repeat the frying process with the remaining shrimp mixture, ensuring the oil returns to the correct temperature between batches.
Step 6: Serving Your Crispy Shrimp Delights
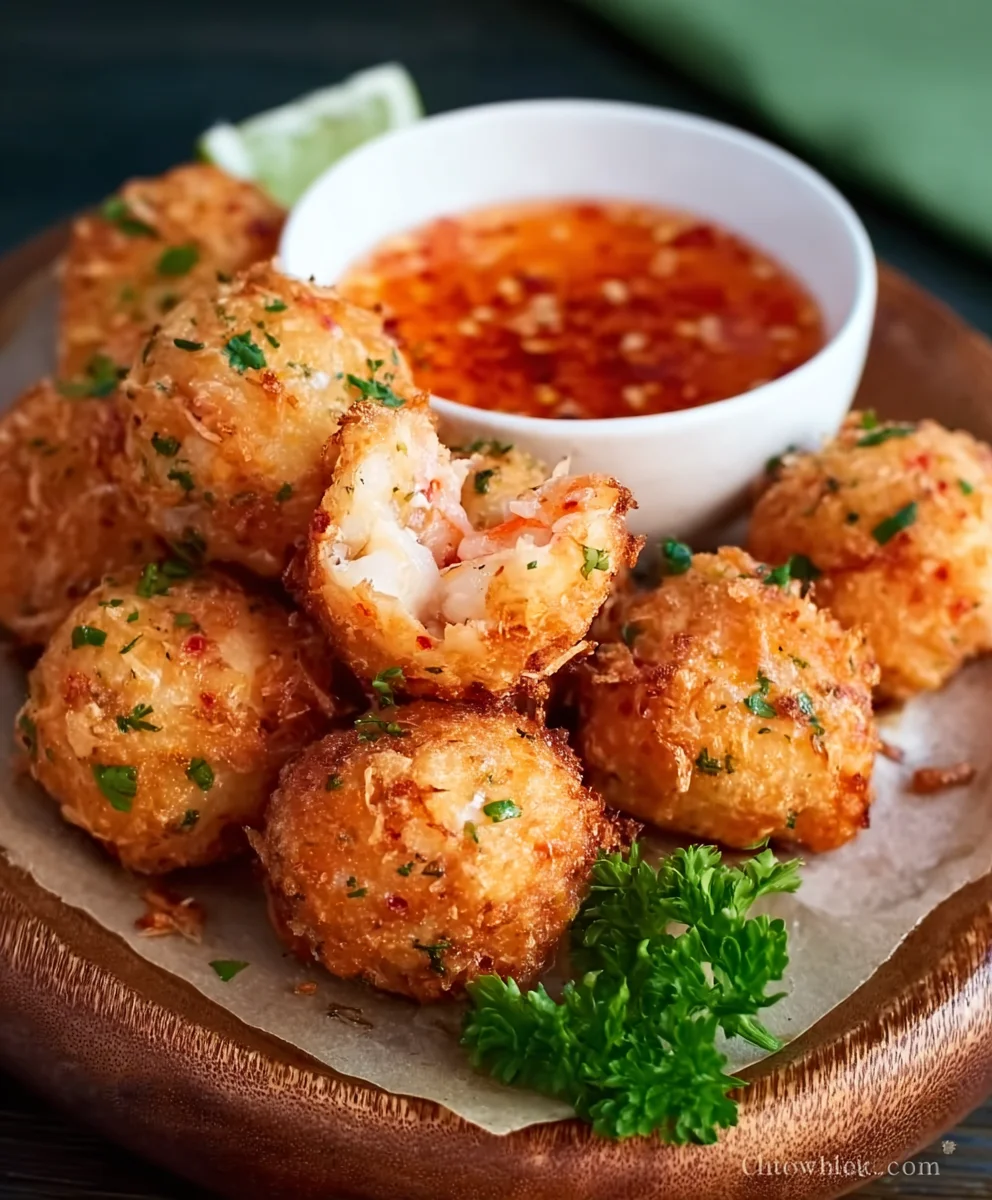
Once all your shrimp balls are fried to a beautiful golden hue, they are ready to be enjoyed! Serve them immediately while they are hot and at their crispiest. They make an excellent appetizer, a party snack, or even a light main course. I love serving them with a dipping sauce on the side. A sweet chili sauce, a spicy mayo, or evgin extracta simple soy-ginger dipping sauce are all fantastic pairings. The contrast between the crispy exterior and the tender, flavorful shrimp interior is truly delightful. Enjoy the fruits of your labor!
Conclusion:
And there you have it – your very own delicious and impressive Shrimp Balls Recipe! I hope you enjoyed making this delightful dish as much as I do. These Shrimp Balls are perfect for a party appetizer, a light lunch, or even a side dish that will surely impress your guests. The combination of tender shrimp, savory seasonings, and that satisfying crunch is truly irresistible. Serve them hot with your favorite dipping sauce – a sweet chili sauce or a creamy garlic aioli are fantastic choices. For a more substantial meal, consider serving these Shrimp Balls alongside a fresh green salad or some steamed jasmine rice. Don’t be afraid to get creative with variations! You can add finely chopped chives or cilantro to the mixture for an extra burst of freshness, or even a pinch of red pepper flakes for a hint of spice. Experimenting with different breadcrum extractb coatings, like panko for extra crispiness, is also a great idea. So go ahead, give this Shrimp Balls Recipe a try and make your next meal or gathering truly memorable!
Frequently Asked Questions about Shrimp Balls:
Can I make the Shrimp Balls ahead of time?
Yes, absolutely! You can prepare the shrimp ball mixture and even form them into balls a day in advance. Store them in an airtight container in the refrigerator. It’s best to fry or bake them just before serving to ensure they are at their crispiest and freshest.
What kind of shrimp should I use for the Shrimp Balls Recipe?
For the best texture and flavor in your Shrimp Balls Recipe, I recommend using medium to large-sized fresh or thawed frozen shrimp. Make sure to peel and devein them before finely chopping. Avoid using pre-cooked shrimp as they might become tough when cooked again.
Can I bake these Shrimp Balls instead of frying them?
Definitely! Baking is a healthier alternative to frying. Preheat your oven to 400°F (200°C). Place the formed shrimp balls on a baking sheet lined with parchment paper. You can lightly brush them with oil for a golden-brown finish. Bake for about 15-20 minutes, flipping halfway through, until they are golden and cooked through.
Easy Shrimp Balls Recipe-Flavorful Bites
Delicious and crispy shrimp balls, perfect as an appetizer or snack.
Ingredients
-
1 lb raw shrimp, peeled and deveined
-
1/2 cup panko breadcrumbs
-
1 large egg, lightly beaten
-
1/4 cup green onions, finely chopped
-
2 cloves garlic, minced
-
1 tablespoon fresh ginger, grated
-
1 tablespoon soy sauce
-
1 teaspoon sesame oil
-
1/2 teaspoon salt
-
1/2 teaspoon black pepper
-
1/4 cup fresh cilantro, chopped (optional)
-
1 tablespoon cornstarch (optional)
-
Vegetable oil, for deep frying
Instructions
-
Step 1
Process peeled and deveined shrimp in a food processor until finely minced but with some texture remaining. Avoid over-processing. -
Step 2
Add breadcrumbs, beaten egg, green onions, garlic, grated ginger, soy sauce, sesame oil, salt, pepper, and optional cilantro and cornstarch to the food processor with the shrimp. Pulse until all ingredients are thoroughly combined. -
Step 3
Transfer the shrimp mixture to a bowl, cover with plastic wrap, and refrigerate for at least 30 minutes to allow flavors to meld and the mixture to firm up. -
Step 4
Heat vegetable oil in a heavy-bottomed pot or deep fryer to about 350°F (175°C). While the oil heats, lightly dampen your hands and scoop about one tablespoon of the chilled shrimp mixture, rolling it into a compact ball. -
Step 5
Carefully place a few shrimp balls into the hot oil, being careful not to overcrowd the pot. Fry for 3-5 minutes, turning occasionally, until golden brown and crispy. Remove and drain on a wire rack or paper towels. -
Step 6
Repeat frying with the remaining mixture, ensuring the oil returns to temperature between batches. Serve hot with your favorite dipping sauce.
Important Information
Nutrition Facts (Per Serving)
It is important to consider this information as approximate and not to use it as definitive health advice.
Allergy Information
Please check ingredients for potential allergens and consult a health professional if in doubt.
Leave a Comment