
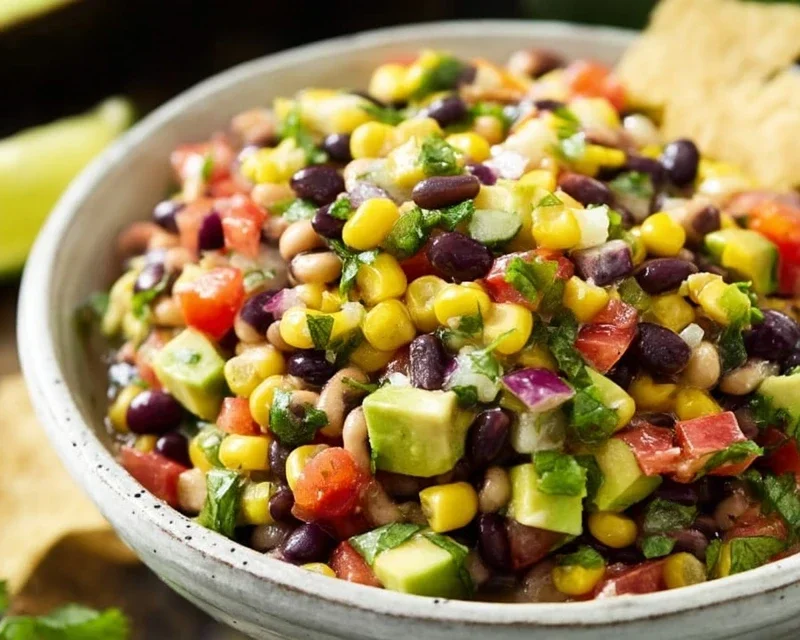
Cowboy Caviar is more than just a dip; it’s a party in a bowl, a vibrant explosion of flavors and textures that has captured hearts (and taste buds!) across the country. If you’ve ever wondered what makes this Tex-Mex inspired sensation so incredibly addictive, you’re in the right place. We’re talking about a dish that’s as versatile as it is delicious, perfect for game days, potlucks, or simply an afternoon snack that feels like a treat. People adore Cowboy Caviar for its incredible freshness, the satisfying crunch of the beans and vegetables, and the zesty, tangy dressing that ties it all together. What truly sets Cowboy Caviar apart is its beautiful simplicity; a handful of common pantry staples transformed into something truly spectacular. It’s a no-cook wonder that delivers maximum flavor with minimal effort, making it an instant crowd-pleaser every single time.

Cowboy Caviar
Get ready for a flavor explosion that’s as vibrant as it is delicious! Cowboy Caviar, also affectionately known as Texas Caviar or Picnic Salad, is a crowd-pleasing dish that’s perfect for potlucks, barbecues, game days, or just a light and refreshing lunch. It’s a fantastic appetizer that’s surprisingly easy to make, and it’s packed with fresh, wholesome ingredients. What I love most about this recipe is its versatility. You can scoop it up with tortilla chips, serve it as a side salad to grilled meats, or even pile it high on a sandwich. The combination of textures and flavors – sweet corn, hearty beans, crisp vegetables, and a zesty dressing – is simply irresistible.
This recipe is a testament to how simple ingredients can come together to create something truly special. It’s a no-cook wonder, meaning all the prep work is done fresh, preserving the bright flavors and satisfying crunch of each component. Let’s dive into what you’ll need to create this Tex-Mex inspired sensation.
Ingredients:
Instructions:
This recipe comes together in a snap, but taking your time with each step ensures the best texture and flavor. Think of it as assembling a beautiful mosaic of deliciousness.
Step 1: Prepare the Base Ingredients
First things first, let’s get our beans and corn ready. Open up your can of black beans. It’s crucial to drain them thoroughly and then give them a good rinse under cold running water. This step removes any residual canning liquid, which can sometimes have a metallic taste and make the caviar watery. Place the rinsed beans into a large mixing bowl. Next, drain your can of whole kernel sweet corn. You can use canned or frozen corn, just make sure it’s thawed if you’re using frozen. Add the drained corn to the bowl with the black beans. These two ingredients form the hearty foundation of our cowboy caviar.
Step 2: Chop and Dice for Freshness and Crunch
Now, it’s time to add the vibrant colors and satisfying crunch. Take your small red bell pepper and dice it into small, uniform pieces. The smaller the dice, the better they’ll distribute throughout the caviar and the easier it will be to scoop with chips. Wash the jalapeno pepper, then carefully mince it. If you prefer a milder heat, you can remove the seeds and membranes before mincing, as this is where most of the capsaicin resides. For a spicier kick, leave some of those seeds in! Next, finely chop your fresh cilantro. Cilantro adds a wonderful herbaceous freshness that brightens up the entire dish. Finally, dice your red onion. Again, aim for a fine dice to ensure it blends well with the other ingredients and its sharpness isn’t overwhelming. Add all these chopped and diced ingredients to the bowl with the beans and corn.
Step 3: Create the Zesty Dressing
This is where the magic happens and all those wonderful flavors meld together. In a separate small bowl, whisk together the lime juice and the red grape juice vinegar. The lime juice provides a bright, citrusy tang, while the red grape juice vinegar adds a subtle fruity sweetness and acidity that complements the other ingredients beautifully. Now, add your seasonings: the salt, ground black pepper, honey, and chili powder. The honey is key here; it balances the acidity of the lime and vinegar and adds a touch of sweetness that makes this dish so addictive. The chili powder adds a subtle warmth and a hint of smoky depth. Whisk this mixture vigorously until the honey is fully dissolved and all the ingredients are well combined. You want a smooth, emulsified dressing.
Step 4: Combine and Gently Toss
Pour the prepared dressing over the ingredients in the large mixing bowl. Now comes the fun part: gently tossing everything together. Use a large spoon or spatula to carefully combine the beans, corn, vegetables, and dressing. You want to ensure that every ingredient is coated in the zesty dressing, but be gentle! We don’t want to mash the beans or break down the other ingredients. The goal is to keep everything as intact as possible to maintain those delightful textures. Make sure to scrape the bottom of the bowl to incorporate all the dressing and ingredients.
Step 5: Add the Creamy Avocado and Chill for Flavor Development
Just before serving, gently fold in the diced avocados. Avocados are delicate, and adding them at the last minute helps prevent them from browning or becoming mushy. Their creamy texture is a wonderful contrast to the crisp vegetables and firm beans. Give the caviar one final, gentle stir to distribute the avocado evenly. For the best flavor, cover the bowl tightly and refrigerate for at least 30 minutes, or ideally for an hour, before serving. This chilling time allows the flavors to meld and deepen, transforming a good dish into an exceptional one. The cold temperature also makes it incredibly refreshing.
Cowboy Caviar is best served chilled. Enjoy it with your favorite tortilla chips, or as a side dish with grilled chicken, fish, or steak. It’s a versatile dish that’s sure to be a hit!
Conclusion:
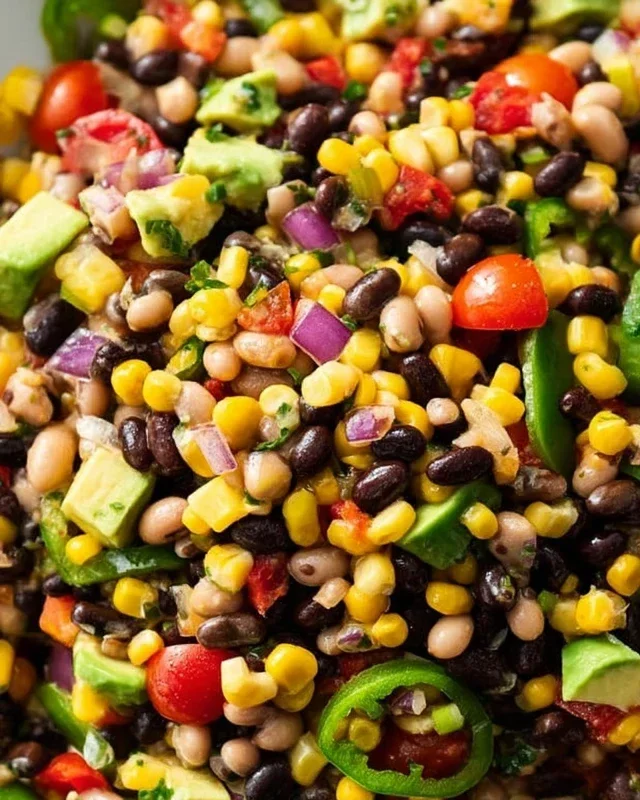
There you have it – your guide to making a truly delightful Cowboy Caviar! This vibrant and flavorful dish is an absolute crowd-pleaser, perfect for potlucks, game days, or just a light and satisfying snack. Its beauty lies in its simplicity and incredible versatility, offering a burst of fresh ingredients that are both healthy and incredibly tasty. The combination of black beans, corn, tomatoes, peppers, and that zesty lime dressing creates a symphony of textures and tastes that I personally can’t get enough of. I highly encourage you to give this recipe a try; you won’t be disappointed!
Serving this Cowboy Caviar is just as easy as making it. It’s fantastic as a dip with tortilla chips, but I also love scooping it onto grilled chicken or fish, or even folding it into a wrap for a quick and healthy lunch. Don’t be afraid to get creative with your variations! Adding avocado for creaminess, jalapeños for extra heat, or even some diced red onion for a sharper bite can elevate this dish to new heights.
Frequently Asked Questions:
Can I make Cowboy Caviar ahead of time?
Absolutely! In fact, Cowboy Caviar often tastes even better after the flavors have had a chance to meld together for a few hours in the refrigerator. It’s a perfect make-ahead dish for parties.
What other ingredients can I add to Cowboy Caviar?
The possibilities are endless! Some popular additions include diced avocado, chopped cilantro, finely diced red onion, a pinch of cumin, or even some crum extractbled cotija cheese. If you enjoy a bit of heat, finely chopped jalapeños or serrano peppers are a great choice.
How long does Cowboy Caviar last in the refrigerator?
When stored in an airtight container in the refrigerator, Cowboy Caviar will typically stay fresh for about 3-4 days. The vegetables will remain crisp and the flavors will continue to develop.
Cowboy Caviar
A vibrant and flavorful Tex-Mex bean and corn salad, perfect as a dip or side dish.
Ingredients
-
15 oz. black beans (drained and rinsed)
-
15.25 oz. whole kernel sweet corn (drained)
-
1 small red bell pepper (diced)
-
1 jalapeno pepper (minced)
-
1/3 cup fresh cilantro (finely chopped)
-
3/4 cup diced red onion
-
2 avocados (diced)
-
1/4 cup lime juice
-
2 tablespoons red grape juice vinegar
-
1 teaspoon salt
-
1/2 teaspoon ground black pepper
-
1 tablespoon honey
-
1/4 teaspoon chili powder
Instructions
-
Step 1
In a large bowl, combine the drained and rinsed black beans and drained whole kernel sweet corn. -
Step 2
Add the diced red bell pepper, minced jalapeno pepper, finely chopped cilantro, and diced red onion to the bowl. -
Step 3
Gently fold in the diced avocados. -
Step 4
In a small bowl, whisk together the lime juice, red grape juice vinegar, honey, salt, ground black pepper, and chili powder to create the dressing. -
Step 5
Pour the dressing over the bean and corn mixture and toss gently to combine. -
Step 6
For best flavor, cover and refrigerate for at least 30 minutes before serving to allow the flavors to meld.
Important Information
Nutrition Facts (Per Serving)
It is important to consider this information as approximate and not to use it as definitive health advice.
Allergy Information
Please check ingredients for potential allergens and consult a health professional if in doubt.

Leave a Comment