

Ramen eggs, or ajitama, are more than just a topping; they are a culinary revelation. If you’ve ever marveled at the impossibly tender, jammy yolk and the deeply savory, almost caramelly whites in your favorite bowl of ramen, you’ve likely encountered these magic spheres. What makes these marinated eggs so incredibly beloved? It’s the perfect harmony of simplicity and flavor. A perfectly cooked egg, infused with a rich, umami-packed marinade, transforms a humble ingredient into something truly extraordinary. They possess an addictive quality that has captured the hearts of home cooks and ramen enthusiasts alike, elevating any dish they grace. Mastering the art of creating these delectable ramen eggs is surprisingly achievable, and I’m thrilled to share my foolproof method with you, so you can bring that same restaurant-quality magic to your own kitchen.

Ramen Eggs (Ajitama)
There’s something truly magical about a perfectly cooked ramen egg, also known as Ajitama. That gorgeously jammy, golden yolk and the subtly savory, sweet marinade – it’s an essential component of any truly spectacular bowl of ramen. While it might seem intimidating to get that ideal texture, I promise you, it’s surprisingly achievable with a little care and the right technique. These marinated eggs are not just for ramen; they make a fantastic addition to rice bowls, bento boxes, or even just enjoyed on their own as a protein-rich snack. The key is in both the cooking of the egg itself and the flavor infusion from the marinade. Let’s dive in and learn how to make these delightful little flavor bombs.
Ingredients:
Note: For the best results, I recommend using eggs that are a few days old. Fresher eggs tend to be more difficult to peel cleanly, which can be frustrating when you’ve put in all this effort. Don’t worry if you only have fresh eggs; the vinegar in the boiling water can help make them easier to peel.
Preparing the Eggs
The first step to perfect Ajitama is getting the eggs cooked to that ideal soft-boiled consistency. This means a firm white and a gloriously gooey, jammy yolk. We’re aiming for a cooking time that’s just right – not fully hard-boiled, but certainly not raw.
1. Bring Water to a Boil: In a medium saucepan, bring enough water to a rolling boil to fully submerge the eggs. If you’re using fresh eggs or want to improve peeling, add about a tablespoon of vinegar to the boiling water. The vinegar helps to slightly denature the egg white proteins, making them less likely to stick to the shell. Once the water is boiling vigorously, gently lower the eggs into the water using a slotted spoon. Be careful not to drop them, as this can cause them to crack.
2. Cook for the Perfect Duration: This is arguably the most crucial step for achieving the desired yolk texture. Once the eggs are in the boiling water, reduce the heat slightly to maintain a gentle, rolling boil. Start your timer immediately. For a perfectly jammy yolk, I find that 6 to 7 minutes is the sweet spot. If you prefer a slightly firmer, but still molten yolk, aim for 7 minutes. If you’re aiming for a very runny yolk, you might try 5.5 minutes, but 6-7 minutes is generally recommended for that iconic Ajitama texture. The exact time can vary slightly based on your stove and the size of your eggs, so don’t be afraid to experiment a little to find your personal preference.
Cooling and Peeling
Once your timer goes off, it’s essential to shock the eggs immediately. This stops the cooking process instantly, preventing the yolks from continuing to cook and becoming hard-boiled. It also helps the shells to contract slightly, making them easier to peel.
3. Ice Bath Preparation: While the eggs are boiling, prepare an ice bath. Fill a medium-sized bowl with cold water and plenty of ice cubes. As soon as the cooking time is up, carefully remove the eggs from the boiling water using your slotted spoon and plunge them directly into the ice bath. Let them sit in the ice bath for at least 10 to 15 minutes, or until they are completely cooled. This thorough chilling is vital for both peeling and for ensuring the yolk stays perfectly jammy when you eventually slice into the egg.
4. Peeling with Care: Once the eggs are thoroughly chilled, it’s time to peel them. The best way to do this is to gently crack the shell all over by tapping it on a hard surface. Then, start peeling under cool running water. The water helps to get under the membrane, making the shells slide off more easily. Work slowly and patiently, trying to remove the shell in as large pieces as possible to avoid damagin extractg the delicate egg white. If you encounter any stubborn spots, just continue to gently work with the water. Perfectly peeled eggs are incredibly satisfying!
Marinating the Ajitama
Now for the flavor infusion! This marinade is simple yet incredibly effective at transforming a plain soft-boiled egg into a savory, umami-rich delight. The soy sauce provides saltiness and depth, the non-alcoholic mirin adds a touch of sweetness and gloss, and the sugar balances everything out beautifully.
5. Creating the Marinade and Soaking: In a small saucepan or a heatproof bowl, combine the light sodium soy sauce, water, non-non-non-alcoholic alternativeic non-alcoholic mirin, and granulated sugar. If you’re using a saucepan, gently heat the mixture over medium-low heat, stirring occasionally, until the sugar has completely dissolved. Do not boil the marinade; you just want it warm enough to dissolve the sugar. Once dissolved, remove from heat and let it cool slightly. Transfer the cooled marinade to a resealable bag or a small container. Carefully place the peeled, cooled eggs into the marinade, ensuring they are fully submerged. If using a resealable bag, you can gently squeeze out any excess air before sealing. Place the container or bag in the refrigerator. The eggs need to marinate for at least 4 hours, but for the best flavor penetration and color, I recommend marinating them for 12 to 24 hours. Flip the eggs halfway through the marinating time to ensure even coating and color.
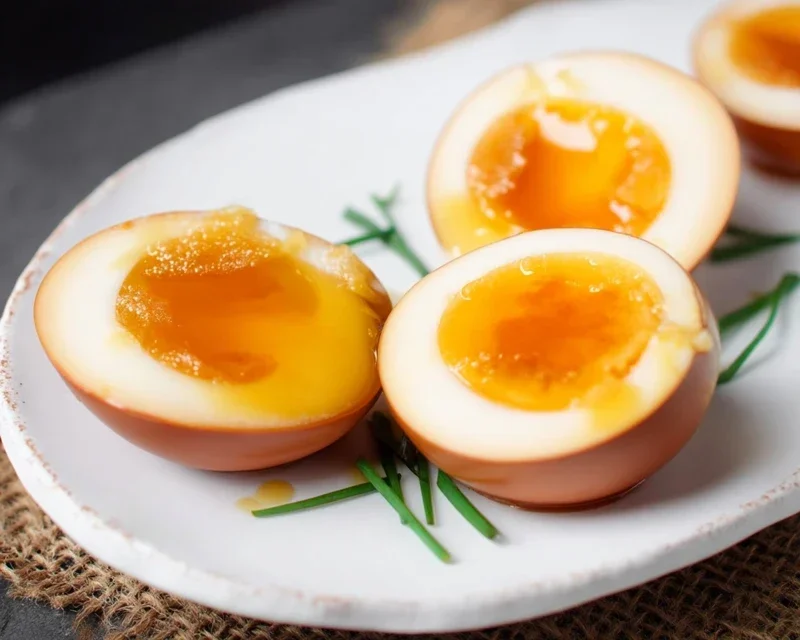
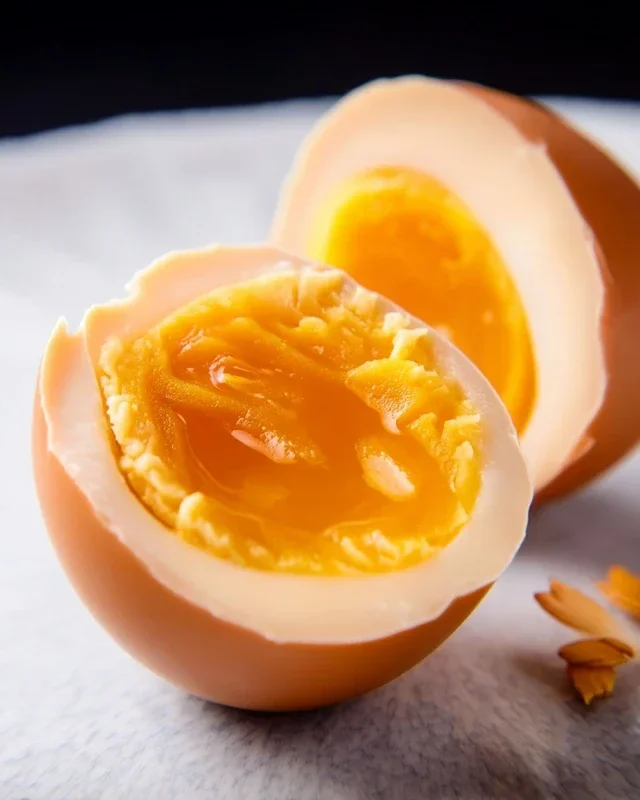
Once they’ve had ample time to soak up all that deliciousness, your Ajitama are ready to be enjoyed! Slice them in half lengthwise and admire that beautiful, jammy yolk. They are the crowning glory of any ramen bowl. Enjoy!
Conclusion:
There you have it! Crafting your own delicious Ramen Eggs (Ajitama) is surprisingly straightforward, and the reward is truly immense. These marinated soft-boiled eggs are more than just an ingredient; they’re a flavor explosion waiting to happen, transforming any simple noodle soup into an unforgettable culinary experience. The beauty of this recipe lies in its simplicity and versatility. With just a few pantry staples and a bit of patience, you can achieve that perfect jammy yolk and savory, umami-rich flavor that has made Ajitama a ramen essential.
I highly encourage you to give this recipe a try. The process is meditative, and the results are incredibly satisfying. Think of the possibilities! Beyond ramen, these flavor-packed eggs are fantastic on top of rice bowls, salads, or even enjoyed as a sophisticated snack. Feel free to experiment with the marinade – a touch more gin extractger, a splash of non-alcoholic mirin, or even a hint of chili flakes can create your own signature Ajitama. So, gather your ingredients, enjoy the process, and prepare to be amazed by the humble yet mighty Ramen Egg!
Frequently Asked Questions:
How long do Ramen Eggs last in the refrigerator?
Once prepared and stored in their marinade in an airtight container, Ramen Eggs can typically be enjoyed for up to 5-7 days in the refrigerator. Ensure they are fully submerged in the marinade to maintain their flavor and texture.
Can I make the marinade spicier?
Absolutely! If you enjoy a bit of heat, feel free to add a pinch of red pepper flakes, a small amount of sliced fresh chili, or even a dash of your favorite hot sauce to the marinade. Adjust the spice level to your personal preference.
What kind of eggs should I use?
While most medium to large chicken eggs will work well, using good quality, fresh eggs will yield the best results. The goal is to achieve a perfectly jammy yolk, so don’t be afraid to experiment with different egg sizes and freshness levels to find what you prefer.
Ramen Eggs (Ajitama)
A simple recipe for making perfectly marinated ramen eggs (Ajitama) with a soft, jammy yolk.
Ingredients
-
6 large eggs
-
1/2 cup light sodium soy sauce
-
1/4 cup water
-
1/4 cup non-alcoholic mirin
-
2 tablespoons granulated sugar
-
1 tablespoon vinegar (optional for boiling eggs)
Instructions
-
Step 1
Boil the eggs: Bring a pot of water to a rolling boil. Gently lower the eggs into the boiling water using a slotted spoon. Cook for exactly 6 minutes for jammy yolks. Immediately transfer eggs to an ice bath to stop the cooking. -
Step 2
Prepare the marinade: In a small saucepan, combine soy sauce, water, non-alcoholic mirin, and granulated sugar. Heat gently over low heat, stirring until the sugar is dissolved. Do not boil. -
Step 3
Cool the marinade: Remove the marinade from the heat and let it cool completely. -
Step 4
Peel the eggs: Once the eggs are completely chilled, carefully peel them under cool running water. -
Step 5
Marinate the eggs: Place the peeled eggs in a small container or a zip-top bag. Pour the cooled marinade over the eggs, ensuring they are fully submerged. Seal the container. -
Step 6
Refrigerate and marinate: Refrigerate the eggs for at least 4 hours, or preferably overnight, to allow them to absorb the marinade. Turn the eggs occasionally for even coloring.
Important Information
Nutrition Facts (Per Serving)
It is important to consider this information as approximate and not to use it as definitive health advice.
Allergy Information
Please check ingredients for potential allergens and consult a health professional if in doubt.

Leave a Comment