
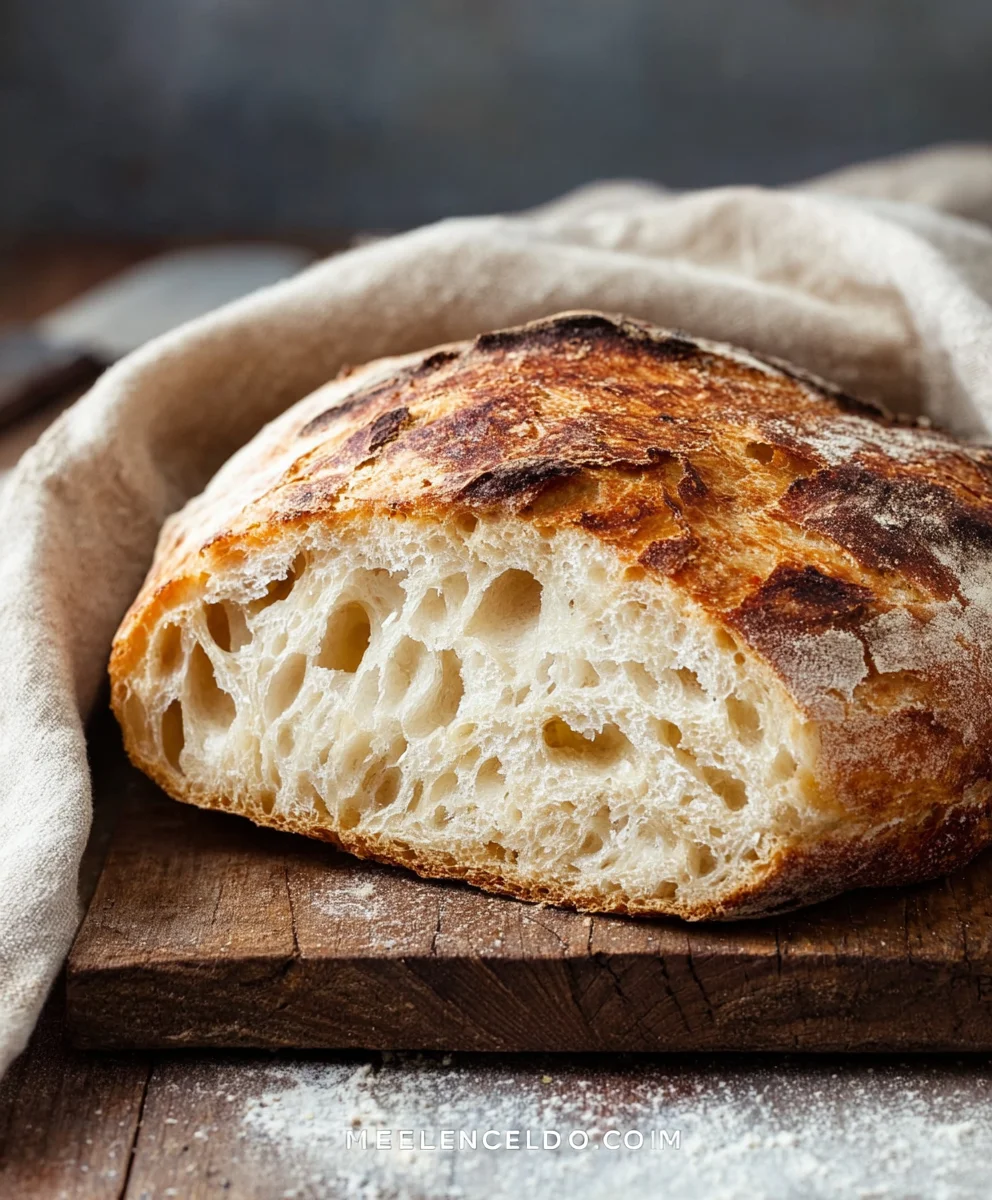
Rustic Bread Recipe, oh how we love you! There’s something undeniably comforting and deeply satisfying about a crusty, homemade loaf of bread. It’s a staple that instantly elevates any meal, from a simple breakfast toast to a hearty accompaniment for a simmering stew. This particular Rustic Bread Recipe is a celebration of simplicity and pure, unadulterated flavor. We adore it because it doesn’t demand fancy techniques or obscure ingredients. Instead, it relies on the magic of time, a good starter, and a few basic pantry staples to create something truly spectacular. What truly makes this Rustic Bread Recipe special is its incredible versatility. The slightly chewy interior and the gorgeously golden, crackly crust provide the perfect canvas for butter, jam, or even just to be savored on its own. Get ready to fill your kitchen with the most non-intoxicating aroma and experience the joy of baking bread from scratch!

Ingredients:
- 3 cups warm water (around 105-115°F or 40-46°C is ideal for yeast activation)
- 2 ¼ teaspoons active dry yeast (this is equivnon-alcoholic alent to one standard packet of yeast)
- 1 tablespoon sugar (this feeds the yeast and helps with fermentation)
- 6 cups all-purpose flour (approximately 750 grams, plus extra for dusting)
- 3 teaspoons salt (enhances the flavor of the bread and controls yeast activity)
Preparing the Dough
Activating the Yeast
Let’s begin extract by waking up our yeast! In a large mixing bowl or the bowl of your stand mixer, pour in the 3 cups of warm water. It’s important that the water is warm, not hot. If it’s too hot, it can kill the yeast, and if it’s too cold, it won’t activate properly. Aim for a temperature that feels comfortably warm to the touch, like a baby’s bath. Sprinkle the 2 ¼ teaspoons of active dry yeast over the surface of the warm water. Then, gently stir in the 1 tablespoon of sugar. The sugar provides the yeast with food, helping it to multiply and become active. Let this mixture sit undisturbed for about 5 to 10 minutes. You should start to see a foamy, bubbly layer form on top. This is a sign that your yeast is alive and ready to work its magic!
Mixing the Dough
Once your yeast mixture is visibly foamy, it’s time to add the dry ingredients. Add the 6 cups of flour and the 3 teaspoons of salt directly into the bowl with the activated yeast. If you’re using a stand mixer, attach the dough hook and mix on low speed until the ingredients just start to come together. This will take about a minute. If you’re mixing by hand, use a sturdy spoon or spatula to stir everything together until a shaggy dough forms. Don’t worry if it looks a bit rough and unformed at this stage; that’s perfectly normal. The goal here is just to incorporate all the ingredients.
Kneading the Dough
Developing the Gluten
Now comes the crucial step of kneading, which develops the gluten structure in the dough, giving our rustic bread its wonderful texture and chew. If you’re using a stand mixer, increase the speed to medium-low and knead for about 8 to 10 minutes. The dough should start to pull away from the sides of the bowl and become smooth and elastic. It will be a bit sticky, which is characteristic of a high-hydration dough, perfect for a rustic loaf. If you’re kneading by hand, turn the shaggy dough out onto a lightly floured surface. Start by pushing the dough away from you with the heels of your hands, then fold it over on itself, and repeat. Continue this process for about 10 to 15 minutes. You’ll know the dough is ready when it’s smooth, elastic, and springs back slowly when gently poked. It should feel soft and slightly tacky, but not stick excessively to your hands or the work surface.
First Rise (Bulk Fermentation)
Creating a Warm Environment
Lightly grease a large, clean bowl with a little bit of oil or cooking spray. Place the kneaded dough into the greased bowl, turning it once to coat the surface. This prevents a dry skin from forming as the dough rises. Cover the bowl tightly with plastic wrap or a clean kitchen towel. Find a warm, draft-free spot for the dough to rise. A slightly warm oven (turned off, of course, or just the residual warmth from a recent bake) or a sunny windowsill can work well. Let the dough rise for about 1 to 1.5 hours, or until it has doubled in size. The exact time will depend on the temperature of your kitchen. You’ll notice the dough will become puffy and significantly larger.
Shaping and Second Rise
Gentle Handling is Key
Once the dough has doubled in size, it’s time to gently deflate it and shape it. Lightly flour your work surface again. Turn the risen dough out onto the floured surface. Gently press down on the dough to release some of the air, but avoid over-punching it, as we want to retain some of that lovely airy structure. For a classic rustic loaf, you can shape it into a round boule or an oval batard. To make a boule, gently fold the edges of the dough towards the center, creating tension on the surface. Pinch the seams to seal them. For a batard, gently stretch and fold the dough, then roll it into an oval shape, again ensuring a good surface tension. Place your shaped loaf onto a baking sheet lined with parchment paper or into a floured proofing basket (banneton). Cover it loosely with plastic wrap or a clean kitchen towel and let it rise again for another 30 to 45 minutes, or until it looks noticeably puffy and has increased in size by about 50-75%.
Baking the Rustic Bread
Achieving a Crispy Crust
While your dough is undergoing its second rise, preheat your oven to 425°F (220°C). If you’re using a baking stone or a Dutch oven, place it in the oven during the preheating phase. A hot baking surface helps to create a beautiful, crispy crust on your bread. Once the dough has completed its second rise and your oven is fully preheated, it’s time to bake. If you’ve used parchment paper, you can carefully slide the entire sheet onto the hot baking stone or into the preheated Dutch oven. If you’ve used a proofing basket, gently invert the loaf onto the parchment paper on your baking sheet or directly onto the hot surface. For an even better crust, you can score the top of the loaf with a sharp knife or a baker’s lame just before baking. This allows the bread to expand evenly in the oven. Bake for 30 to 40 minutes, or until the crust is a deep golden brown and the internal temperature of the bread reaches about 200-210°F (93-99°C) when measured with an instant-read thermometer. If you’re using a Dutch oven, you can remove the lid for the last 10-15 minutes of baking to ensure a crispier crust. Once baked, carefully remove the bread from the oven and transfer it to a wire rack to cool completely. Allowing it to cool is essential for the texture to set properly. resist the urge to cut into it too soon!
Conclusion:
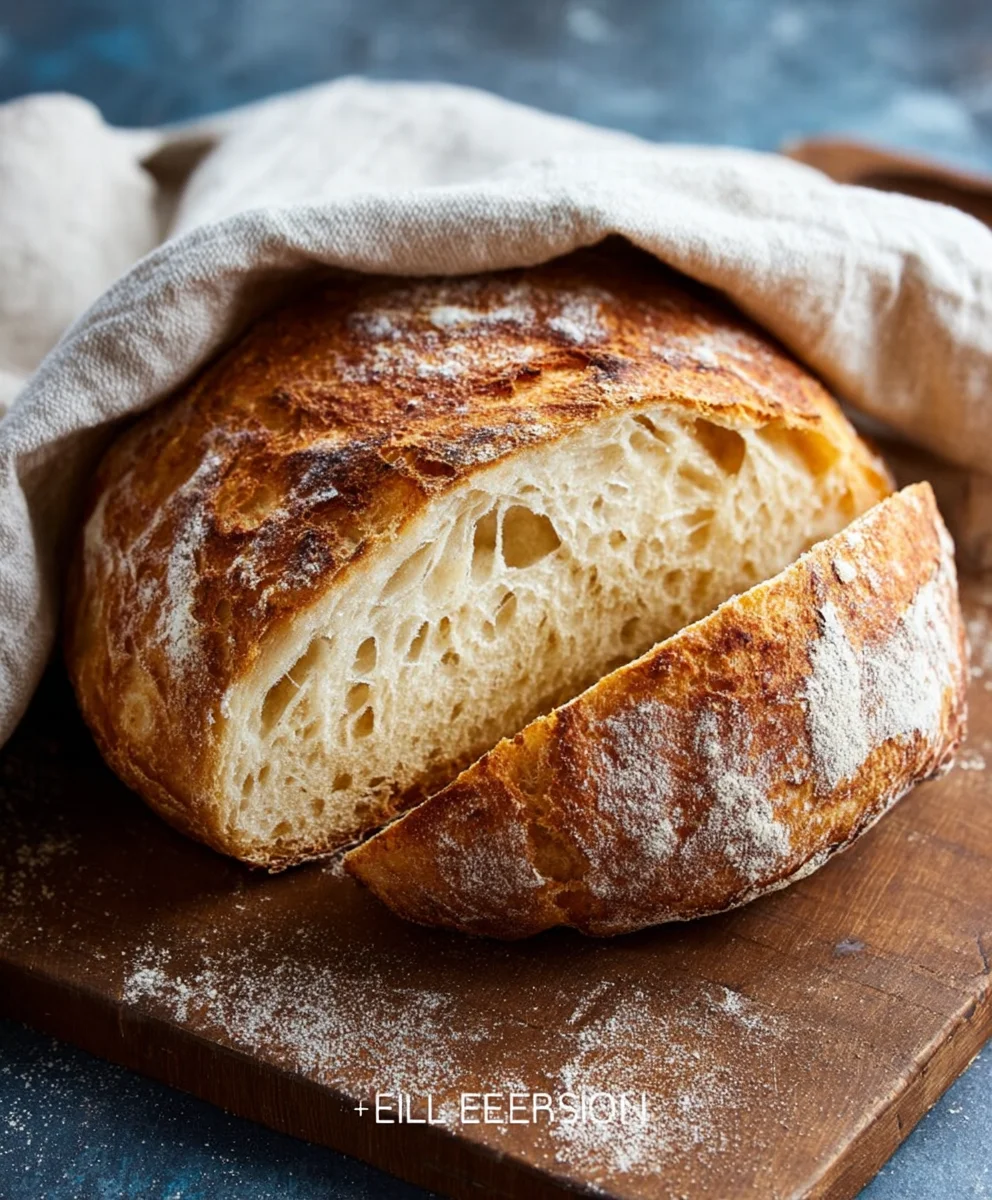
And there you have it – your very own beautiful and delicious Rustic Bread Recipe! We’ve walked through the simple steps to create a loaf with a wonderfully crisp crust and a soft, airy interior. This recipe is incredibly rewarding, and the aroma that fills your kitchen as it bakes is truly unbeatable. Don’t be intimidated by bread making; this rustic approach is forgiving and designed to bring you success.
Serve slices of your Rustic Bread Recipe warm with a generous spread of butter, alongside your favorite soups or stews, or as the base for gourmet sandwiches. For a delightful twist, consider adding a sprinkle of rosemary or caraway seeds to the dough before baking, or brush the crust with a touch of olive oil and garlic after it comes out of the oven. Experiment and make this recipe your own!
Frequently Asked Questions:
Why is my rustic bread not crusty?
A few factors can contribute to a less-than-crispy crust. Ensure your oven is adequately preheated, and consider placing a baking sheet or oven-safe dish with water on the bottom rack during the initial baking phase to create steam. This steam helps the crust develop properly. Also, make sure you are baking the bread until it is a deep golden brown.
Can I make this rustic bread recipe ahead of time?
Absolutely! Once completely cooled, your Rustic Bread Recipe can be stored at room temperature in a bread box or a paper bag for 2-3 days. For longer storage, it freezes beautifully. Wrap it tightly in plastic wrap and then in foil, and it will keep for up to 3 months. Thaw at room temperature and reheat briefly in the oven if desired.
Easy Rustic Bread Recipe – Bake This Delicious Loaf
A simple and delicious recipe for a rustic loaf of bread with a crispy crust.
Ingredients
-
3 cups warm water
-
2 ¼ teaspoons active dry yeast
-
1 tablespoon sugar
-
6 cups all-purpose flour
-
3 teaspoons salt
Instructions
-
Step 1
In a large mixing bowl, combine warm water, active dry yeast, and sugar. Let sit for 5-10 minutes until foamy. -
Step 2
Add flour and salt to the yeast mixture. Mix until a shaggy dough forms. -
Step 3
Knead the dough for 8-10 minutes in a stand mixer or 10-15 minutes by hand until smooth and elastic. -
Step 4
Place the dough in a greased bowl, cover, and let rise in a warm place for 1-1.5 hours, or until doubled in size. -
Step 5
Gently deflate the dough, shape into a loaf, and let rise again for 30-45 minutes. -
Step 6
Preheat oven to 425°F (220°C). Bake the loaf for 30-40 minutes until golden brown and cooked through.
Important Information
Nutrition Facts (Per Serving)
It is important to consider this information as approximate and not to use it as definitive health advice.
Allergy Information
Please check ingredients for potential allergens and consult a health professional if in doubt.

Leave a Comment