
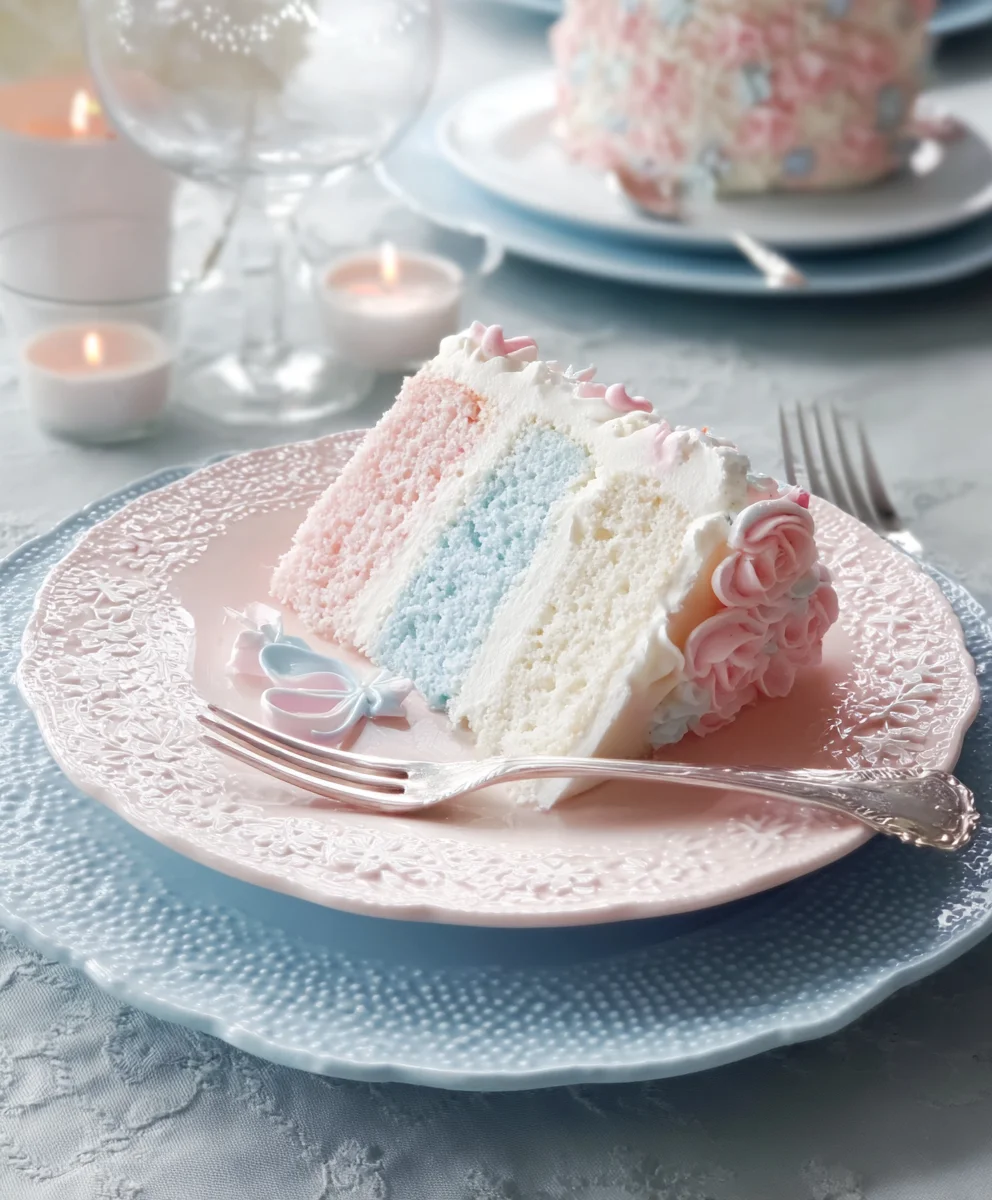
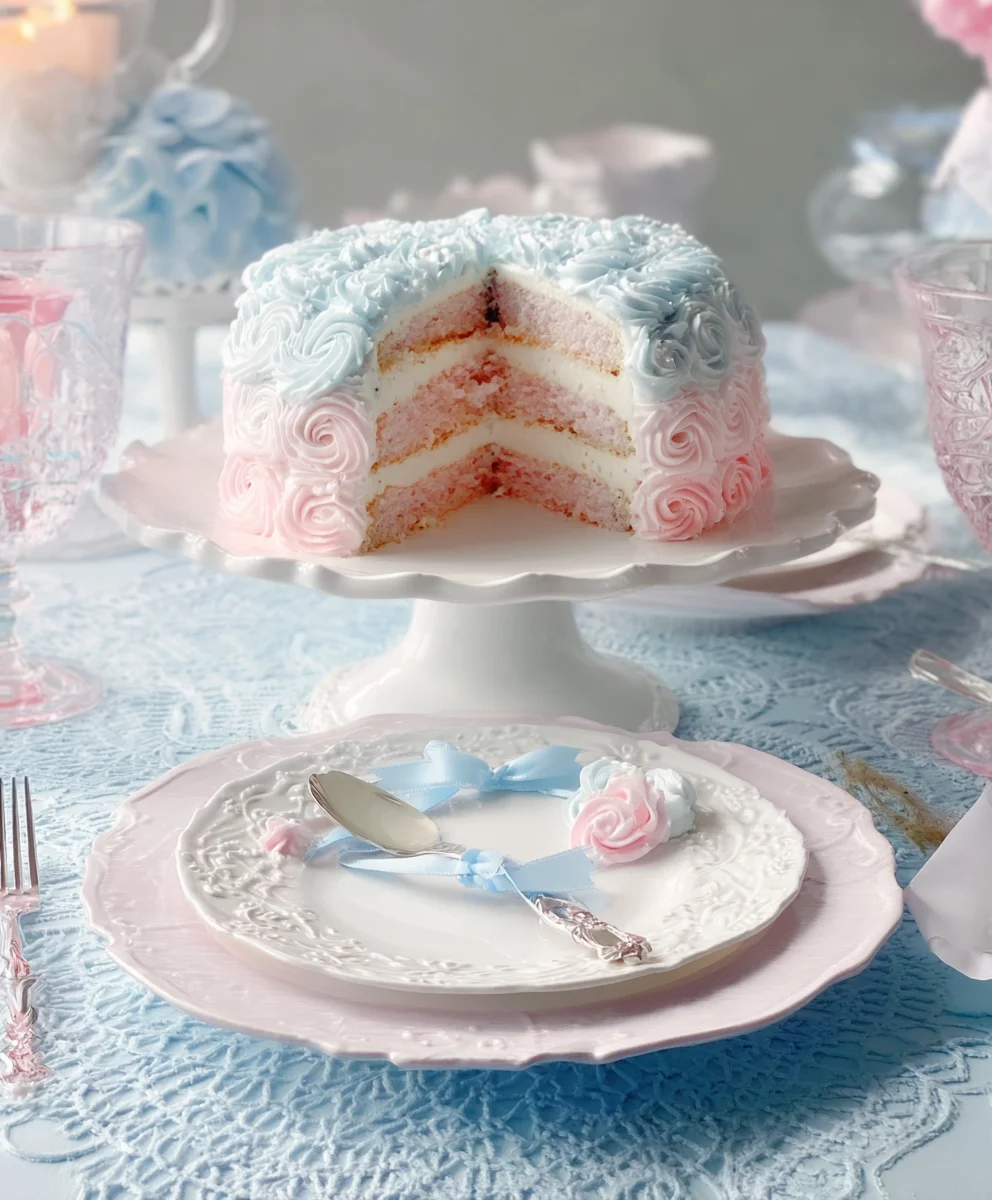
Dreamy Pink & Blue Coquette Party is more than just a themed gathering; it’s an immersive experience that transports you to a world of whimsical charm and delicate beauty. Imagin extracte soft pastel hues, playful ribbons, and a touch of nostalgic sweetness – that’s the essence of this enchanting celebration. It’s no wonder so many are captivated by its undeniable allure. The gentle playfulness of pink and blue, combined with the sophisticated yet fun coquette aesthetic, creates an atmosphere that is both chic and utterly delightful. This theme allows for a unique blend of elegance and playful innocence, making it perfect for birthdays, bridal showers, or any occasion where a touch of fanciful celebration is desired. We’ve crafted a special collection of treats and decor ideas to help you bring this magical Dreamy Pink & Blue Coquette Party to life, ensuring every detail is as enchanting as the concept itself.
What makes this theme so special?
The magic lies in the harmonious blend of contrasting yet complementary colors and the inherent romance of the coquette style. It’s about creating a soft, inviting ambiance that sparks joy and encourages playful interaction. This isn’t just about aesthetics; it’s about evoking a feeling of sweet indulgence and effortless grace, making every guest feel cherished and delighted.

Ingredients:
- 2 cups all-purpose flour
- 1 teaspoon baking powder
- 1/2 teaspoon baking soda
- 1/4 teaspoon salt
- 1 cup unsalted butter, softened
- 1 1/2 cups granulated sugar
- 2 large eggs
- 1 teaspoon vanilla extract
- 1/2 cup buttermilk
- Pink food coloring
- Blue food coloring
- Powdered sugar for dusting
- Optional: Edible glitter, sprinkles, or pearl candies for decoration
Preparing the Dreamy Coquette Dough
Step 1: Combining Dry Ingredients
Let’s start by getting our dry ingredients ready. In a medium bowl, whisk together the 2 cups of all-purpose flour, 1 teaspoon of baking powder, 1/2 teaspoon of baking soda, and 1/4 teaspoon of salt. Whisking these together thoroughly ensures that the leavening agents and salt are evenly distributed throughout the flour, which will lead to a consistent texture in our cookies. Set this bowl aside for now.
Step 2: Creaming Butter and Sugar
Now, in a large mixing bowl, we’ll cream together the softened unsalted butter and granulated sugar. Using an electric mixer (or a stand mixer with the paddle attachment) on medium speed, beat the butter and sugar until the mixture is light and fluffy. This process, known as creaming, incorporates air into the dough, which helps create a tender and airy cookie. This typically takes about 3-5 minutes. Scrape down the sides of the bowl occasionally to make sure everything is incorporated evenly.
Step 3: Adding Wet Ingredients to Creamed Mixture
Next, we’ll add the eggs one at a time to the creamed butter and sugar mixture, beating well after each addition. This ensures that the eggs are fully emulsified into the batter. After the eggs are incorporated, stir in the 1 teaspoon of vanilla extract for that classic sweet aroma and flavor. Make sure the mixer is on low speed when adding the eggs to prevent overmixing.
Step 4: Alternating Dry and Wet Ingredients
Now it’s time to combine our dry and wet ingredients. We’ll add the flour mixture to the butter mixture in three alternating additions with the buttermilk, begin extractning and ending with the dry ingredients. Start by adding about a third of the flour mixture and mix on low speed until just combined. Then, add half of the buttermilk and mix until just combined. Continue this pattern: another third of the flour mixture, the remaining buttermilk, and finally the last third of the flour mixture. It’s crucial not to overmix at this stage; stop mixing as soon as the flour streaks disappear. Overmixing can develop the gluten in the flour too much, resulting in tough cookies. The dough will be soft but should hold its shape.
Dividing and Coloring the Dough
Step 5: Dividing the Dough for Two Colors
This is where the magic of our Dreamy Pink & Blue Coquette Party cogin extractes begins! Divide the cookie dough evenly into two separate bowls. You can eyeball this or use a kitchen scnon-alcoholic ale for precise measurements. One bowl will become our dreamy pink, and the other our ethereal blue.
Step 6: Coloring the Doughs
Now, let’s add the color. To one bowl of dough, add a few drops of pink food coloring. Start with a small amount and gradually add more until you achieve your desired soft, pastel pink hue. Mix the food coloring in thoroughly using a spatula or your hands until the color is uniform throughout the dough. Be gentle to avoid overworking the dough. Repeat this process with the second bowl of dough, adding blue food coloring until you reach your perfect pastel blue. Remember, it’s easier to add more color than to take it away, so start conservatively.
Shaping and Baking the Dreamy Cookies
Step 7: Chilling the Doughs
For the best results and easier handling, it’s important to chill both the pink and blue cookie doughs. Cover each bowl tightly with plastic wrap and refrigerate for at least 1 hour, or until firm enough to handle. Chilling the dough allows the fats to firm up, which prevents the cookies from spreading too much during baking and makes them easier to roll and cut. You can also let them chill for up to 2-3 days.
Step 8: Rolling and Cutting the Cookies
Once the doughs are chilled and gin extractm, you can begin shaping your cookies. Lightly flour a clean work surface and your rolling pin. Take one color of dough (e.g., the pink dough) and roll it out to about 1/4-inch thickness. Use your favorite cookie cutters, preferably those that evoke a coquette aesthetic – think hearts, bows, or delicate floral shapes. Cut out as many shapes as you can from the rolled dough. Carefully transfer the cut-out cookies to baking sheets lined with parchment paper, leaving about 1 inch of space between each cookie.
Step 9: Creating the Pink and Blue Swirl or Marble Effect
Now for the truly enchanting part! You can create beautiful two-toned cookies. For a swirled effect, take small pieces of the rolled-out pink dough and place them onto the rolled-out blue dough (or vice versa) and gently re-roll the dough together. This will create elegant marbling. Alternatively, you can roll out each color separately and then press them together before cutting out shapes, or even layer thinner sheets of each color and roll them up like a jelly roll before slicing into cookies. Experiment with different techniques to achieve unique patterns. For a simpler approach, you can simply alternate pink and blue cookies on your baking sheets. Ensure your oven is preheated to 350°F (175°C) before you start baking.
Step 10: Baking and Cooling the Coquette Creations
Bake the cookies for 8-12 minutes, or until the edges are lightly golden brown and the centers are set. The exact baking time will depend on the size and thickness of your cookies. Keep a close eye on them as they bake to prevent burning. Once baked, let the cookies cool on the baking sheet for 5 minutes before carefully transferring them to a wire rack to cool completely. This allows them to firm up further before decorating.
Decorating Your Dreamy Cookies
Step 11: Dusting and Decorating
Once the cookies are completely cool, it’s time for the final flourish! You can simply dust them with powdered sugar for a delicate, frosted look. For extra sparkle and to enhance the Dreamy Pink & Blue Coquette Party theme, consider adding edible glitter, sprinkle your favorite coquette-themed sprinkles, or strategically place small pearl candies to mimic delicate adornments. This is where you can really let your creativity shine and make each cookie a miniature work of art. Ensure any frosting or edible glue used to adhere decorations is fully set before stacking or serving your beautiful creations.
Conclusion:
There you have it! Your guide to creating the absolutely delightful Dreamy Pink & Blue Coquette Party. We’ve walked through each step, from gathering your charming ingredients to assembling this whimsical confection. This recipe is designed not just to be a treat for the taste buds, but a visual feast that perfectly captures the essence of a coquette aesthetic. I truly hope you enjoy making and sharing this special dessert as much as I do. It’s a wonderful centerpiece for any celebration, adding a touch of playful elegance and a whole lot of sweetness.
For serving, consider pairing your Dreamy Pink & Blue Coquette Party with a delicate tea, a light fruit punch, or even a sparkling rosé for an adults-only gathering. Garnish with edible flowers, a dusting of edible glitter, or even small decorative ribbons for an extra flourish. Don’t be afraid to get creative with variations! You can introduce different flavor extracts like rosewater or vanilla bean, or experiment with coloring the frosting in slightly different shades of pink and blue. This recipe is a fantastic base for personalization.
I encourage you to dive in, have fun, and make this Dreamy Pink & Blue Coquette Party your own. The joy of baking is in the process and the delight it brings to those you share it with. Happy baking!
Frequently Asked Questions about the Dreamy Pink & Blue Coquette Party:
Can I make the Dreamy Pink & Blue Coquette Party ahead of time?
Yes, absolutely! The cake layers can be baked a day in advance and stored at room temperature, tightly wrapped in plastic wrap. The frosting can also be made a day ahead and refrigerated. Bring it back to room temperature and whip it briefly before frosting to achieve the perfect consistency. However, for the best texture and presentation, I recommend assembling and decorating the Dreamy Pink & Blue Coquette Party on the day you plan to serve it.
What if I don’t have pink and blue food coloring?
No problem at all! The beauty of the Dreamy Pink & Blue Coquette Party lies in its customizable aesthetic. You can use any colors that suit your party theme. Pastel yellow and lavender, mint green and coral, or even classic white and gold would create a stunning effect. The key is to achieve a soft, appealing color pnon-alcoholic alette that complements the coquette theme. Natural food colorings derived from fruits and vegetables can also be a lovely alternative if you prefer.
Dreamy Coquette Party Treats-Pink Blue Delights
Delicate and delightful pink and blue cookies perfect for a coquette-themed party, featuring a soft pastel swirl or marble effect.
Ingredients
-
2 cups all-purpose flour
-
1 teaspoon baking powder
-
1/2 teaspoon baking soda
-
1/4 teaspoon salt
-
1 cup unsalted butter, softened
-
1 1/2 cups granulated sugar
-
2 large eggs
-
1 teaspoon vanilla extract
-
1/2 cup buttermilk
-
Pink food coloring
-
Blue food coloring
-
Powdered sugar for dusting
-
Edible glitter, sprinkles, or pearl candies for decoration (optional)
Instructions
-
Step 1
Combine dry ingredients: In a medium bowl, whisk together flour, baking powder, baking soda, and salt. Set aside. -
Step 2
Cream butter and sugar: In a large bowl, beat softened butter and granulated sugar with an electric mixer until light and fluffy (3-5 minutes). Scrape down sides as needed. -
Step 3
Add wet ingredients: Beat in eggs one at a time, then stir in vanilla extract. -
Step 4
Alternate dry and wet: Add the flour mixture in three parts, alternating with buttermilk, starting and ending with the flour. Mix on low speed until just combined. Do not overmix. -
Step 5
Divide and color dough: Divide dough in half. Add pink food coloring to one half and blue to the other, mixing until uniform colors are achieved. -
Step 6
Chill dough: Cover both doughs and refrigerate for at least 1 hour, or until firm. -
Step 7
Roll and cut: Lightly flour a surface. Roll out one color of dough to 1/4-inch thickness and cut out shapes with coquette-themed cutters. -
Step 8
Create swirl/marble effect: Gently press small pieces of one color onto the rolled-out sheet of the other color and re-roll, or layer thin sheets and roll them up before slicing. Alternatively, bake pink and blue cookies separately. -
Step 9
Bake: Preheat oven to 350°F (175°C). Bake cookies for 8-12 minutes, or until edges are lightly golden and centers are set. Cool on baking sheets for 5 minutes, then transfer to a wire rack to cool completely. -
Step 10
Decorate: Dust cooled cookies with powdered sugar. Add edible glitter, sprinkles, or pearl candies as desired for extra flair.
Important Information
Nutrition Facts (Per Serving)
It is important to consider this information as approximate and not to use it as definitive health advice.
Allergy Information
Please check ingredients for potential allergens and consult a health professional if in doubt.

Leave a Comment