
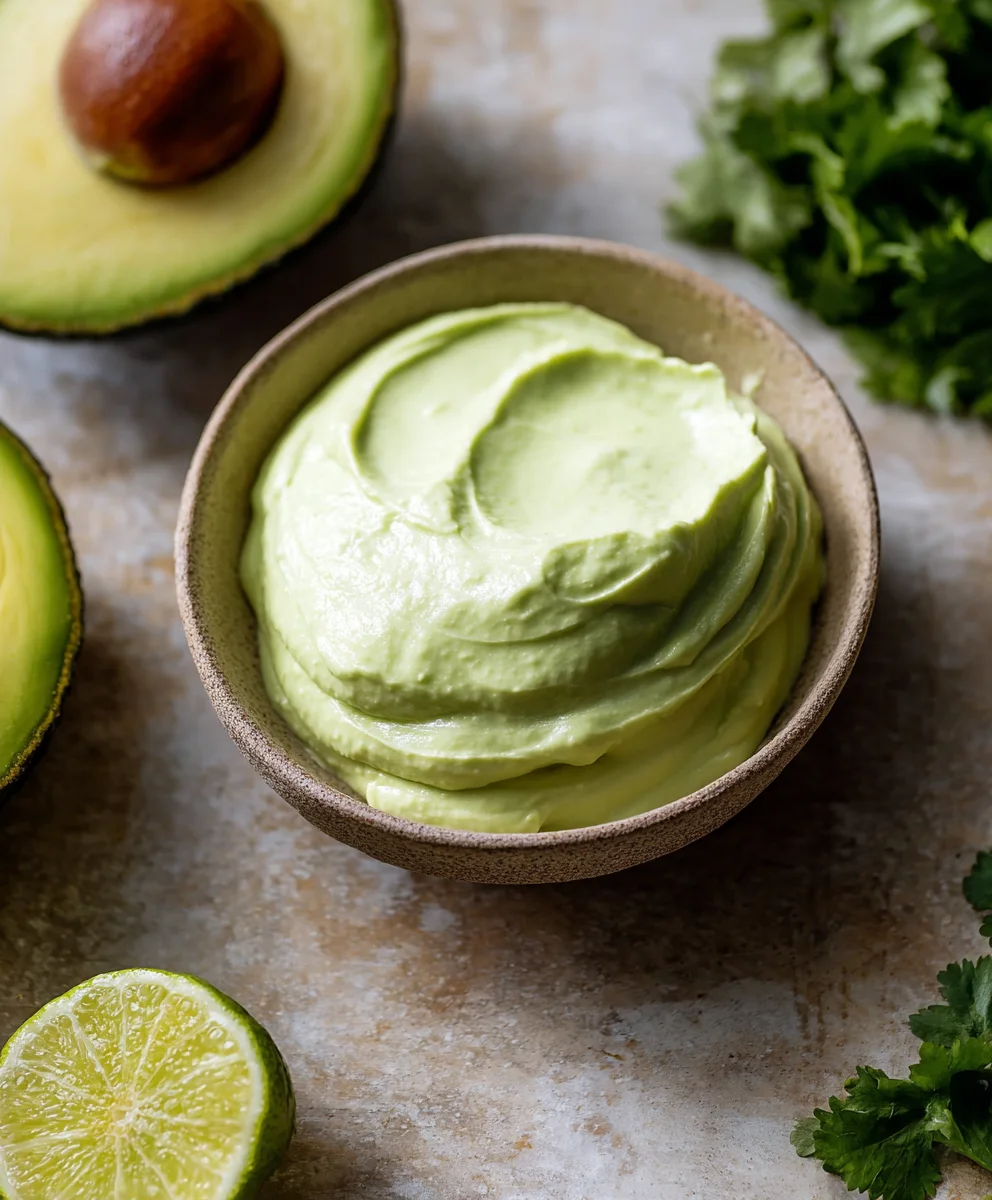
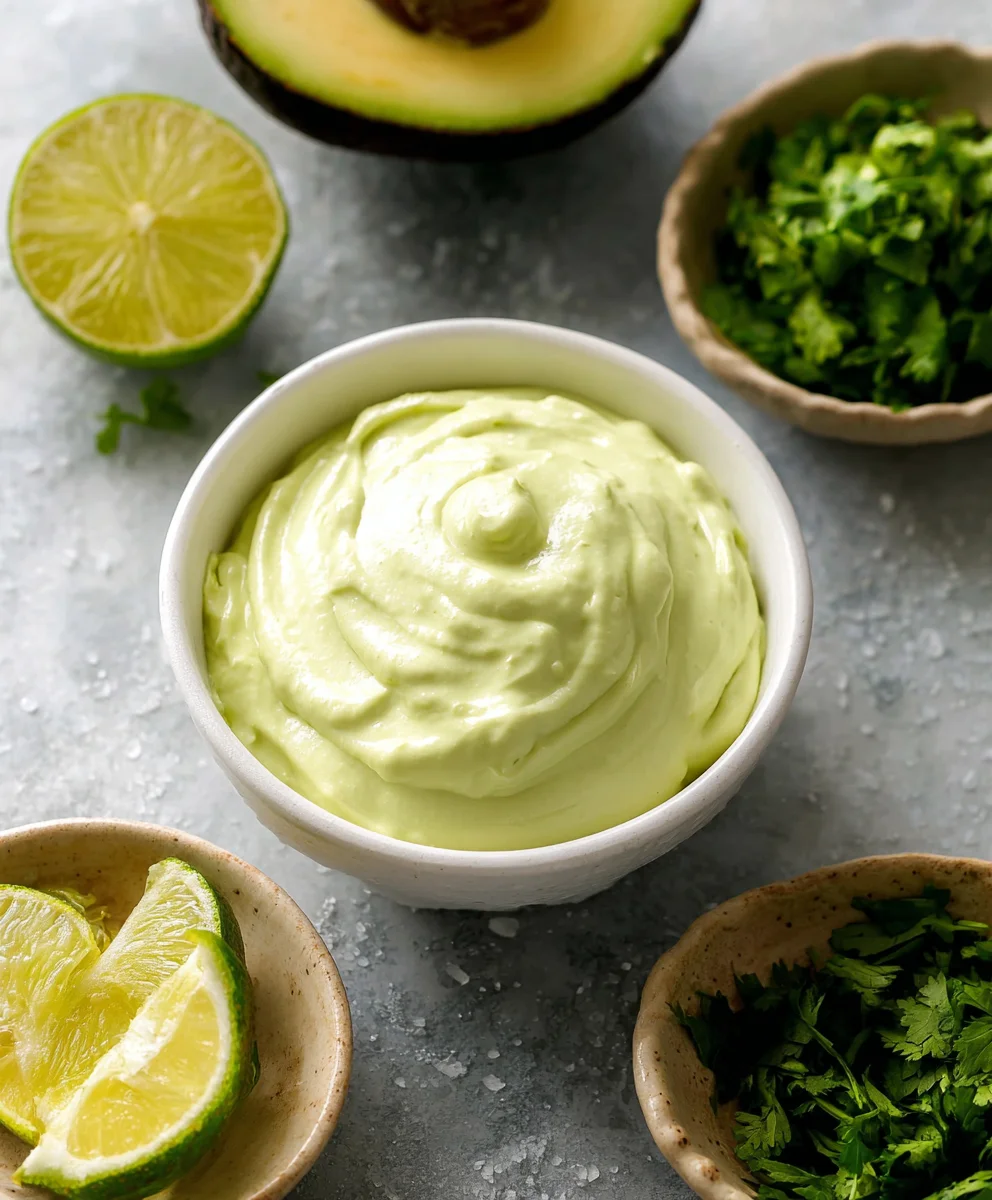
The Creamiest Avocado Crema For Tacos, Salads, & More is not just a condiment; it’s a culinary superpower. Imagin extracte a velvety smooth, vibrant green sauce that instantly elevates anything it touches. This isn’t just another avocado dip; it’s the epitome of lusciousness, designed to bring a burst of fresh, tangy flavor to your plate. People absolutely adore this crema because it strikes that perfect balance: rich and satisfying, yet wonderfully light and refreshing. It’s the secret weapon that turns an ordinary taco Tuesday into a gourmet experience and transforms a simple salad into a truly memorable meal. What makes this specific recipe so special is its foolproof simplicity and the incredible depth of flavor achieved with just a few key ingredients. You’ll wonder how you ever lived without this versatile delight.

Ingredients:
- ⅔ cup sour cream
- ½ large ripe avocado, peeled and pitted
- 1 large garlic clove, finely chopped
- 1 lime, zested and juiced
- Pinch of Kosher salt
- Milk (optional, for thinning out the crema)
Making The Creamiest Avocado Crema
This avocado crema is incredibly versatile and will elevate everything from your favorite tacos to a simple green salad. The key to its luxurious texture and bright flavor lies in using perfectly ripe avocado and balancing the creamy sour cream with the zesty tang of fresh lime.
Phase 1: Preparing the Base
The first step is all about getting our creamy foundation ready. In a medium-sized bowl, we’re going to combine the main creamy components. Start by adding the ⅔ cup of sour cream to your bowl. For the best results, I find that using full-fat sour cream yields the creamiest texture, but feel free to use a reduced-fat option if that’s what you have on hand. Next, we introduce the star of the show: the avocado. Make sure your avocado is ripe – it should yield gently to pressure but not be mushy. We’ll add the ½ large ripe avocado, making sure it’s peeled and the pit has been removed. If you’re having trouble getting the pit out, a firm tap with the heel of your knife and a gentle twist usually does the trick.
Phase 2: Infusing Flavor
Now it’s time to add the aromatics and bright flavors that will make this crema truly sing. Take your 1 large garlic clove and finely chop it. Mincing it very finely will ensure that its pungent flavor is distributed evenly throughout the crema without any overpowering bites. Add the finely chopped garlic to the bowl with the sour cream and avocado. Next, we’ll introduce the vibrant zing of lime. Using a microplane or the fine side of a grater, zest the entire lime. Be sure to only zest the green outer peel, as the white pith underneath can be bitter. Add this fragrant lime zest to the bowl. After zesting, cut the lime in half and juice it. You’ll want to add 1 tablespoon of fresh lime juice to the mixture. The lime juice not only adds a wonderful acidity but also helps to prevent the avocado from browning too quickly, keeping your crema a beautiful green. Finally, season your crema with a pinch of Kosher salt. Kosher salt has larger flakes than table salt, which makes it easier to control the amount you add and it dissolves beautifully, providing a clean, crisp saltiness.
Phase 3: Blending to Perfection
This is where the magic happens and we transform these simple ingredients into a silky smooth crema. We have a couple of options here for achieving the perfect consistency. For a slightly chunkier, more rustic texture, you can use a fork or a potato masher to thoroughly mash the ingredients together in the bowl. Ensure that you break down the avocado completely and incorporate the garlic and lime zest evenly. However, for the truly “creamiest” experience, I highly recommend using an immersion blender or transferring the mixture to a regular blender. If using an immersion blender, simply insert it into the bowl and blend until the mixture is completely smooth and homogenous. If using a regular blender, carefully spoon the contents of the bowl into the blender jar and process until it reaches your desired smoothness. This blending process will emulsify the ingredients and create that signature velvety texture we’re aiming for. Be patient and blend until there are no visible chunks of avocado or garlic.
Phase 4: Achieving Ideal Consistency
Once blended, take a moment to taste your crema. Does it need a little more salt? A touch more lime? Adjust the seasonings to your preference. Now, let’s talk about consistency. The thickness of your crema will depend on the ripeness of your avocado and how much liquid is already present. If you find that your crema is too thick for your liking – perhaps too dense for drizzling or dipping – this is where our optional milk comes in. Add the milk, just a teaspoon at a time, and blend or stir it in until you reach your desired pouring or spreading consistency. It’s important to add the milk very gradually because it’s easy to add too much and end up with a crema that’s too thin. The goal is a smooth, luscious sauce that coats the back of a spoon beautifully.
Phase 5: Resting and Serving
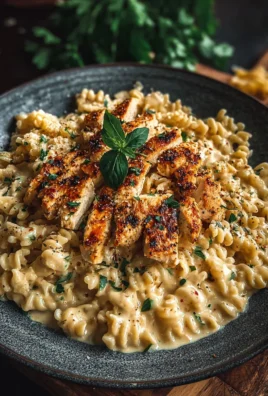
For the best flavor development and for all those delicious ingredients to meld together, I like to cover the bowl of crema and let it rest in the refrigerator for at least 15 to 30 minutes. This chilling period allows the flavors to deepen and the crema to thicken slightly. Once chilled, give it a quick stir. If it has thickened up a bit more than you prefer after chilling, you can always add another tiny splash of milk to loosen it. Then, it’s ready to be used! Dollop it generously onto your tacos, swirl it into your salads, use it as a dip for your favorite vegetables, or spread it onto sandwiches. The possibilities are truly endless, and I guarantee it will become a staple in your kitchen.
Conclusion:
There you have it – the secret to achieving unbelievably smooth and flavorful results with The Creamiest Avocado Crema For Tacos, Salads, & More! This versatile crema is more than just a condiment; it’s a flavor enhancer that will elevate your everyday meals. We’ve explored how to achieve that perfect, silky texture and discussed its incredible versatility, from topping your favorite tacos and vibrant salads to serving as a delicious dip for crudités or even a binder in sandwiches. Don’t be afraid to experiment with this recipe; it’s remarkably forgiving and encourages creativity.
I encourage you to give The Creamiest Avocado Crema For Tacos, Salads, & More a try. Once you master the basics, feel free to play with different additions. Consider a pinch of smoked paprika for a subtle smoky depth, a dash of hot sauce for a spicy kick, or even some fresh cilantro or chives for an herbaceous brightness. The possibilities are truly endless, and I can’t wait to hear about your delicious creations!
Frequently Asked Questions:
Q1: How long does The Creamiest Avocado Crema For Tacos, Salads, & More last in the refrigerator?
Properly stored in an airtight container, The Creamiest Avocado Crema For Tacos, Salads, & More will typically stay fresh for 2-3 days. The lime juice helps to preserve it slightly, but the avocado can eventually oxidize and turn brown. For the best flavor and texture, it’s ideal to make it as close to when you plan to use it as possible.
Q2: Can I make The Creamiest Avocado Crema For Tacos, Salads, & More ahead of time?
Yes, you can make The Creamiest Avocado Crema For Tacos, Salads, & More a few hours in advance. To minimize browning, press a piece of plastic wrap directly onto the surface of the crema before sealing the container. This prevents air from coming into contact with the avocado. Give it a good stir before serving to re-incorporate any separated liquid.
Creamy Avocado Crema
An incredibly versatile and easy avocado crema recipe that elevates tacos, salads, and more with its luxurious texture and bright, fresh flavor.
Ingredients
-
⅔ cup sour cream
-
½ large ripe avocado, peeled and pitted
-
1 large garlic clove, finely chopped
-
1 lime, zested and juiced
-
Pinch of Kosher salt
-
Milk (optional, for thinning out the crema)
Instructions
-
Step 1
In a medium-sized bowl, combine ⅔ cup sour cream and ½ large ripe avocado (peeled and pitted). -
Step 2
Add 1 large finely chopped garlic clove, the zest of 1 lime, and 1 tablespoon of fresh lime juice to the bowl. Season with a pinch of Kosher salt. -
Step 3
Blend the ingredients until completely smooth and homogenous. An immersion blender or a regular blender is recommended for the creamiest texture. -
Step 4
Taste and adjust seasonings as needed. If the crema is too thick, gradually add milk, one teaspoon at a time, until the desired consistency is reached. -
Step 5
Cover and refrigerate for at least 15-30 minutes to allow flavors to meld. Stir before serving.
Important Information
Nutrition Facts (Per Serving)
It is important to consider this information as approximate and not to use it as definitive health advice.
Allergy Information
Please check ingredients for potential allergens and consult a health professional if in doubt.


Leave a Comment