
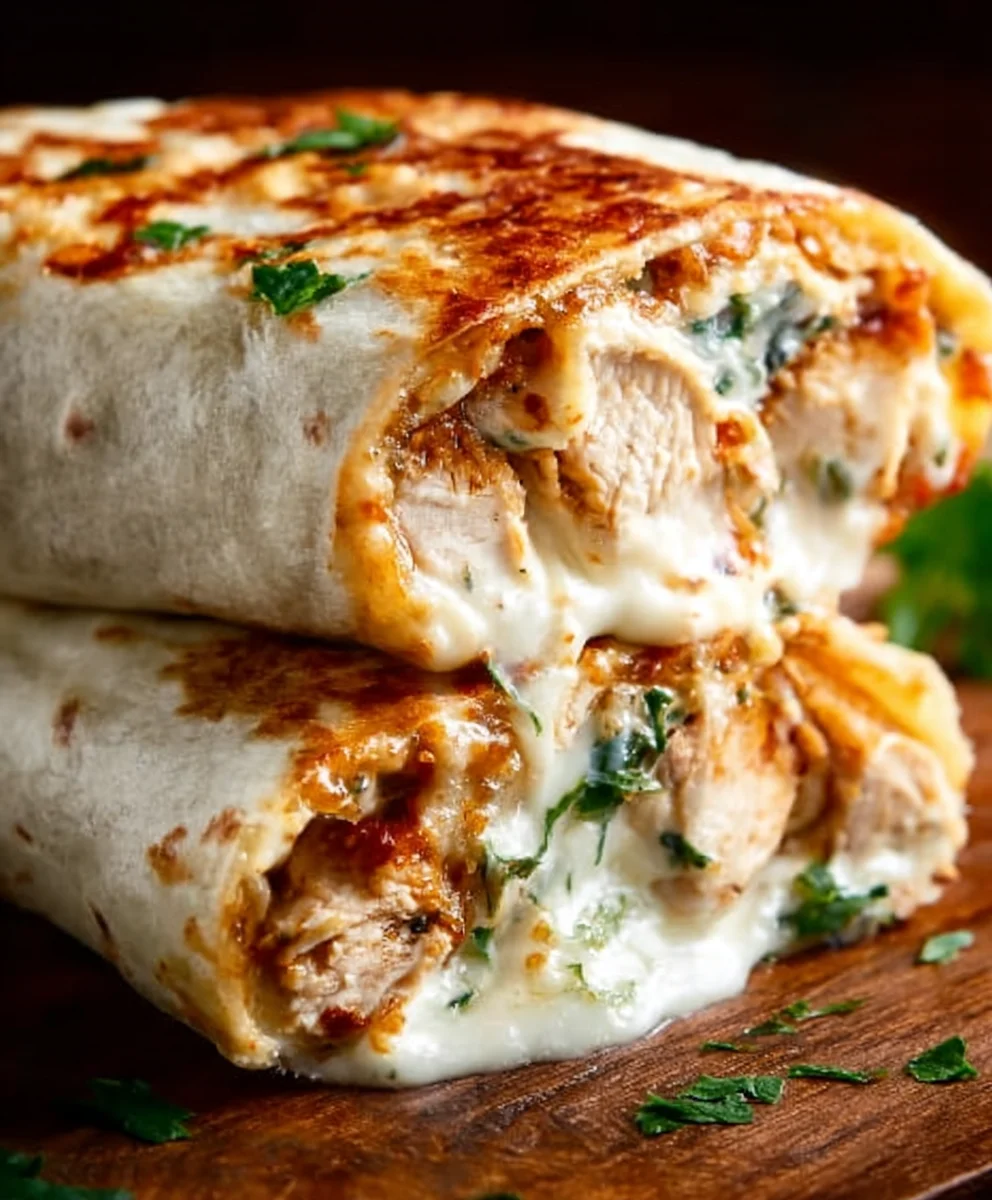
Cheesy Garlic Chicken Wraps are more than just a meal; they’re a comforting hug in tortilla form, a symphony of savory, creamy, and garlicky goodness that always hits the spot. Have you ever craved something incredibly satisfying, something that’s quick enough for a weeknight but feels special enough for a weekend treat? That’s exactly the magic these wraps bring to your table. People absolutely adore them for their incredible flavor profile – the pungent kick of garlic perfectly balanced by the rich, melty cheese, all embracing tender, succulent chicken. What truly sets our Cheesy Garlic Chicken Wraps apart is the delightful contrast of textures: the soft, yielding tortilla, the juicy chicken, and the gooey, stretchy cheese. It’s a simple combination, yet the execution here elevates it into something truly craveable, promising a delightful culinary adventure that will have you coming back for more, every single time.

Ingredients:
- 2 cups cooked chicken, shredded
- 1/2 cup garlic aioli
- 1 cup cheddar cheese, shredded
- 4 large tortillas
- Salt and pepper to taste
Preparing the Cheesy Garlic Chicken Filling
This is where all the flavor magic happens! We’re going to create a rich, creamy, and incredibly satisfying chicken filling that’s perfect for stuffing into our tortillas. Start by taking your 2 cups of pre-cooked, shredded chicken. You can use leftover rotisserie chicken for ultimate convenience, or bake and shred your own chicken breasts. The key here is to have it finely shredded, as this helps it blend beautifully with the other ingredients and makes for a more pleasant texture in the final wrap. In a medium-sized mixing bowl, combine the shredded chicken with the 1/2 cup of garlic aioli. Make sure to use a good quality garlic aioli; it’s the star of the flavor profile, lending a delicious garlicky and creamy base to our filling. If you don’t have pre-made garlic aioli, you can easily make your own by combining mayonnaise with minced garlic, a squeeze of lemon juice, and a pinch of salt and pepper.
Now, gently fold the aioli into the chicken, ensuring every strand of chicken is coated. We want it to be well-bound, not swimming in aioli. This ensures an even distribution of flavor. Next, it’s time for the cheese! Add the 1 cup of shredded cheddar cheese to the bowl. Cheddar provides that wonderful tangy, melty goodness that makes these wraps so irresistible. I like to use a medium cheddar, but you can opt for sharp if you prefer a more pronounced cheese flavor. Again, gently mix everything together. Don’t overmix at this stage; we just want the cheese to be incorporated throughout the chicken mixture.
Finally, season your filling with salt and pepper to taste. Remember that garlic aioli and cheddar cheese both have some inherent saltiness, so start with a small pinch of salt and a grind of pepper, then taste and adjust as needed. The goal is to enhance the flavors, not overpower them. You should have a wonderfully cohesive, creamy, and cheesy chicken mixture at this point, ready to be assembled into delicious wraps.
Assembling and Warming the Wraps
Now that our delicious cheesy garlic chicken filling is prepared, it’s time to assemble these fantastic wraps. Lay out your 4 large tortillas on a clean, flat surface. These larger tortillas are ideal for holding a generous amount of filling and for rolling up neatly. If your tortillas are a little stiff, you can warm them up slightly in a dry skillet or in the microwave for about 15-20 seconds. This makes them more pliable and less likely to tear when you’re filling and rolling them.
Divide the cheesy garlic chicken mixture evenly among the four tortillas. Aim to place the filling slightly off-center, closer to one edge, leaving a border of about an inch or so around the edges. This will make rolling much easier. Don’t be tempted to overfill them, as this can make rolling a messy endeavor. A generous but manageable amount is key for perfectly formed wraps.
To roll the wraps, first fold the edge of the tortilla closest to the filling over the filling itself. Tuck this edge in snugly to create a tight seal. Then, fold in the sides of the tortilla inwards, creating a neat package. Finally, roll the entire wrap away from you, keeping it tight and secure. The warmth from the filling and the slight pliability of the tortilla should help it hold its shape. Repeat this process for all four tortillas.
Perfecting the Cheesy Garlic Chicken Wraps
To achieve that glorious melted cheese and warm tortilla perfection, we have a couple of excellent options for cooking your wraps. The first method involves pan-frying. Heat a large skillet or griddle over medium heat. You can add a tiny bit of butter or oil to the skillet if you like, but it’s often not necessary, especially if your aioli has enough fat. Carefully place the rolled wraps seam-side down into the hot skillet. Cook for about 2-4 minutes per side, or until the tortillas are golden brown and slightly crispy, and the cheese inside is beautifully melted and gooey. Keep an eye on them to prevent burning. This method gives you a delightful crunch on the outside.
Alternatively, you can bake the wraps in a preheated oven. Preheat your oven to 375°F (190°C). Place the rolled wraps seam-side down on a baking sheet lined with parchment paper. Bake for about 10-15 minutes, or until the tortillas are lightly golden and the cheese is fully melted. Baking is a great option if you’re making a larger batch, as you can fit more wraps on the baking sheet at once.
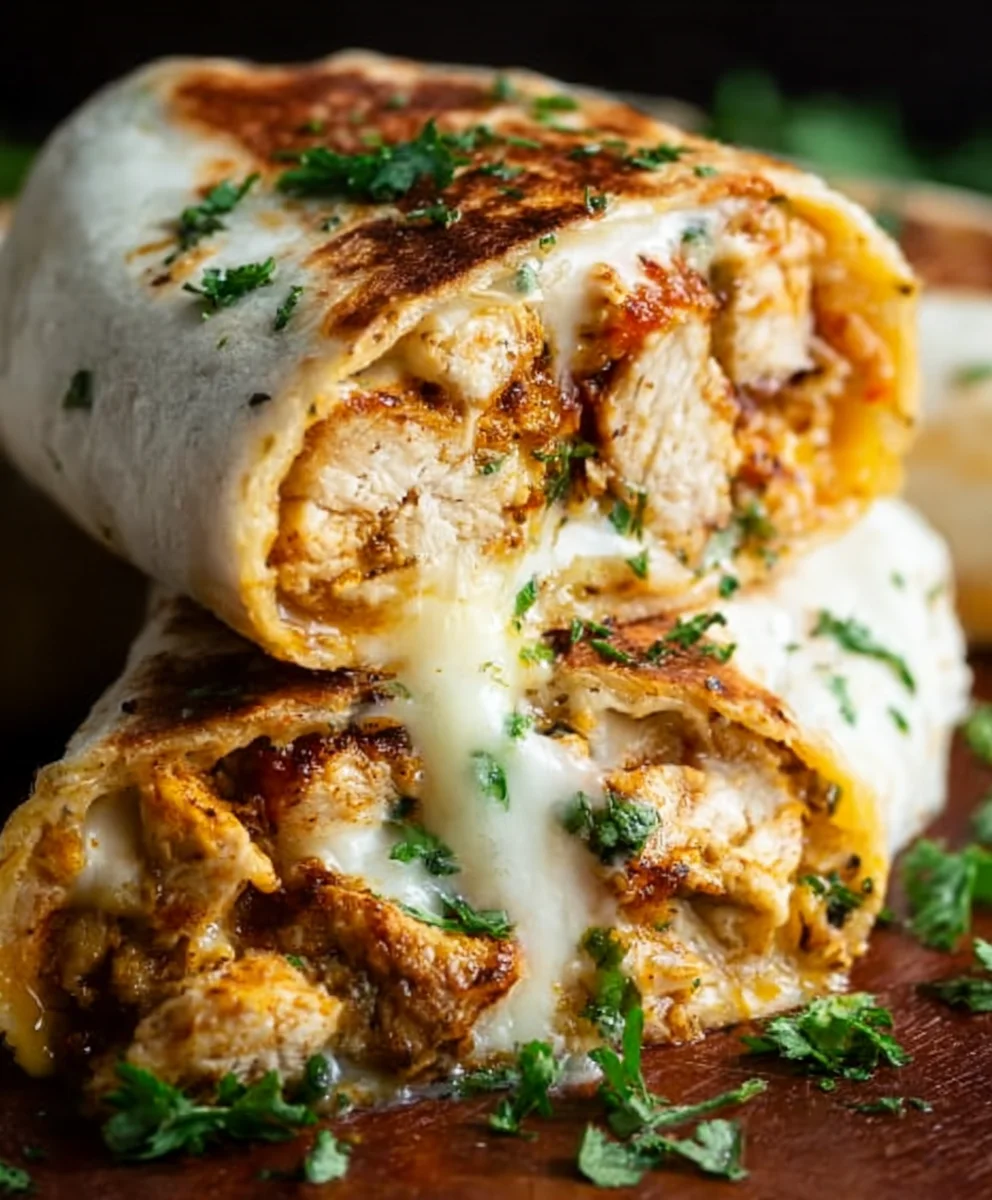
For an even crispier exterior, especially after pan-frying, you can place the wraps under the broiler for a minute or two at the very end of cooking. Just be extremely vigilant during this step as broilers can turn things from golden to burnt in a flash. Whichever method you choose, the end goal is a warm, slightly crisped tortilla encasing a gooey, flavorful, cheesy garlic chicken filling. Allow the wraps to cool for just a minute or two before slicing and serving, allowing the cheese to set slightly and preventing any molten cheese accidents.
Conclusion:
You’ve now got the blueprint for crafting incredibly delicious Cheesy Garlic Chicken Wraps! This recipe is designed to be straightforward, yielding a wonderfully savory and satisfying meal that’s perfect for a quick weeknight dinner or a fun weekend lunch. The combination of tender garlic-infused chicken, melty cheese, and your favorite fresh toppings all wrapped up in a warm tortilla is simply irresistible. Don’t be afraid to customize! Experiment with different types of cheese, add some spicy jalapeños for a kick, or pile on extra greens like spinach or arugula for added freshness. I encourage you to give these Cheesy Garlic Chicken Wraps a try – you won’t be disappointed with the fantastic flavor and ease of preparation. Enjoy every bite!
FAQs:
Can I make the chicken filling ahead of time?
Absolutely! The garlic chicken filling can be prepared up to 2 days in advance and stored in an airtight container in the refrigerator. Reheat it gently on the stovetop or in the microwave before assembling your wraps.
What kind of tortillas work best for Cheesy Garlic Chicken Wraps?
You can use any type of tortilla you prefer! Flour tortillas, whole wheat tortillas, or even gluten-free options work wonderfully. For a slightly different texture, you could also try warming them in a dry skillet for a minute or two on each side before filling.
Are there any vegetarian variations for this recipe?
Yes! For a vegetarian version, you can substitute the chicken with pan-fried halloumi cheese, seasoned and crum extractbled firm tofu, or a hearty mix of sautéed mushrooms and bell peppers. Ensure they are seasoned similarly to the chicken for a comparable flavor profile.
Cheesy Garlic Chicken Wraps- Easy Weeknight Meal
Delicious and easy cheesy garlic chicken wraps, perfect for a quick and satisfying weeknight meal.
Ingredients
-
2 cups cooked chicken, shredded
-
1/2 cup garlic aioli
-
1 cup cheddar cheese, shredded
-
4 large tortillas
-
Salt to taste
-
Pepper to taste
Instructions
-
Step 1
In a medium bowl, combine shredded chicken and garlic aioli. Mix well until chicken is evenly coated. -
Step 2
Add shredded cheddar cheese to the chicken mixture. Gently fold in until incorporated. -
Step 3
Season the filling with salt and pepper to taste. Adjust as needed. -
Step 4
Lay out tortillas. Divide the chicken mixture evenly among the tortillas, placing it slightly off-center. -
Step 5
Fold the closest edge over the filling, tuck in the sides, and roll tightly. -
Step 6
Heat a skillet over medium heat. Place wraps seam-side down and cook for 2-4 minutes per side until golden brown and crispy. -
Step 7
Alternatively, bake in a preheated oven at 375°F (190°C) for 10-15 minutes until golden and cheese is melted. -
Step 8
Allow to cool slightly before slicing and serving.
Important Information
Nutrition Facts (Per Serving)
It is important to consider this information as approximate and not to use it as definitive health advice.
Allergy Information
Please check ingredients for potential allergens and consult a health professional if in doubt.
Leave a Comment