
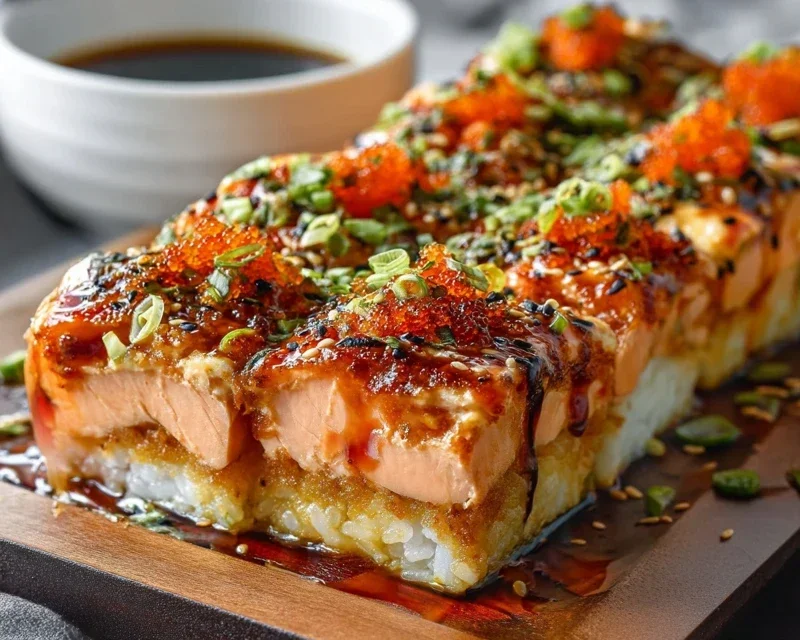
Spicy Salmon Sushi Bake Recipe: Get ready to revolutionize your weeknight dinners and impress your friends with this incredibly delicious and surprisingly easy Spicy Salmon Sushi Bake Recipe! Forget the rolling mats and the intricate techniques; this deconstructed sushi sensation captures all the vibrant flavors and textures we adore about sushi, but in a warm, comforting casserole format that’s perfect for sharing. It’s the ultimate comfort food with a zesty kick, bringin extractg together flaky, seasoned salmon, creamy sushi rice, and a luscious, spicy sauce that will have you coming back for second (and maybe third!) servings. This dish has become a sensation for a reason – it’s incredibly satisfying, packed with umami, and offers that delightful balance of creamy, tangy, and spicy notes that just sing. What makes our Spicy Salmon Sushi Bake Recipe truly special is its approachable nature, allowing even novice cooks to achieve restaurant-worthy results with minimal fuss, making it your new go-to for gatherings or a solo treat.

Spicy Salmon Sushi Bake Recipe
If you’re a fan of sushi but crave something a little more comforting and perhaps a touch easier to assemble than traditional rolls, then this Spicy Salmon Sushi Bake is about to become your new favorite dish! It captures all the vibrant flavors of your beloved sushi rolls – the tender salmon, the slightly sweet and vinegary rice, the hint of umami from the nori – all baked together into a glorious, shareable casserole. It’s perfect for a weeknight dinner, a potluck, or even a fun weekend project. Get ready to impress your taste buds!
Ingredients:
Cooking Instructions
The beauty of this sushi bake lies in its layered approach, much like a deconstructed sushi roll. We’ll start with perfectly cooked sushi rice, then move on to preparing the flavorful salmon topping, and finally, assemble and bake it to perfection.
1. Prepare the Sushi Rice
The foundation of any great sushi dish is perfectly seasoned sushi rice. Rinse your 2 cups of sushi rice thoroughly under cold running water until the water runs clear. This step is crucial for removing excess starch, which prevents the rice from becoming gummy. Once rinsed, combine the rice and 2.5 cups of water in a medium saucepan. Bring to a boil over medium-high heat, then immediately reduce the heat to low, cover tightly, and simmer for about 15-20 minutes, or until all the water is absorbed. Let the rice steam, covered, for another 10 minutes off the heat. While the rice is steaming, prepare the sushi vinegar. In a small bowl, whisk together the 1/4 cup rice vinegar, 2 tablespoons sugar, and 1 teaspoon salt until the sugar and salt are completely dissolved. Once the rice has rested, transfer it to a large, shallow non-metallic bowl. Gently pour the sushi vinegar mixture over the hot rice. Using a rice paddle or a wooden spoon, fold the vinegar into the rice with a cutting motion. Avoid mashing the rice; you want to keep the grains intact. Fan the rice as you mix to cool it down quickly and give it that characteristic glossy sheen. Continue fanning and folding until the rice reaches room temperature. This process is important for achieving the right texture.
2. Cook and Season the Salmon
Next, we’ll prepare the star of our show – the spicy salmon. You can cook your salmon fillet in a couple of ways. For a quick method, you can bake it. Preheat your oven to 400°F (200°C). Place the diced 1 lb fresh salmon fillet on a baking sheet lined with parchment paper. Drizzle with a tiny bit of oil if desired, and season lightly with salt and pepper. Bake for about 8-10 minutes, or until the salmon is just cooked through and flakes easily with a fork. Alternatively, you can pan-sear the salmon. Heat a little oil in a non-stick skillet over medium-high heat and sear the salmon pieces for a few minutes per side until cooked through. Once cooked, let the salmon cool slightly. In a medium bowl, combine the cooled, flaked salmon with 1/2 cup mayonnaise, 2 tablespoons Sriracha sauce (adjust this to your spice preference – you can always add more!), and 1 teaspoon sesame oil. Gently mix until the salmon is evenly coated. This is where the magic happens, transforming simple salmon into a creamy, spicy delight.
3. Assemble the Sushi Bake
Now it’s time to bring it all together! Lightly grease a 9×13 inch baking dish. Spread the seasoned sushi rice evenly across the bottom of the dish, pressing it down gently to create a compact layer. This layer will act as the delicious base for our bake. Next, spoon the spicy salmon mixture evenly over the rice layer. Make sure to distribute it as uniformly as possible so every bite gets that flavorful topping. Finally, sprinkle the chopped 1/2 cup green onions over the salmon mixture. This adds a fresh, oniony bite that complements the richness of the salmon.
4. Add the Nori and Bake
For that authentic sushi flavor, we’ll add strips of nori. Scatter the cut nori strips over the green onions. These will toast slightly in the oven and add a wonderful depth of flavor. Now, cover the baking dish tightly with aluminum foil. Place the dish in your preheated oven (still at 400°F or 200°C). Bake for about 15-20 minutes, or until the salmon mixture is heated through and bubbly around the edges, and the rice is warmed. The foil helps to steam everything together and prevent the top from drying out too quickly.
5. Garnish and Serve
Once the sushi bake is out of the oven, let it rest for a few minutes before serving. This allows it to set slightly, making it easier to scoop. Now for the fun part – garnishing! Sprinkle with extra chopped green onions and, if you’re feeling fancy, a generous scattering of tobiko (flying fish roe). The tobiko adds a pop of color, a slight crunch, and a delightful briny flavor that perfectly enhances the dish. You can serve this Spicy Salmon Sushi Bake as is, or with a side of soy sauce for dipping, and pickled gin extractger or wasabi for those who enjoy them. It’s delicious scooped up with the nori strips or even served over a bed of lettuce. Enjoy this flavorful and satisfying twist on your favorite sushi!
Conclusion:
This Spicy Salmon Sushi Bake recipe truly is a game-changer! It delivers all the delicious, comforting flavors of your favorite sushi roll in an easy-to-share, baked casserole format. The creamy, spicy salmon filling combined with the perfectly cooked sushi rice creates a harmonious balance that’s incredibly satisfying. It’s also a fantastic way to enjoy the taste of sushi without the fuss of rolling, making it perfect for weeknight dinners or casual gatherings. I’ve found it’s a huge hit with both sushi aficionados and those new to the flavor profile.
For serving, I love to garnish this Spicy Salmon Sushi Bake with extra masago (fish roe), thinly sliced green onions, and a drizzle of sriracha mayo. It pairs wonderfully with a side of pickled gin extractger and a light miso soup. Feeling adventurous? You can easily swap the salmon for cooked shrimp or even shredded imitation crab for a different twist. Don’t be afraid to experiment with adding finely chopped jalapeños for extra heat or a sprinkle of toasted sesame seeds for added texture. I wholeheartedly encourage you to give this recipe a try – I promise you won’t be disappointed!
Frequently Asked Questions:
Can I make this Spicy Salmon Sushi Bake ahead of time?
Yes, you absolutely can! You can assemble the entire bake, cover it tightly with plastic wrap, and refrigerate it for up to 24 hours before baking. You might need to add a few extra minutes to the baking time if baking directly from the refrigerator.
What kind of salmon is best for this recipe?
I recommend using cooked salmon for this recipe. You can use leftover baked or grilled salmon, or you can quickly pan-fry or bake a fillet specifically for the dish. Canned salmon can also work in a pinch, just be sure to drain it well.
How spicy is this sushi bake?
The spice level is quite customizable! The recipe uses sriracha and mayonnaise, which provides a moderate heat. If you prefer it milder, start with less sriracha and you can always add more to your serving. For extra heat, you can add a pinch of red pepper flakes to the salmon mixture or serve with extra spicy mayo.
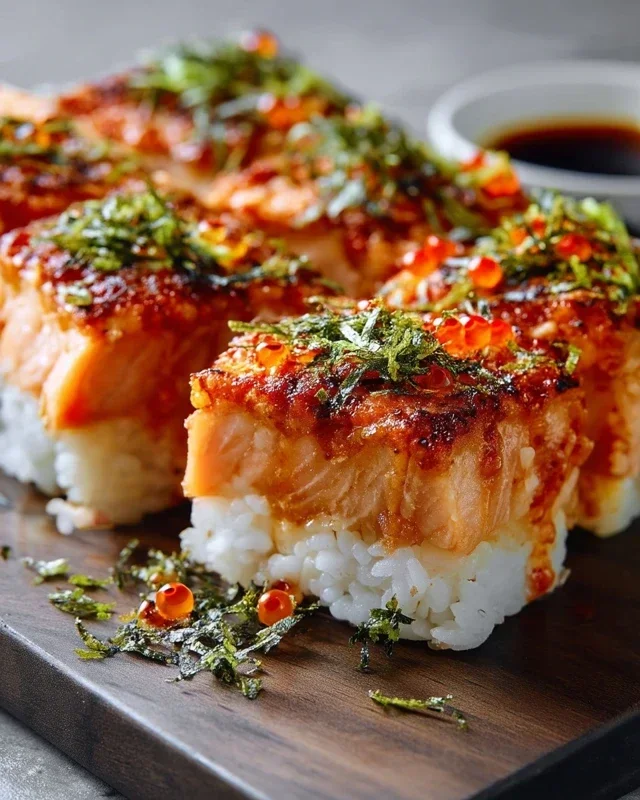
Spicy Salmon Sushi Bake
A flavorful and easy baked sushi dish featuring spicy salmon, sushi rice, and a creamy sriracha topping.
Ingredients
-
2 cups sushi rice (uncooked)
-
2.5 cups water
-
1/4 cup rice vinegar
-
2 tablespoons sugar
-
1 teaspoon salt
-
1 lb fresh salmon fillet (skinless and diced)
-
1/2 cup mayonnaise
-
2 tablespoons Sriracha sauce (or to taste)
-
1 teaspoon sesame oil
-
1/2 cup green onions (chopped, plus extra for garnish)
-
1 sheet nori (cut into small strips)
-
tobiko (optional for garnish)
Instructions
-
Step 1
Cook the sushi rice according to package directions. While the rice is cooking, in a small bowl, whisk together rice vinegar, sugar, and salt until dissolved. Once the rice is cooked, transfer it to a large bowl and gently fold in the vinegar mixture. Let it cool slightly. -
Step 2
In a separate bowl, combine the diced salmon, mayonnaise, Sriracha sauce, and sesame oil. Mix well until the salmon is evenly coated. -
Step 3
Preheat your oven to 375°F (190°C). -
Step 4
Spread the cooled sushi rice evenly into a baking dish (approximately 9×13 inches). Top the rice layer with the spicy salmon mixture, spreading it out evenly. -
Step 5
Sprinkle the chopped green onions over the salmon mixture. Arrange the nori strips on top. -
Step 6
Bake for 20-25 minutes, or until the salmon is cooked through and the top is lightly golden brown. -
Step 7
Let it cool for a few minutes before serving. Garnish with extra green onions and tobiko, if desired.
Important Information
Nutrition Facts (Per Serving)
It is important to consider this information as approximate and not to use it as definitive health advice.
Allergy Information
Please check ingredients for potential allergens and consult a health professional if in doubt.


Leave a Comment