
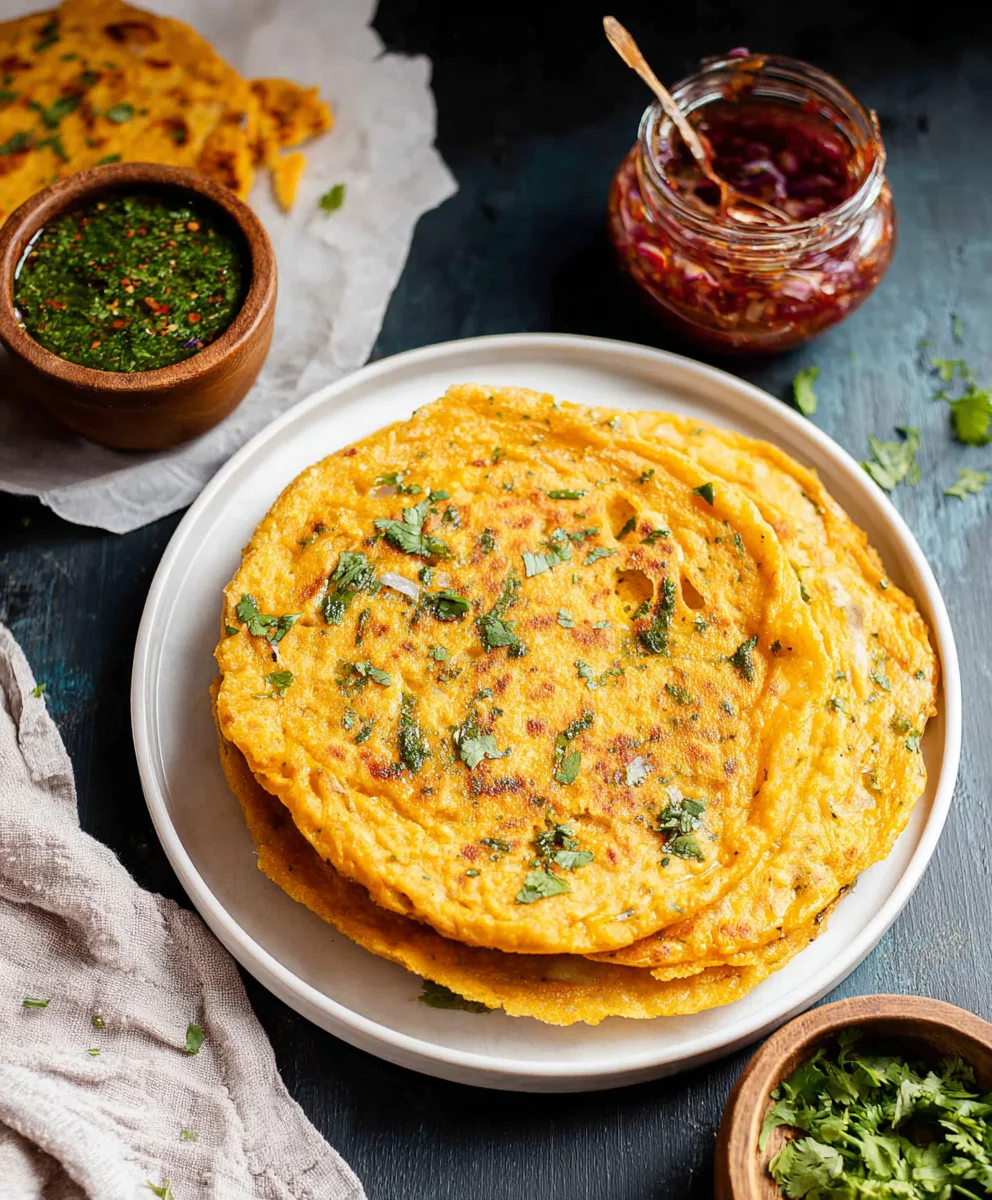
Masoor Dal Chilla | Savory Red Lentil Pancakes are more than just a simple breakfast; they are a vibrant explosion of flavor and a testament to the humble red lentil’s culinary versatility. If you’ve ever craved a dish that’s both nourishing and delightfully satisfying, then this is your answer. The sheer ease of preparation combined with the incredible taste makes Masoor Dal Chilla | Savory Red Lentil Pancakes a beloved staple for so many. What truly sets these pancakes apart is their incredible texture – a perfect balance between tender and slightly crisp, achieved through the simple yet brilliant use of ground red lentils. They offer a fantastic protein boost, making them an ideal start to any day, or even a light and healthy lunch. The subtle earthiness of the lentils, when seasoned correctly, creates a comforting and deeply gratifying experience that’s hard to resist. Get ready to discover your new favorite savory pancake!

Ingredients:
- 1 cup split red lentils (masoor dal)
- 3 cups water (for soaking lentils)
- 1 green chili
- 1 inch gin extractger
- 1 teaspoon kosher salt
- ½ cup water (for grinding)
- 2 tablespoons cilantro (finely chopped)
- 2 tablespoons oil
Preparing the Masoor Dal Batter
Soaking the Lentils
The foundation of delicious Masoor Dal Chilla is well-soaked red lentils. Start by thoroughly rinsing the 1 cup of split red lentils (masoor dal) under cool running water. This initial rinse helps remove any dust or debris. Once rinsed, transfer the lentils to a medium-sized bowl. Pour in 3 cups of fresh water, ensuring the lentils are completely submerged. We want them to swell and soften, which is crucial for achieving a smooth batter. Let them soak for at least 2 to 3 hours. For an even softer consistency and quicker grinding, you can soak them overnight in the refrigerator. If you’re short on time, a longer soak of 4-5 hours at room temperature can also work, but always ensure they are fully covered with water.
Grinding the Batter
After the soaking period, drain the water completely from the red lentils. You’ll notice they have plumped up significantly. Transfer the soaked lentils to a blender or a food processor. Now, let’s add the aromatics. Finely chop the 1 green chili, removing the seeds if you prefer less heat, and add it to the blender. Peel and roughly chop the 1-inch pgin extracte of ginger, theGin Extractdd that too. Ginger adds a wonderful warmth and complexity to the chilla. Add 1 teaspoon of kosher salt to season the batter. Finally, pour in ½ cup of water. This water is specifically for grinding; the amount might vary slightly depending on your blender’s power and the soaked gin extracttils’ consistency. Begin by blending on a low speed, scraping down the sides of the blender as needed. Gradually increase the speed and blend until you achieve a smooth, thick batter, similar in consistency to pancake batter or dosa batter. It should be pourable but not watery. If the batter is too thick and struggling to blend, add a tablespoon of water at a time, blending after each addition, until the desired consistency is reached.
Adding Freshness and Finishing the Batter
Once you have a smooth batter, transfer it to a mixing bowl. Now it’s time to add the fresh herbs. Finely chop 2 tablespoons of fresh cilantro and gently fold it into the batter. Cilantro brings a burst of freshness and a beautiful color contrast to the chilla. Stir gently to distribute the cilantro evenly throughout the batter. At this stage, you can taste a tiny bit of the batter to check for salt. Adjust if necessary, but remember the salt will enhance as it cooks. Let the batter rest for about 10-15 minutes. This resting period allows the flavors to meld together beautifully and also helps in achieving a better texture for the chilla. While the batter rests, you can prepare your cooking surface and heat your pan.
Cooking the Masoor Dal Chilla
Heating the Pan and First Chilla
Heat a non-stick skillet or a cast-iron griddle over medium heat. It’s important to have the pan at the right temperature – not too hot, or the chilla will burn before cooking through, and not too cool, or it will stick and be difficult to flip. Drizzle about 1 teaspoon of oil onto the hot pan and spread it evenly using a paper towel or a pastry brush. Once the pan is hot and lightly oiled, pour a ladleful of the masoor dal batter onto the center of the skillet. Immediately after pouring, use the back of the ladle to gently spread the batter outwards in a circular motion, creating a thin, even pancake. Aim for a diameter of about 6-8 inches. Try not to make it too thick, as this will require longer cooking time and can make the chilla gummy.
Cooking and Flipping
Cook the chilla for about 2 to 3 minutes on the first side. You’ll see small bubbles forming on the surface, and the edges will start to look a little dry and slightly golden brown. This indicates that the bottom is cooked and ready to be flipped. Carefully slide a spatula under the chilla and gently flip it over. If you’ve made your chilla thin and used a good non-stick pan, this should be relatively easy. Add another ½ teaspoon of oil around the edges of the chilla as it cooks on the second side. Cook the second side for another 1 to 2 minutes, or until it’s golden brown and cooked through. The chilla should be slightly crisp on the edges and tender in the center.
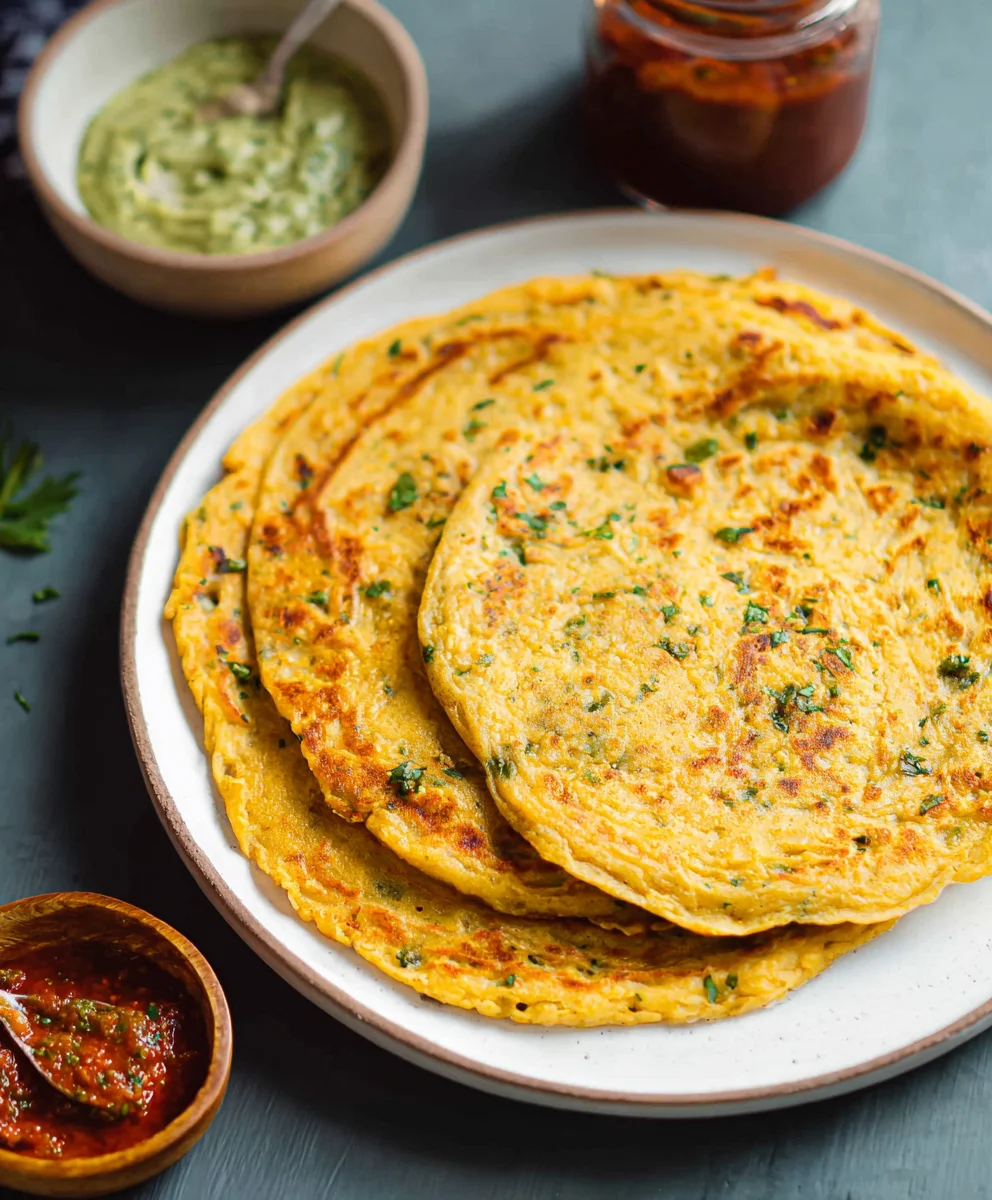
Achieving Golden Perfection and Serving
Once the second side is cooked to a beautiful golden brown, you can remove the chilla from the pan. Transfer it to a plate and immediately start preparing the next one. If you’re cooking multiple chillas, you can keep the cooked ones warm by stacking them on a plate with a lid or by placing them in a low oven (around 200°F or 95°C). Repeat the process of lightly oiling the pan and pouring the batter for each subsequent chilla. You should be able to make about 4-6 chillas with this batter, depending on their size. The key is to maintain consistent heat and ensure the pan is always lightly oiled to prevent sticking and promote even browning. Serve your delicious Masoor Dal Chilla hot, straight from the pan. They are fantastic on their own or can be served with your favorite chutney, yogurt, or a simple side salad. Enjoy the simple, wholesome goodness of these savory red lentil pancakes!
Conclusion:
You’ve now learned how to create delicious and wholesome Masoor Dal Chilla | Savory Red Lentil Pancakes! This recipe offers a fantastic way to enjoy a nutritious and satisfying meal, packed with protein and fiber from the red lentils. We’ve explored the simple steps to achieve perfectly cooked, golden-brown chillas that are both incredibly flavorful and surprisingly easy to make, even for begin extractners. Don’t hesitate to experiment and make this dish your own!
For serving, Masoor Dal Chilla | Savory Red Lentil Pancakes are wonderfully versatile. They are delightful on their own, or can be paired with a variety of accompaniments. Consider serving them with a dollop of cooling yogurt or raita, a vibrant mint-coriander chutney, or even a simple side of pickled onions. They make an excellent breakfast, a light lunch, or a healthy snack.
When it comes to variations, the possibilities are endless! You can finely chop and incorporate a variety of vegetables into the batter, such as onions, tomatoes, bell peppers, or grated carrots for added texture and nutrients. A pinch of asafoetida (hing) or finely chopped green chilies can elevate the spice quotient. Feel free to adjust the spices to your preference – a touch of cumin or coriander powder can add another layer of complexity.
So, go ahead and give Masoor Dal Chilla | Savory Red Lentil Pancakes a try. We encourage you to embrace the process, savor the aromas filling your kitchen, and enjoy the delightful taste of this healthy and satisfying dish. Happy cooking!
FAQs:
Can I make the batter ahead of time?
Yes, you can definitely prepare the Masoor Dal Chilla | Savory Red Lentil Pancakes batter a few hours in advance. Store it in an airtight container in the refrigerator. You might need to add a splash of water and give it a good whisk before cooking, as it can thicken over time.
What is the best way to store leftover chillas?
Leftover Masoor Dal Chilla | Savory Red Lentil Pancakes can be stored in an airtight container in the refrigerator for up to 2-3 days. To reheat, you can gently warm them in a non-stick pan with a little oil, or even pop them in a toaster on a low setting for a quick crisp-up.
Masoor Dal Chilla Recipe – Savory Red Lentil Pancakes
A simple and healthy recipe for savory red lentil pancakes (chilla) made with split red lentils, green chili, ginger, and cilantro.
Ingredients
-
1 cup split red lentils (masoor dal)
-
3 cups water (for soaking lentils)
-
1 green chili
-
1 inch ginger
-
1 teaspoon kosher salt
-
½ cup water (for grinding)
-
2 tablespoons cilantro (finely chopped)
-
2 tablespoons oil
Instructions
-
Step 1
Rinse 1 cup of split red lentils (masoor dal) thoroughly and soak them in 3 cups of water for at least 2 to 3 hours, or overnight in the refrigerator for best results. -
Step 2
Drain the soaked lentils and transfer them to a blender. Add 1 chopped green chili, 1-inch chopped ginger, 1 teaspoon kosher salt, and ½ cup water. Blend until a smooth, thick batter is formed, similar to pancake batter. Add more water by the tablespoon if needed. -
Step 3
Transfer the batter to a bowl and fold in 2 tablespoons of finely chopped cilantro. Let the batter rest for 10-15 minutes. -
Step 4
Heat a non-stick skillet or griddle over medium heat and lightly oil it. Pour a ladleful of batter onto the hot pan and spread it outwards in a circular motion to form a thin pancake. -
Step 5
Cook for 2-3 minutes until bubbles form and the edges look dry. Gently flip the chilla and cook the other side for another 1-2 minutes until golden brown. -
Step 6
Serve the Masoor Dal Chilla hot with your favorite chutney, yogurt, or a side salad.
Important Information
Nutrition Facts (Per Serving)
It is important to consider this information as approximate and not to use it as definitive health advice.
Allergy Information
Please check ingredients for potential allergens and consult a health professional if in doubt.

Leave a Comment