
Gluten-Free Buttery Tea Scones are an absolute delight, and today we’re diving into a recipe that captures that classic, comforting taste without any gluten. For so many of us, tea time isn’t complete without a warm, flaky scone, and the allure of buttery goodness is undeniable. These particular gluten-free buttery tea scones are special because they manage to achieve that perfect crum extractbly texture and rich flavor that can sometimes be elusive in gluten-free baking. We’ve perfected the balance of ingredients to ensure they rise beautifully, offering a soft interior that melts in your mouth, complemented by a delicately crisp exterior. Whether you’re a seasoned baker or just starting your gluten-free journey, get ready to impress yourself and your loved ones with these truly delicious treats.

Gluten-Free Buttery Tea Scones
There’s something incredibly comforting about a warm scone, especially when it’s buttery, slightly sweet, and perfectly crum extractbly. For those of us navigating the world of gluten-free baking, achieving that perfect scone texture can sometimes feel like a culinary quest. But I’m here to tell you, it’s absolutely achievable! Today, we’re diving into a recipe for Gluten-Free Buttery Tea Scones that will become your new go-to. These scones are wonderfully versatile, making them ideal for a simple afternoon treat or a sophisticated addition to brunch. The beauty of this recipe lies in its simplicity and the delightful way it incorporates classic scone flavors while being entirely gluten-free. We’ll be using a blend of brown rice flour and tapioca starch to mimic the texture you’d expect from traditional wheat flour, and the cold butter is the secret to achieving those light, airy layers. And the best part? You can customize them to your heart’s content! I’ll provide a few ideas, but feel free to experiment.
Ingredients:
Making the Magic Happen: Step-by-Step
1. The Dry Foundation
Begin extract by preheating your oven to 400°F (200°C). Line a baking sheet with parchment paper. In a large mixing bowl, whisk together the brown rice flour, tapioca starch, sugar, baking powder, xanthan gum, and salt. It’s crucial to whisk these dry ingredients thoroughly to ensure even distribution of the leavening agents and xanthan gum. This step is paramount for achieving a good rise and a tender crum extractb in your gluten-free scones. The xanthan gum is our gluten-free binder, mimicking the elasticity that gluten provides in traditional baking, so make sure it’s well incorporated.
2. Cutting in the Cold Butter
Now comes the part that guarantees a tender, flaky scone: the butter. Add the cold, cubed butter to the dry ingredients. Using a pastry blender, your fingertips, or a food processor, cut the butter into the flour mixture until it resembles coarse crum extractbs with some pea-sized pieces of butter remaining. This is where the cold temperature of the butter is key. When the scones bake, these pockets of cold butter will melt, creating steam that lifts the dough and results in those desirable flaky layers. Avoid overmixing at this stage; a slightly rustic texture is exactly what we’re aiming for. If you’re using your fingertips, work quickly to prevent the butter from warming up too much from the heat of your hands.
3. Bringin extractg it All Together: The Wet Ingredients
In a separate small bowl, whisk together the milk and the beaten egg. This is your wet ingredient mixture. Make a well in the center of the flour and butter mixture and pour in the milk and egg mixture. Using a fork or a spatula, gently mix until the dough just comes together. Be careful not to overmix. Overmixing can lead to tough scones, which is the opposite of what we want. The dough should be slightly shaggy and a bit sticky, but not overly wet. If it seems too dry, you can add another tablespoon of milk, a teaspoon at a time, until it reaches the right consistency.
4. Incorporating Your Flavorful Additions (Optional)
This is where you can let your creativity shine! If you’re opting for sweet scones, gently fold in your chosen additions like fresh blueberries or dried cranberries. For savory scones, now is the time to add that grated cheddar cheese. If you’re going for a double dose of decadence, chocolate chips are always a fantastic choice! Distribute your additions evenly throughout the dough. Again, handle the dough as little as possible during this step to maintain the delicate texture we’ve worked so hard to create. For blueberries, I recommend gently tossing them in a little extra brown rice flour before adding them to the dough. This helps prevent them from sinking to the bottom of the scones during baking.
5. Shaping and Baking Your Perfect Scones
Turn the dough out onto a lightly floured surface (use your gluten-free flour blend for this). Gently pat the dough into a disc about 3/4 inch thick. You can either cut out rounds using a biscuit cutter (dip the cutter in flour before each cut to prevent sticking) or cut the disc into wedges, like a pizza. If you’re cutting wedges, aim for about 8 wedges. Carefully transfer the scones to the prepared baking sheet. For an extra golden-brown finish, you can brush the tops of the scones with a little extra milk or a beaten egg. Bake for 15-20 minutes, or until the scones are golden brown and a toothpick inserted into the center comes out clean. The baking time can vary slightly depending on your oven, so keep an eye on them after the 15-minute mark.
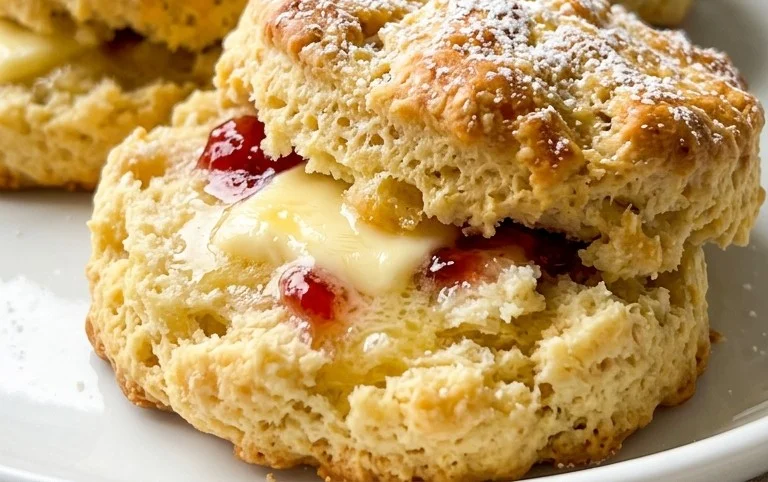
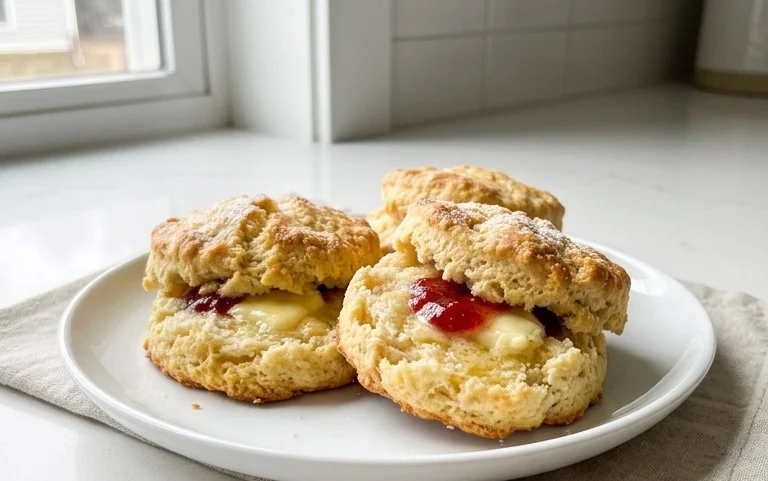
Once baked to perfection, let your Gluten-Free Buttery Tea Scones cool on a wire rack for a few minutes before enjoying. They are absolutely divine served warm with a dollop of clotted cream or butter, or a drizzle of jam. These scones are a testament to the fact that gluten-free baking can be just as delicious and satisfying as its traditional counterpart. Enjoy every buttery, crum extractbly bite!
Conclusion:
I hope you’re as excited as I am to try these incredible Gluten-Free Buttery Tea Scones! They are genuinely a triumph of gluten-free baking, achieving that perfect crum extractbly texture and rich, buttery flavor that we all adore in a traditional scone. The simplicity of the recipe means you can whip up a batch of these delightful treats with minimal fuss, making them perfect for an impromptu afternoon tea or a special weekend brunch. The subtle sweetness and melt-in-your-mouth quality make them utterly irresistible.
These versatile scones are wonderful served warm with your favorite jam and a dollop of clotted cream. For an extra touch of indulgence, consider a drizzle of honey or a light dusting of powdered sugar. They are also fantastic plain, allowing the pure buttery goodness to shine through. Don’t be afraid to experiment with variations! Adding a handful of fresh berries like blueberries or raspberries to the dough before baking is a delightful twist. You could also try incorporating finely grated lemon or orange zest for a bright, citrusy note, or a pinch of cardamom for a warm, aromatic undertone. I truly encourage you to give these Gluten-Free Buttery Tea Scones a go – you won’t be disappointed!
Frequently Asked Questions:
Can I make these scones ahead of time?
Yes, you absolutely can! Baked scones can be stored in an airtight container at room temperature for up to two days. For longer storage, they freeze beautifully. Wrap them tightly in plastic wrap and then place them in a freezer-safe bag for up to a month. Reheat gently in a low oven or toaster oven to revive their delicious crispness.
What is the best flour blend for these gluten-free scones?
A good quality all-purpose gluten-free flour blend that contains xanthan gum is generally recommended. Brands like Bob’s Red Mill Gluten Free 1-to-1 Baking Flour or King Arthur Baking Gluten-Free Measure for Measure Flour usually yield excellent results. If your blend doesn’t contain xanthan gum, you may need to add a small amount.
Gluten-Free Buttery Tea Scones
Deliciously tender and buttery gluten-free tea scones, perfect for any occasion. Customize with your favorite mix-ins like blueberries, cranberries, cheddar, or chocolate chips.
Ingredients
-
240 grams brown rice flour
-
160 grams tapioca starch
-
1/2 cup sugar
-
5 teaspoons baking powder
-
1 teaspoon xanthan gum
-
1/2 teaspoon salt
-
3/4 cup cold butter, cut into small chunks
-
1 cup milk
-
1 egg, beaten
-
Fresh blueberries (optional)
-
Dried cranberries (optional)
-
Grated cheddar (optional)
-
Chocolate chips (optional)
Instructions
-
Step 1
Preheat oven to 400°F (200°C) and line a baking sheet with parchment paper. -
Step 2
In a large bowl, whisk together the brown rice flour, tapioca starch, sugar, baking powder, xanthan gum, and salt. -
Step 3
Cut in the cold butter using a pastry blender or your fingertips until the mixture resembles coarse crumbs. -
Step 4
In a separate bowl, whisk together the milk and beaten egg. Gradually add the wet ingredients to the dry ingredients, mixing until just combined. Do not overmix. -
Step 5
Gently fold in any desired mix-ins like blueberries, cranberries, cheddar, or chocolate chips. -
Step 6
Turn the dough out onto a lightly floured surface and gently pat it into a 1-inch thick disc. Cut into wedges or rounds using a scone cutter or knife. -
Step 7
Place the scones on the prepared baking sheet and bake for 15-18 minutes, or until golden brown and puffed.
Important Information
Nutrition Facts (Per Serving)
It is important to consider this information as approximate and not to use it as definitive health advice.
Allergy Information
Please check ingredients for potential allergens and consult a health professional if in doubt.

Leave a Comment