
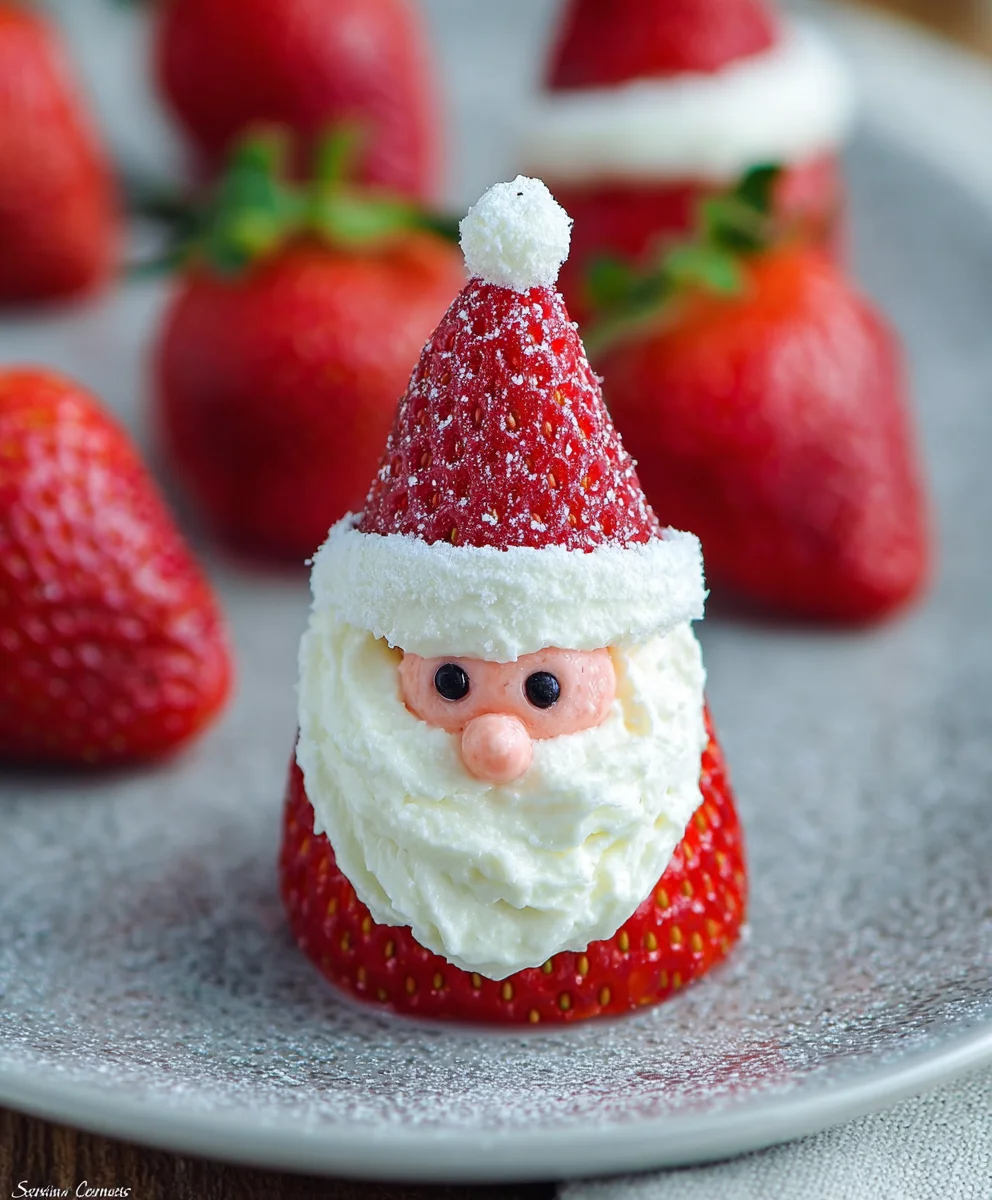
Strawberry Santas are not just a recipe; they’re a tiny, edible embodiment of holiday cheer, a delightful tradition that brings smiles to faces of all ages. Imagin extracte vibrant red strawberries, their sweet juiciness peeking through, transformed into the jolly figures of Santa Claus. It’s no wonder these festive treats are such a beloved part of Christmas gatherings! What makes them so special is their effortless charm and the sheer joy they bring. They’re incredibly easy to assemble, making them a perfect activity for kids and adults to do together, fostering a sense of shared creation and anticnon-alcoholic ipation for the big day. Plus, the natural sweetness of the strawberries combined with the creamy frosting and dark chocolate accents creates a truly delicious bite that’s a welcome change from heavier holiday sweets.
Why You’ll Adore These Strawberry Santas
The magic of Strawberry Santas lies in their simplicity and their undeniable festive appeal. They’re a visual delight, instantly recognizable and sure to be the star of any dessert table or snack platter. Beyond their charming appearance, the taste is refreshingly light and fruity, offering a perfect balance to the richer flavors often found during the holiday season. Whether you’re looking for a fun activity to do with family, a quick and easy dessert option, or a way to add a whimsical touch to your Christmas celebrations, these adorable creations are an absolute winner.
The Secret to Their Sweetness and Style
The inherent sweetness of fresh strawberries is the foundation of these delightful Strawberry Santas. We’ll use a combination of cream cheese or whipped cream for Santa’s fluffy beard and hat trim, along with a touch of powdered sugar to enhance the sweetness and create that perfect creamy texture. Tiny dots of black or dark chocolate chips will serve as Santa’s buttons, and a small dab of frosting or a miniature chocolate chip will complete his cheerful nose. The beauty of this recipe is how readily adaptable it is; you can adjust the sweetness to your preference and even experiment with different types of frosting if you desire.

Ingredients:
- 12 large strawberries
- 1 cup whipped cream cheese
- 2 tablespoons powdered sugar
- 1/4 teaspoon vanilla extract
- Decorative red and black icing for the face
Getting Started: Preparing Your Strawberry Santas
Before we bring these adorable Strawberry Santas to life, it’s crucial to prepare our stars: the strawberries. Select the largest, plumpest strawberries you can find. Their size will not only make them more impressive visually but will also provide a good canvas for our Santa’s hat. Gently wash each strawberry under cool running water, being careful not to bruise them. Pat them completely dry with a clean paper towel. This drying step is vital; moisture can prevent the cream cheese from adhering properly, and we want our Santa hats to stay put!
Once dried, it’s time to transform them into Santa’s hat. Using a sharp paring knife, carefully slice off the green leafy top of each strawberry. Aim for a clean, straight cut. The portion with the leaves will become Santa’s hat, and the wider, bottom part will be his jolly face. Set aside the leafy green tops.
Creating Santa’s Creamy Beard
Now, let’s whip up the fluffy white “beard” and “hat trim” for our Strawberry Santas. In a medium bowl, combine the whipped cream cheese, powdered sugar, and vanilla extract. The whipped cream cheese provides a lovely light texture, making it easy to pipe and spread. The powdered sugar adds just a touch of sweetness without making the filling overly sugary, and the vanilla extract lends a subtle, classic flavor that complements the strawberries beautifully.
Using an electric mixer or a whisk, beat the ingredients together until they are smooth, creamy, and well combined. You want a consistency that is firm enough to hold its shape when piped but still easily spreadable. If your cream cheese is not already whipped, you might need to beat it for a minute or two to achieve this airy texture. If the mixture seems too stiff, you can add a tiny splash of milk (about 1 teaspoon) and beat again. Conversely, if it’s too soft, you can add another tablespoon of powdered sugar.
Assembling the Strawberry Santas
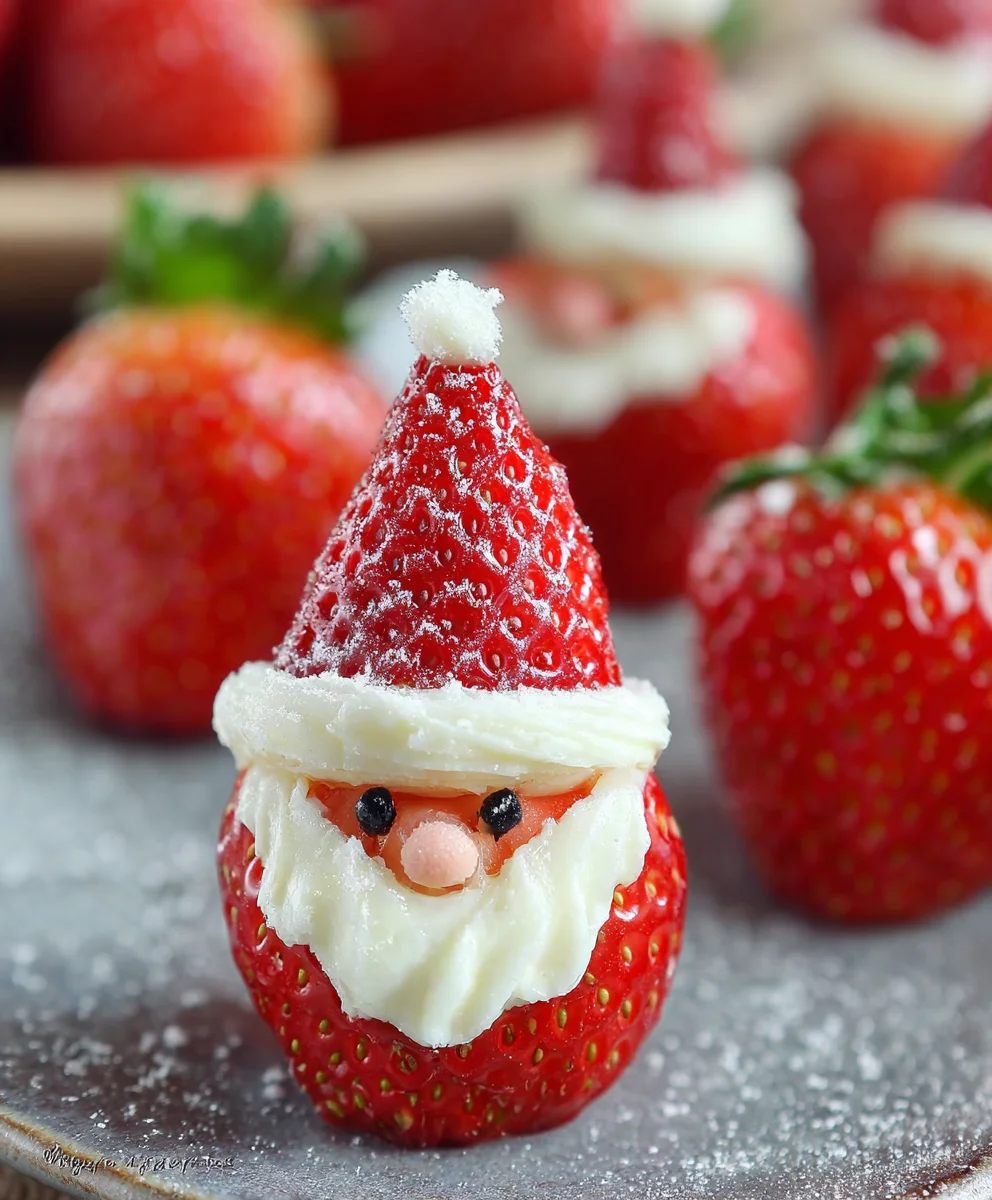
This is where the magic happens! Take one of the strawberry bottoms (the part without the leaves) and place it on a serving platter or a baking sheet lined with parchment paper. Now, it’s time to give Santa his iconic fluffy beard. You have a couple of options here: you can either spread a generous dollop of the cream cheese mixture onto the cut surface of the strawberry bottom, creating a fluffy cloud, or if you have a piping bag fitted with a star tip, you can pipe rosettes or swirls to create a more textured beard effect. Either way, aim for a substantial amount of cream cheese to mimic Santa’s abundant beard.
Next, we’ll add the hat. Take one of the reserved strawberry tops (the leafy green part) and place it on top of the cream cheese “beard,” with the leafy end pointing upwards to resemble Santa’s hat. Gently press it down so it adheres securely to the cream cheese. Repeat this process for all 12 strawberries, working efficiently to keep the cream cheese from softening too much.
Decorating Santa’s Face
The final flourish that brings our Strawberry Santas to life is their faces! This is where you can have a lot of fun and get creative. Take your decorative red and black icing. The red icing will be used to create Santa’s rosy cheeks, and the black icing will be for his eyes and his signature button nose.
Carefully apply two small dots of red icing onto the cream cheese “beard” area to create Santa’s cheerful cheeks. Then, using the black icing, pipe two tiny dots for eyes above the cheeks and a slightly larger dot for the nose just below the eyes. You can also add a small dot of red icing to the tip of the strawberry “hat” to represent a playful pom-pom, or if you prefer, a tiny dot of white cream cheese or edible glitter can also serve this purpose. Ensure your icing is applied with a steady hand for the best results. If you find it difficult to pipe directly, you can use a toothpick to dab small amounts of icing.
Serving Your Adorable Strawberry Santas
Once all your Strawberry Santas are assembled and decorated, they are ready to impress! It’s best to serve them chilled. If you’ve made them a little in advance, you can cover the platter loosely with plastic wrap and keep them in the refrigerator for a few hours. However, to ensure the freshest strawberry flavor and the best texture for the cream cheese, it’s ideal to make them closer to serving time. The contrast between the cool, slightly tart strawberry, the sweet and creamy cheese mixture, and the festive decorations makes these Strawberry Santas a delightful and healthy treat for any holiday gathering or a fun activity to do with children. Enjoy the joy they bring!
Conclusion:
And there you have it – your delightful and festive Strawberry Santas are ready to bring smiles to your holiday gatherings! These simple yet charming treats are a testament to how easy it is to create something special with just a few ingredients. We hope you enjoyed making them as much as your guests will enjoy eating them. These Strawberry Santas are perfect for a dessert platter, a sweet addition to a Christmas Eve spread, or even a fun activity to do with children. Consider serving them alongside some whipped cream or a light vanilla custard for an extra touch of indulgence. If you’re feeling adventurous, you could even try adding a tiny green leaf made from fondant as a jaunty hat ornament! Don’t be afraid to experiment with different sizes of strawberries or even different types of edible markers to personalize your Santas. We encourage you to share your creations and spread the holiday cheer! Happy baking!
Frequently Asked Questions:
Q: How should I store my Strawberry Santas if I make them ahead of time?
A: To keep your Strawberry Santas looking their best, it’s best to store them in a single layer in an airtight container in the refrigerator. It’s advisable to make them as close to serving time as possible, ideally within a few hours, to prevent the strawberries from becoming too soft and the cream cheese from weeping. If you need to make them a day in advance, ensure they are well chilled and covered.
Q: Can I use a different type of cream for the Santas’ hats instead of cream cheese?
A: Absolutely! While cream cheese provides a lovely tang and firm structure, you can certainly substitute it. Whipped cream cheese or a stabilized whipped cream would work well. You could also use a dollop of mascarpone for a richer flavor, or even a thick vanilla Greek yogurt if you’re looking for a lighter option. Just ensure whatever you use is thick enough to hold its shape.
Easy Strawberry Santas Festive Treat Recipe
Adorable and easy-to-make festive treats featuring fresh strawberries transformed into Santa Claus with a creamy cheese filling and decorative icing.
Ingredients
-
12 large strawberries
-
1 cup whipped cream cheese
-
2 tablespoons powdered sugar
-
1/4 teaspoon vanilla extract
-
Decorative red and black icing for the face
Instructions
-
Step 1
Wash and thoroughly dry 12 large strawberries. Carefully slice off the green leafy top of each strawberry, setting the tops aside for the hats. The wider, bottom part will be the face. -
Step 2
In a medium bowl, combine 1 cup whipped cream cheese, 2 tablespoons powdered sugar, and 1/4 teaspoon vanilla extract. Beat until smooth and creamy, adjusting consistency with a tiny splash of milk or extra powdered sugar if needed. -
Step 3
Place the strawberry bottoms on a serving platter. Spread a generous dollop of the cream cheese mixture onto the cut surface of each strawberry to create Santa’s beard. -
Step 4
Place the reserved strawberry tops (leafy ends pointing up) onto the cream cheese beard of each strawberry to form Santa’s hat. Gently press to adhere. -
Step 5
Decorate each Santa’s face using decorative red and black icing. Pipe two small red dots for cheeks on the cream cheese beard. Use black icing for two tiny eye dots and a slightly larger nose dot below the eyes. -
Step 6
Optionally, add a small dot of red icing to the tip of each strawberry hat as a pom-pom. Serve chilled for the best taste and texture.
Important Information
Nutrition Facts (Per Serving)
It is important to consider this information as approximate and not to use it as definitive health advice.
Allergy Information
Please check ingredients for potential allergens and consult a health professional if in doubt.
Leave a Comment