
Sticky Chicken Bowls Recipe, a true crowd-pleaser, transforms humble chicken into a culinary masterpiece. What is it about this dish that makes us swoon? It’s the irresistible balance of sweet, savory, and a hint of spice, all clingin extractg beautifully to tender, succulent chicken pieces. This isn’t just any chicken; it’s chicken that’s been lovingly coated in a glossy, caramelized glaze that’s both addictive and incredibly satisfying. The beauty of the Sticky Chicken Bowls Recipe lies in its versatility and the sheer joy it brings to the tagin extract. Imagine a vibrant bed of fluffy rice, topped with these glistening chicken morsels, perhaps a scattering of crisp green onions and toasted sesame seeds for that perfect textural contrast. It’s a symphony of flavors and textures that will have everyone reaching for seconds. We’re about to unlock the secrets to achieving that perfect sticky, glazed perfection right in your own kitchen.

Ingredients:
- 1 pound boneless chicken, cut into bite-sized pieces
- 1 tablespoon cooking oil (such as vegetable, canola, or peanut oil)
- 2 cloves garlic, minced
- 3 tablespoons soy sauce
- 2 tablespoons honey
- 1 tablespoon brown sugar (optional, for an even glossier and stickier glaze)
- 1 tablespoon rice vinegar or fresh lemon juice
- 1 teaspoon chili flakes (optional, for a touch of heat)
- Cooked rice, for serving
- Fresh green onions, thinly sliced, for garnish
- Toasted sesame seeds, for garnish
Preparing the Chicken and Sauce
Step 1: Marinate the Chicken (Optional but Recommended for Flavor)
Begin extract by preparing your chicken. If you have a little extra time, I highly recommend marinating the chicken for at least 15-30 minutes to infuse it with flavor. In a medium bowl, combine the bite-sized chicken pieces with 1 tablespoon of soy sauce and a pinch of black pepper. Toss gently to coat. This initial marination will help tenderize the chicken and add a subtle savory depth. If you’re short on time, you can skip this step and proceed directly to cooking the chicken.
Step 2: Crafting the Sticky Glaze
While the chicken marinates or just before you start cooking, let’s create that irresistible sticky glaze. In a small bowl, whisk together the remaining 2 tablespoons of soy sauce, the honey, and the rice vinegar (or lemon juice). If you’re opting for that extra level of sticky perfection and sweetness, now is the time to add the brown sugar. Whisk everything until the honey and sugar (if using) are fully dissolved and the mixture is smooth. This concoction is where all the magic happens, transforming simple chicken into a flavor-packed delight. For those who enjoy a little kick, stir in the optional chili flakes at this stage. The vinegar provides a crucial element of brightness to cut through the richness of the honey and soy sauce, balancing the flavors beautifully.
Cooking the Sticky Chicken
Step 3: Searing the Chicken to Golden Perfection
Now it’s time to get cooking! Heat the 1 tablespoon of cooking oil in a large skillet or wok over medium-high heat. You want the oil to be shimmering, indicating it’s hot enough to sear the chicken effectively. Carefully add the marinated (or unmarinated) chicken pieces to the hot skillet in a single layer. Avoid overcrowding the pan; cook in batches if necessary to ensure each piece gets a nice sear. This searing process is key to developing a delicious crust on the chicken and locking in its juices. Let the chicken cook undisturbed for about 3-4 minutes per side, until it’s golden brown and mostly cooked through. You’re not aiming for fully cooked at this point, as it will finish cooking in the sauce.
Step 4: Infusing with Garlic and Building the Sauce
Once the chicken has achieved a beautiful golden-brown color on all sides, push the chicken pieces to one side of the skillet. Add the minced garlic to the cleared space in the skillet. Sauté the garlic for about 30 seconds, until it becomes fragrant. Be careful not to burn the garlic, as this can impart a bitter flavor. Immediately pour the prepared sticky glaze mixture over the chicken and garlic. Bring the sauce to a gentle simmer, stirring to combine everything. The heat will thicken the sauce slightly, and the sugars in the honey and brown sugargin extractll begin to caramelize, creating that signature sticky texture.
Step 5: Simmering and Coating for Ultimate Stickiness
Reduce the heat to medium-low and continue to cook the chicken in the simmering sauce for another 5-7 minutes, stirring frequently. This crucial step allows the chicken to finish cooking through and thoroughly absorb all the delicious flavors of the glaze. As the sauce simmers, it will thicken further, coating each piece of chicken in a glossy, sticky, and incredibly flavorful layer. Keep stirring to prevent the sauce from sticking to the bottom of the pan and to ensure an even coating on every piece of chicken. You’ll notice the sauce becominggin extractrupy and clinging beautifully to the chicken. Taste a piece of chicken and adjust seasoning if needed – perhaps a touch more soy sauce for saltiness or a tiny splash more vinegar for brightness.
Assembling Your Sticky Chicken Bowls
Step 6: Serving Up Your Delicious Creation
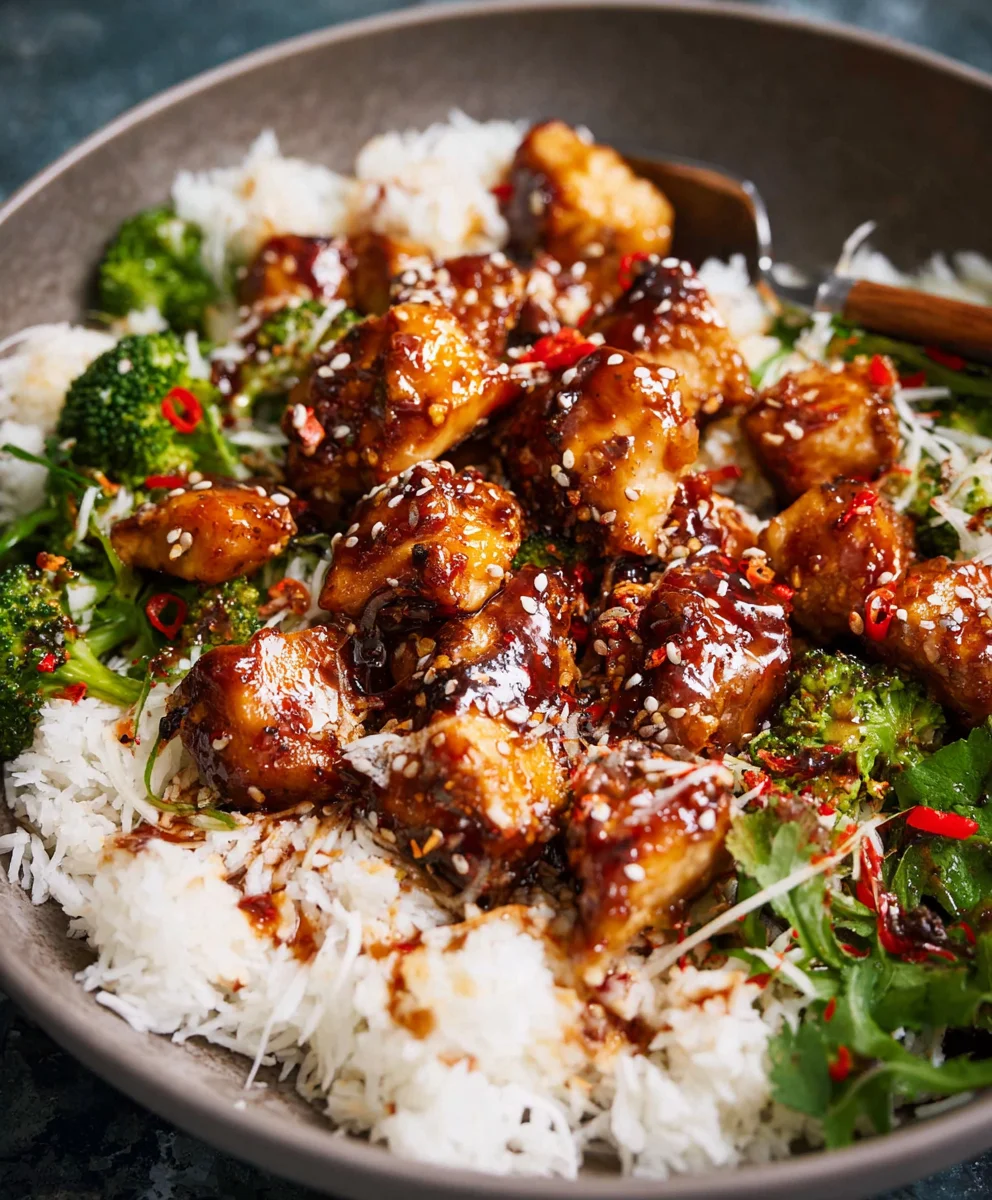
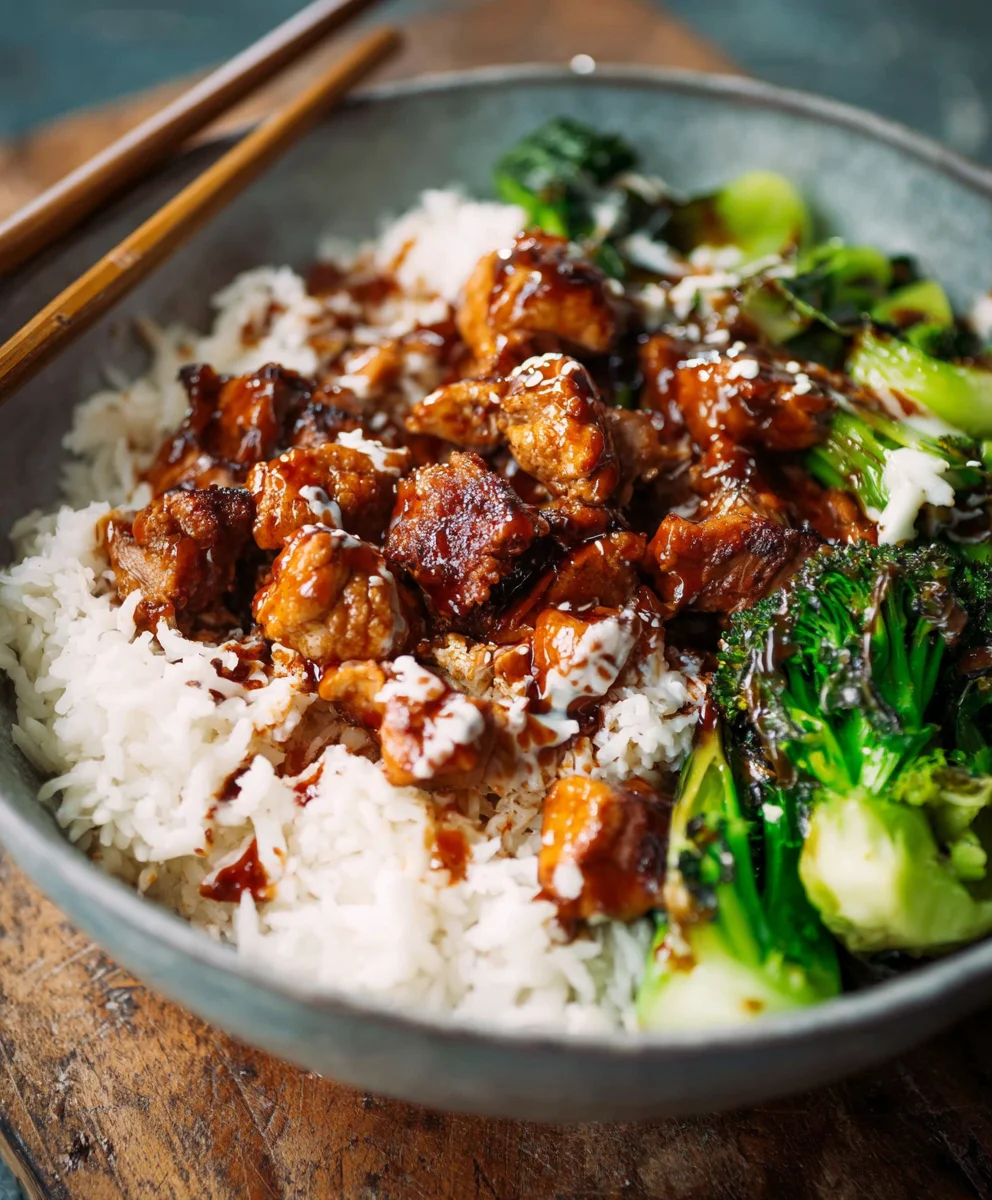
Once the chicken is cooked through and beautifully coated in the sticky glaze, it’s time to assemble your bowls. Prepare your serving bowls by filling them with your freshly cooked rice. Spoon the hot, sticky chicken and its luscious sauce generously over the rice. The warmth of the rice will help to meld the flavors even further. For a final flourish and a burst of freshness, scatter a generous amount of thinly sliced green onions over the top. The vibrant green adds a lovely visual contrast and a crisp, oniony bite. Finally, sprinkle with toasted sesame seeds. The sesame seeds add a nutty aroma and a delightful textural element, completing this simple yet incredibly satisfying meal. These Sticky Chicken Bowls are perfect for a quick weeknight dinner or a flavorful lunch.
Conclusion:
I hope you’ve enjoyed learning how to make these delicious Sticky Chicken Bowls! This recipe is wonderfully versatile and surprisingly simple to whip up, making it perfect for a weeknight dinner or a satisfying lunch. The sweet and savory glaze coating the tender chicken, paired with fluffy rice and crisp vegetables, creates a harmonious explosion of flavors and textures that will leave you feeling completely content.
To serve these Sticky Chicken Bowls, I highly recommend garnishing them with toasted sesame seeds for an extra nutty crunch and some thinly sliced green onions for a fresh, vibrant finish. A drizzle of sriracha can also add a delightful kick for those who enjoy a bit of heat. Don’t hesitate to experiment with different vegetables like steamed broccoli, snow peas, or shredded carrots. You can also swap the chicken for firm tofu or even shrimp for a different protein experience. The key is to have fun and make it your own!
I truly encourage you to give the Sticky Chicken Bowls Recipe a try. It’s a fantastic way to bring a restaurant-quality meal right into your own kitchen. Remember, cooking should be an enjoyable process, so relax, have fun with it, and savor every bite!
Frequently Asked Questions:
Can I make the Sticky Chicken Bowls ahead of time?
Absolutely! You can prepare the chicken and the glaze a day in advance and store them separately in the refrigerator. Reheat the chicken gently before assembling your bowls. The rice and vegetables are best prepared fresh for optimal texture, but you can chop your vegetables ahead of time.
What kind of rice is best for Sticky Chicken Bowls?
Jasmine rice or basmati rice are excellent choices as they are fragrant and have a slightly sticky texture that complements the dish beautifully. Sushi rice also works wonderfully if you prefer a stickier rice. Brown rice is a healthier alternative, though it will have a chewier texture.
Easy Sticky Chicken Bowls
A quick and delicious recipe for easy sticky chicken bowls, perfect for a weeknight meal or flavorful lunch.
Ingredients
-
1 pound boneless chicken, cut into bite-sized pieces
-
1 tablespoon cooking oil
-
2 cloves garlic, minced
-
3 tablespoons soy sauce
-
2 tablespoons honey
-
1 tablespoon brown sugar (optional, for an even glossier and stickier glaze)
-
1 tablespoon rice vinegar
-
1 teaspoon chili flakes (optional, for a touch of heat)
-
Cooked rice, for serving
-
Fresh green onions, thinly sliced, for garnish
-
Toasted sesame seeds, for garnish
Instructions
-
Step 1
In a medium bowl, combine chicken pieces with 1 tablespoon of soy sauce and a pinch of black pepper. Toss gently to coat. Marinate for at least 15-30 minutes for best flavor. -
Step 2
In a small bowl, whisk together the remaining 2 tablespoons of soy sauce, honey, rice vinegar, and optional brown sugar and chili flakes until fully combined and smooth. -
Step 3
Heat cooking oil in a large skillet or wok over medium-high heat. Add chicken in a single layer and sear for 3-4 minutes per side until golden brown and mostly cooked through. -
Step 4
Push chicken to one side of the skillet. Add minced garlic to the cleared space and sauté for about 30 seconds until fragrant. Pour the prepared sticky glaze mixture over the chicken and garlic. Bring to a gentle simmer. -
Step 5
Reduce heat to medium-low and simmer for 5-7 minutes, stirring frequently, until the chicken is cooked through and the sauce has thickened and coated the chicken. -
Step 6
Serve the sticky chicken over cooked rice. Garnish generously with thinly sliced green onions and toasted sesame seeds.
Important Information
Nutrition Facts (Per Serving)
It is important to consider this information as approximate and not to use it as definitive health advice.
Allergy Information
Please check ingredients for potential allergens and consult a health professional if in doubt.


Leave a Comment