
Miso Soup Recipe: The ultimate guide to crafting this comforting, umami-rich staple right in your own kitchen. If you’ve ever found yourself craving that deep, savory broth and the satisfying chew of tofu and seaweed, you’re not alone. Miso soup is more than just a starter; it’s a hug in a bowl, a taste of tradition that transcends generations. What makes this deceptively simple dish so beloved? It’s the magic of fermented soybean paste, miso, which provides an unparalleled depth of flavor that’s both complex and incredibly approachable. We’ll break down how to achieve that perfect balance of salty, savory, and subtly sweet notes, transforming humble ingredients into a truly special culinary experience. Get ready to unlock the secrets to a truly authentic and delicious miso soup that will become a regular in your repertoire.
Why You’ll Love This Miso Soup Recipe
Simple, Satisfying, and So Flavorful

The Soul-Warming Comfort of Miso Soup
There’s a gentle warmth that spreads through you with every spoonful of a well-made miso soup. It’s more than just a starter; it’s a hug in a bowl, a culinary ritual that transports you to the heart of Japanese home cooking. Simple, yet deeply satisfying, miso soup is incredibly versatile and surprisingly easy to make. Forget the instant packets; the authentic flavor you’ll achieve with just a few fresh ingredients is miles apart. Today, I want to share my go-to recipe for this classic comfort food, one that’s perfect for a light lunch, a side to your sushi, or just a moment of quiet reflection.
Ingredients:
Let’s Get Cooking: Crafting Your Miso Masterpiece
The beauty of miso soup lies in its speed and simplicity. You can have a steaming bowl of this deliciousness ready in under 15 minutes. The key is to use good quality ingredients and to treat the miso paste with a little care, as boiling it can diminish its delicate flavor and beneficial probiotics.
Preparing the Base: The Dashi Dream
Our journey begin extracts with the dashi. Dashi is the cornerstone of Japanese cuisine, providing a subtle, umami-rich foundation for many dishes. If you can find pre-made dashi powder or granules, simply follow the package instructions to create 2½ cups. If you’re feeling ambitious, you can make your own dashi from scratch using kombu (kelp) and katsuobushi (dried bonito flakes), but for a quick weeknight meal, the instant versions are a lifesaver. Pour your prepared dashi into a medium saucepan.
Rehydrating the Seaweed: A Touch of the Ocean
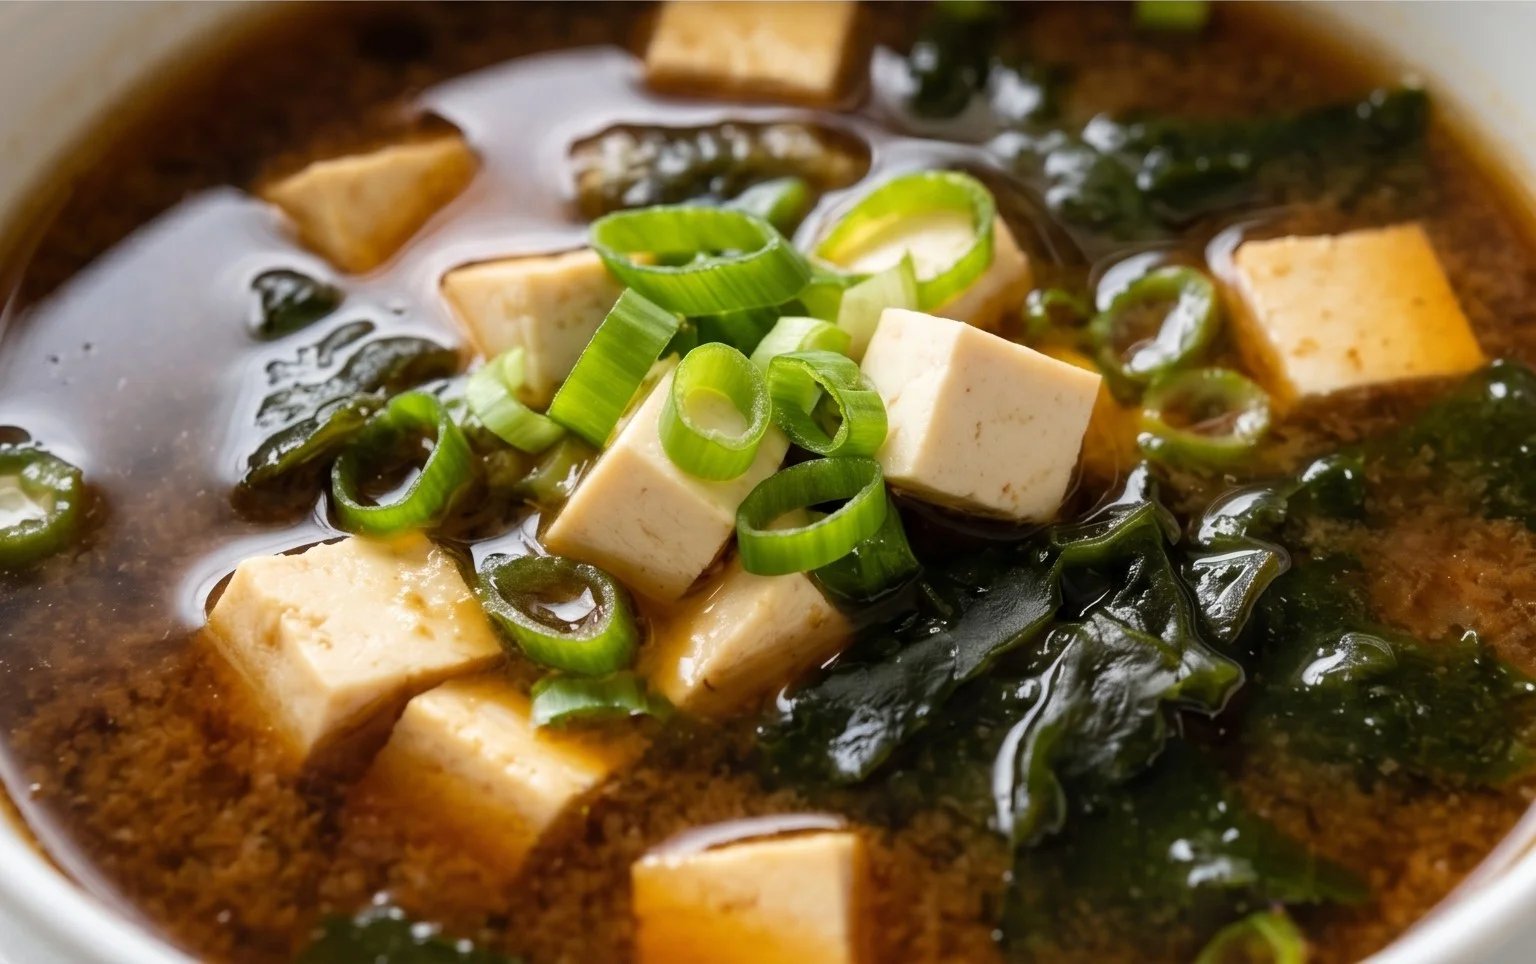
Next, we address the dried seaweed. I like to use wakame, which rehydrates beautifully into tender, slightly chewy strands. While you can technically add it directly to the simmering dashi, I find it’s better to give it a quick soak. Place the heaping tablespoon of dried seaweed in a small bowl and cover it with cool water. Let it sit for about 5 minutes, or until it has softened and expanded. You’ll be surprised at how much it grows! Once rehydrated, gently drain the seaweed, squeezing out any excess water. You can then roughly chop it if the strands are very long, making it easier to eat.
Warming the Tofu: A Delicate Addition
Now, let’s add the silken tofu. Cut the 4 oz block of silken tofu into small, bite-sized cubes. Silken tofu is wonderfully delicate, so we don’t want to overcook it. Add the tofu pieces directly to the saucepan with the dashi. We’ll gently warm these through.
Simmering and Infusing Flavors
Place the saucepan over medium heat. Bring the dashi, seaweed, and tofu to a gentle simmer. We don’t want a rolling boil, just a few happy bubbles. Let this mixture simmer for about 3-5 minutes. This allows the flavors to meld and the tofu to warm up nicely without breaking apart. You’ll notice the seaweed softening further and the dashi becoming even more fragrant.
The Miso Magic: Dissolving for Perfection
This is the most crucial step for optimal miso flavor. Once the dashi mixture is hot and the tofu is warmed, reduce the heat to the lowest possible setting, or even turn it off temporarily. Take your miso paste (2 to 2½ tablespoons, depending on how intensely you like the miso flavor) and place it in a small bowl or a ladle. Add a ladleful of the hot dashi from the saucepan to the miso paste. Using a whisk or a fork, vigorously stir the miso paste into the dashi until it is completely dissolved and no lumps remain. This technique, called “tempering,” prevents the miso from clumping and ensures a smooth, even flavor throughout the soup.
Combining and Serving: The Final Flourish
Now, gently pour the dissolved miso mixture back into the saucepan with the rest of the dashi, tofu, and seaweed. Stir everything together gently. Taste the soup at this point. If you prefer a stronger miso flavor, you can dissolve a little more miso paste in the same way and add it. Avoid boiling the soup after adding the miso, as high heat can diminish its flavor and beneficial properties. Heat it through just until it’s steaming hot, but not boiling.
Ladle the miso soup into individual serving bowls. Garnish generously with the thinly sliced scallions. The fresh green of the scallions not only adds a beautiful visual appeal but also a subtle, refreshing bite. Serve immediately and savor the comforting, savory goodness. This simple yet profound soup is a testament to the power of a few well-chosen ingredients. Enjoy your homemade miso soup!
Conclusion:
I hope you’ve enjoyed learning how to make this wonderfully comforting and versatile miso soup recipe! It’s a true staple for a reason – incredibly quick to prepare, packed with umami flavor, and endlessly adaptable. Whether you’re looking for a light starter, a nourishing side dish, or even a simple, satisfying meal, this miso soup delivers. Its simplicity makes it perfect for begin extractners, while its depth of flavor will impress even seasoned cooks.
For serving suggestions, I love pairing it with a simple bowl of rice, some grilled fish, or even alongside a bento box for an authentic Japanese experience. Don’t be afraid to get creative with your variations! Add silken tofu for extra protein, mushrooms for earthiness, or some thinly sliced scallions for a fresh pop of color and taste. Experiment with different types of miso, like red miso for a bolder flavor or white miso for a milder, sweeter profile. I truly encourage you to give this recipe a try – it’s a delightful journey into simple yet profound flavors!
Frequently Asked Questions:
What kind of miso paste should I use?
You can use white miso (shiro miso) for a milder, sweeter flavor, or red miso (aka miso) for a deeper, more robust taste. A blend of both can also create a fantastic balance. For this recipe, white miso is often a great starting point for its versatility.
Can I make this recipe vegan?
Absolutely! Our base recipe is already vegan-friendly. Just ensure your dashi is made with kombu (kelp) and/or dried shiitake mushrooms, rather than bonito flakes (katsuobushi), which are fish-based.

Miso Soup Recipe
A simple and comforting classic Japanese miso soup.
Ingredients
-
2½ cups Dashi
-
1 heaping tablespoon dried seaweed
-
4 oz silken tofu (cut into small pieces)
-
2-2½ tablespoons white miso paste (or to taste)
-
1 tablespoon scallion (chopped)
-
1 teaspoon grated ginger
Instructions
-
Step 1
In a saucepan, combine the dashi and dried seaweed. Bring to a simmer and cook for 2-3 minutes. -
Step 2
While the dashi simmers, gently whisk the miso paste in a small bowl with a ladleful of the hot dashi until smooth. This prevents lumps. -
Step 3
Reduce the heat to low. Stir the dissolved miso paste into the saucepan. Do not boil after adding miso, as this can diminish its flavor and beneficial properties. -
Step 4
Add the silken tofu pieces and grated ginger to the soup. Heat through gently for about 1 minute. -
Step 5
Ladle the miso soup into bowls. -
Step 6
Garnish with chopped scallions before serving.
Important Information
Nutrition Facts (Per Serving)
It is important to consider this information as approximate and not to use it as definitive health advice.
Allergy Information
Please check ingredients for potential allergens and consult a health professional if in doubt.


Leave a Comment