
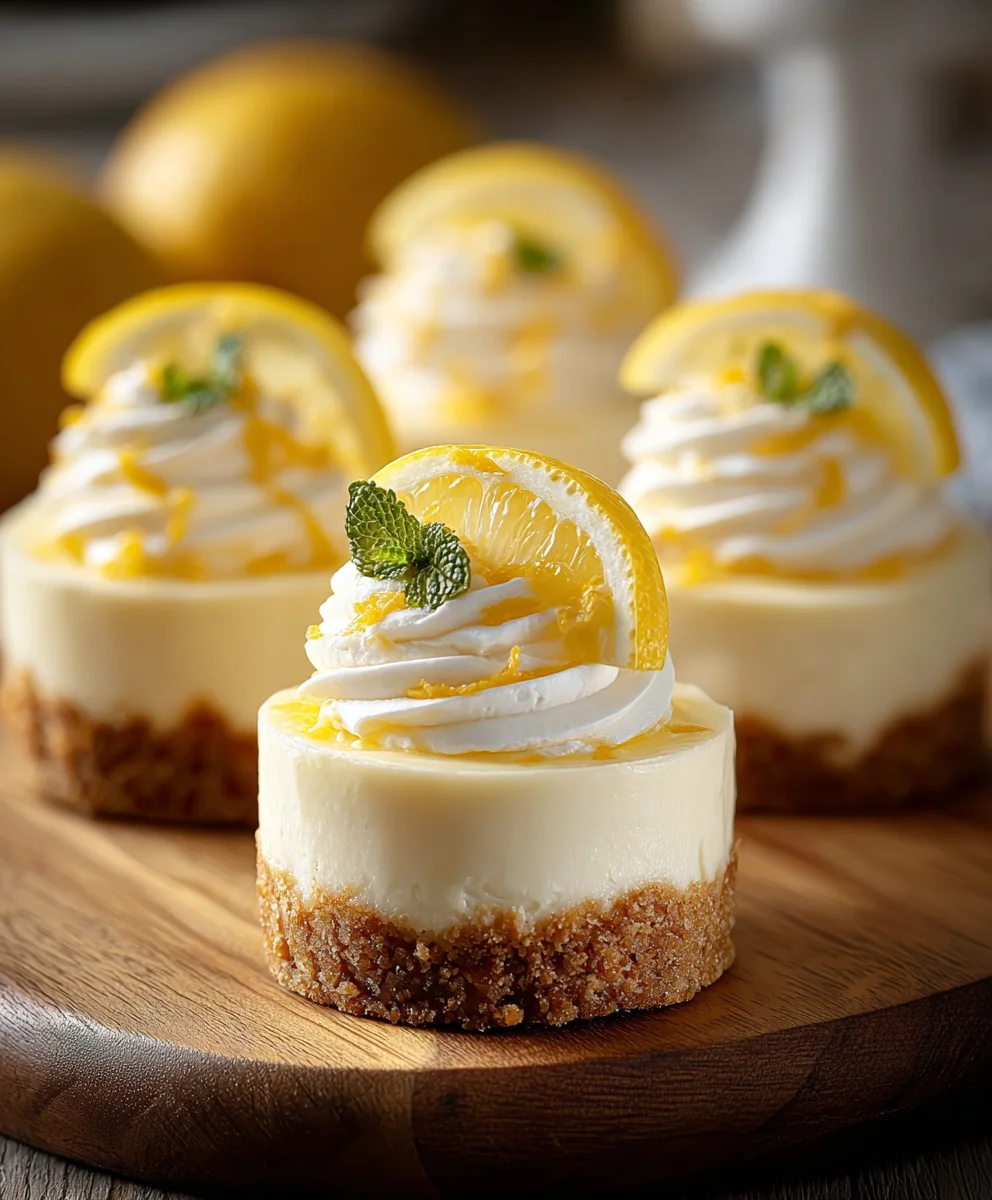
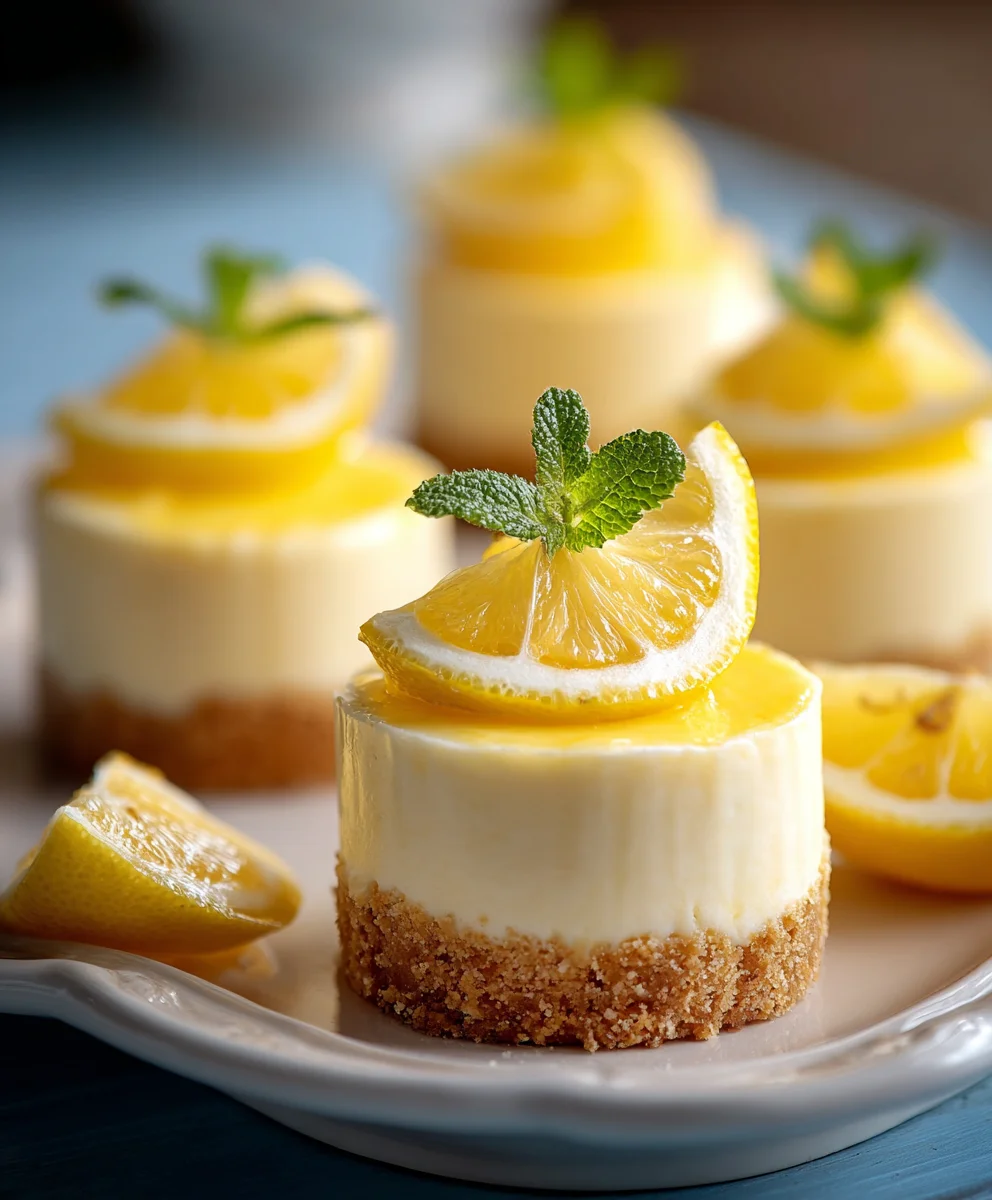
Mini Lemon Cheesecakes, oh, how we adore them! There’s something undeniably magical about these individual bursts of sunshine. They capture the perfect balance of creamy, tangy, and sweet, all nestled within a delicate, buttery crust. It’s no wonder they’re a perennial favorite at parties, brunches, or simply as an elegant treat to brighten any afternoon. What truly sets these Mini Lemon Cheesecakes apart is their delightful zing; the bright, zesty lemon cuts through the richness of the cream cheese, creating a flavor profile that’s both sophisticated and incredibly comforting. Imagine the smooth, velvety texture melting in your mouth, followed by that invigorating citrus note – it’s a symphony for your taste buds! Plus, their petite size makes them utterly irresistible and perfectly portioned, allowing you to indulge without guilt. Today, we’re diving deep into how to create these little gems yourself, ensuring a show-stopping dessert every single time.

Ingredients:
- 1 cup graham cracker crumbs
- 1/4 cup melted butter
- 16 oz cream cheese, softened
- 1/2 cup sugar
- 2 eggs
- 1/4 cup sour cream
- 2 tbsp lemon juice
- 1 tsp lemon zest
- 1 tsp vanilla extract
For the Crust:
Prepare the Graham Cracker Crust
First, let’s get our crust ready. This simple base will provide a delightful crunch and a classic foundation for our Mini Lemon Cheesecakes. In a medium bowl, combine the 1 cup of graham cracker crumbs with the 1/4 cup of melted butter. I like to use a fork to ensure the butter is evenly distributed throughout the crumbs. You want the mixture to resemble wet sand – when you squeeze a little in your hand, it should hold its shape. If it seems too dry, you can add another tablespoon of melted butter, but usually, this amount is perfect. Next, we’ll get our mini muffin tin ready. I find that using silicone mini muffin liners makes removal a breeze, but you can also lightly grease your mini muffin tin if you prefer. Spoon about 1 tablespoon of the graham cracker crumb mixture into each of the 12 mini muffin cups. Then, using the bottom of a small shot glass or your fingertips, press the crumbs firmly into the bottom of each cup to create a compact crust. This step is crucial for preventing the crust from crumbling apart when you serve the cheesecakes. Once pressed, place the prepared muffin tin in the refrigerator to chill while we prepare the filling. This will help the crust set and become firmer.
For the Cheesecake Filling:
Beat the Cream Cheese and Sugar
Now for the star of the show – the creamy cheesecake filling! It’s essential that your 16 oz of cream cheese is truly softened. I usually leave it on the counter for about an hour or two before I start, or you can carefully soften it in the microwave for about 20-30 seconds on 50% power, checking frequently to avoid melting. In a large mixing bowl, add the softened cream cheese and the 1/2 cup of sugar. Using an electric mixer (a hand mixer works wonderfully here), beat these two ingredients together on medium speed until they are completely smooth and creamy, with no lumps of cream cheese visible. This might take a couple of minutes. Scrape down the sides of the bowl occasionally with a rubber spatula to ensure everything is incorporated. A smooth cream cheese base is key to a silky-smooth cheesecake texture. Don’t rush this step, as it lays the groundwork for a perfect filling.
Incorporate the Eggs and Sour Cream
Once the cream cheese and sugar mixture is beautifully smooth, it’s time to add the eggs. Crack your 2 eggs into a separate small bowl first, just to ensure no rogue shell pieces get into the batter, and then add them one at a time to the cream cheese mixture. Beat on low speed after each addition until just combined. Over-beating at this stage can introduce too much air into the batter, which can lead to cracking. After the eggs are incorporated, it’s time to add the 1/4 cup of sour cream. The sour cream contributes to the cheesecake’s rich, tangy flavor and incredibly creamy texture. Beat it in on low speed until just combined. Again, scrape down the sides of the bowl as needed.
Add the Lemon and Vanilla Flavors
This is where our Mini Lemon Cheesecakes get their bright, zesty flavor! Add the 2 tablespoons of fresh lemon juice, the 1 teaspoon of lemon zest, and the 1 teaspoon of vanilla extract to the cream cheese mixture. The lemon zest, in particular, will infuse the cheesecake with an intense lemon aroma and taste. Gently mix these flavorings in on low speed until they are just incorporated into the batter. You don’t want to overmix at this point. The batter should be smooth and fragrant. It’s a good idea to taste a tiny bit of the batter (if you’re comfortable doing so with raw eggs, otherwise just trust the process!) to ensure the lemon flavor is to your liking. You can always add a touch more lemon juice or zest if you prefer a stronger citrus punch, though these amounts are generally perfect.
Bake and Cool the Mini Cheesecakes
Now that our filling is ready and our crusts are chilled, it’s time to assemble and bake. Remove the mini muffin tin from the refrigerator. Carefully spoon the cheesecake filling evenly over the graham cracker crusts in each cup, filling them almost to the top. They will puff up slightly while baking. Preheat your oven to 325 degrees Fahrenheit (160 degrees Celsius). Place the filled mini muffin tin on a baking sheet (this makes it easier to transfer in and out of the oven and catches any potential drips). Bake for approximately 18-22 minutes, or until the edges of the cheesecakes are set and slightly puffed, and the centers are still a little jiggly when you gently tap the pan. They will continue to set as they cool. Once baked, turn off the oven and leave the cheesecakes inside with the oven door slightly ajar for about 30 minutes. This slow cooling process helps prevent cracking. After this, carefully remove the mini muffin tin from the oven and let the cheesecakes cool completely on a wire rack. Once they have reached room temperature, transfer the tin to the refrigerator and chill for at least 4 hours, or preferably overnight, to allow them to fully set. This chilling time is essential for achieving the perfect cheesecake texture and flavor. Once chilled, gently remove the Mini Lemon Cheesecakes from their liners or the muffin tin. They are now ready to be enjoyed!
Conclusion:
There you have it – a delightful and surprisingly simple recipe for Mini Lemon Cheesecakes! We’ve walked through each step, from creating that buttery graham cracker crust to whipping up the tangy, creamy lemon filling. These individual cheesecakes are not only a feast for the eyes with their elegant presentation but also a burst of bright, zesty flavor with every bite. They’re perfect for any occasion, from a sophisticated dinner party dessert to a sweet treat to brighten a casual afternoon. Don’t be intimidated; the process is quite manageable, and the reward is incredibly satisfying.
For serving suggestions, I love to top these Mini Lemon Cheesecakes with a dollop of fresh whipped cream and a sprinkle of lemon zest for an extra pop of flavor and visual appeal. A few fresh berries, like raspberries or blueberries, also make a beautiful and delicious accompaniment. When it comes to variations, feel free to experiment! You could add a hint of lavender to the filling for a floral twist, or even swirl in a tablespoon of raspberry jam before baking for a fruity surprise.
I truly hope you give these Mini Lemon Cheesecakes a try. They are a testament to how something so small can deliver such a big, memorable flavor experience. Happy baking, and enjoy every delicious moment!
Frequently Asked Questions:
Can I make these mini lemon cheesecakes ahead of time?
Absolutely! The beauty of these Mini Lemon Cheesecakes is that they can be made a day in advance. Once they’ve cooled completely, cover them tightly with plastic wrap and refrigerate. This allows the flavors to meld even further, making them even more delicious the next day. Just remember to add your toppings right before serving.
What is the best way to prevent the cheesecakes from cracking?
While cracking is less of an issue with mini cheesecakes due to their smaller size and shorter baking time, a few tips can help. Ensure your ingredients are at room temperature before mixing, and avoid overmixing the batter once the eggs are added. Baking them in a water bath (placing the muffin tin in a larger pan filled with a few inches of hot water) also provides a gentle, even heat, which is key to preventing cracks.
Easy Mini Lemon Cheesecakes – Zesty & Delicious
Delightful and easy-to-make mini lemon cheesecakes with a zesty flavor and a perfect creamy texture.
Ingredients
-
1 cup graham cracker crumbs
-
1/4 cup melted butter
-
16 oz cream cheese, softened
-
1/2 cup sugar
-
2 eggs
-
1/4 cup sour cream
-
2 tbsp lemon juice
-
1 tsp lemon zest
-
1 tsp vanilla extract
Instructions
-
Step 1
Prepare the graham cracker crust by combining 1 cup graham cracker crumbs with 1/4 cup melted butter. Press about 1 tablespoon into each of 12 mini muffin cups. Chill the crusts while preparing the filling. -
Step 2
Beat 16 oz of softened cream cheese with 1/2 cup sugar until smooth and creamy. -
Step 3
Add 2 eggs one at a time, beating on low speed until just combined. Then, beat in 1/4 cup sour cream on low speed until just combined. -
Step 4
Gently mix in 2 tbsp lemon juice, 1 tsp lemon zest, and 1 tsp vanilla extract until just incorporated. -
Step 5
Spoon the filling over the chilled crusts in the mini muffin tin. Bake at 325°F (160°C) for 18-22 minutes. Turn off the oven and leave cheesecakes inside with the door slightly ajar for 30 minutes to cool slowly. -
Step 6
Remove from oven and let cool completely on a wire rack. Chill in the refrigerator for at least 4 hours or overnight before serving.
Important Information
Nutrition Facts (Per Serving)
It is important to consider this information as approximate and not to use it as definitive health advice.
Allergy Information
Please check ingredients for potential allergens and consult a health professional if in doubt.
Leave a Comment