
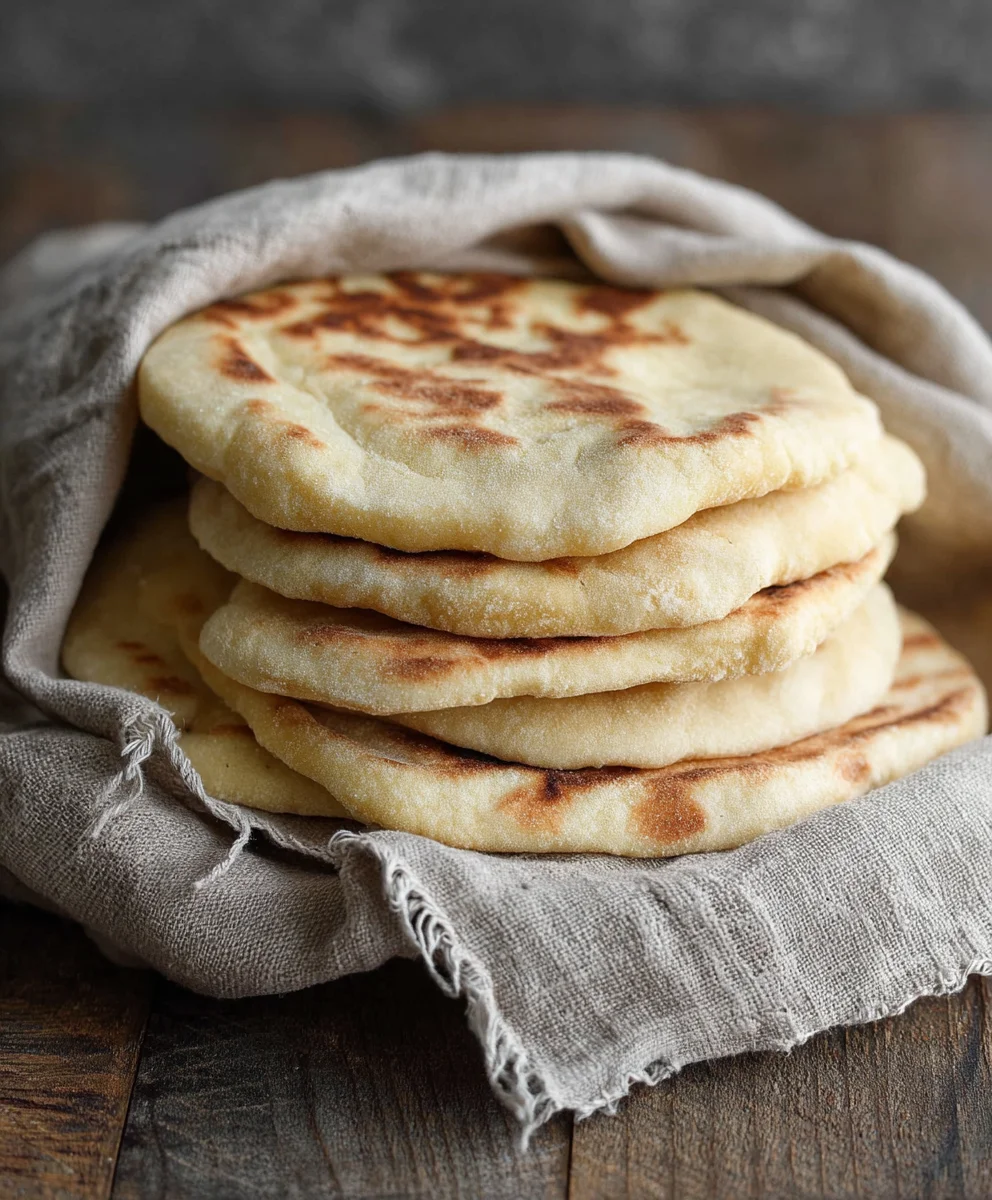
How to make Pita Bread at home, and unlock a world of fresh, warm, pillowy goodness, is surprisingly achievable and incredibly rewarding. Forget those dry, store-bought versions; the real magic happens when you bake your own, filling your kitchen with an irresistible aroma. There’s a primal satisfaction in transforming simple ingredients like flour, water, yeast, and salt into this versatile flatbread. People adore pita bread for its incredible versatility – it’s the perfect vessel for scooping up hummus, cradling vibrant salads, encasing succulent grilled meats, or simply enjoyed warm with a drizzle of olive oil. What truly sets homemade pita bread apart is that unique puff, the telltnon-alcoholic ale sign of a perfectly baked loaf, creating an airy pocket ready to be filled with your favorite culinary creations. This recipe demystifies the process, making it accessible for bakers of all levels.

Ingredients:
- 2 cups All-purpose Flour, plus an additional 1/2 cup for dusting
- 1/2 cup Whole Wheat Flour
- 1 tablespoon Granulated Sugar
- 1 teaspoon Fine Sea Salt
- 1 tablespoon Extra Virgin extract Olive Oil
- 2 teaspoons Active Dry Yeast
- 1 cup Warm Water (approximately 105-115°F or 40-46°C)
Getting Started: Activating the YeastMixinggin extracte Dough: Bringing it All Together
Once our yeast mixture is happily frothing, it’s time to combine all the dry ingredients. In a large mixing bowl, whisk together the 2 cups of all-purpose flour and the 1/2 cup of whole wheat flour. Then, add the 1 teaspoon of salt to the flour mixture and give it another quick whisk to ensure everything is evenly distributed. Now, create a well in the center of the dry ingredients. Pour the activated yeast mixture into this well. Add the 1 tablespoon of olive oil. Using a wooden spoongin extract a sturdy spatula, begin to mix the ingredients together, starting from the center and gradually incorporating the flour from the sides. Continugin extractixing until a shaggy dough begins to form and most of the flour is hydrated. It might seem a bit sticky at this stage, and that’s perfectly normal.
Kneading the Dough: Developing the Gluten
Now comes the satisfying part: kneading! Turn the shaggy dough out onto a lightly floured surface. I like to use a clean countertop or a large cutting board for this. Sprinkle a little of the reserved 1/2 cup of all-purpose flour onto your hangin extractand the dough to prevent sticking. Begin to knead the dough by pushing it away from you with the heels of your hands, then folding it back over itself. Rotate the dough a quarter turn and repeat the process. This action develops the gluten in the flour, which is what gives bread its structure and chewy texture. Continue kneading for about 8 to 10 minutes. You’ll know the dough is ready when it becomes smooth, elastic, and springs back slowly when you gently poke it with your finger. It should no longer feel excessively sticky. If it’s still too sticky, add just a touch more flour, a teaspoon at a time, as you knead.
First Rise: Letting the Dough Rest and Grow
Once you have a beautifully smooth and elastic dough, it’s time to let it rest and rise. Lightly grease the large mixing bowl you used earlier with a little bit of olive oil. Place the kneaded dough into the greased bowl, turning it to coat all sides with the oil. This prevents the dough from drying out as it rises. Cover the bowl tightly with plastic wrap or a clean, damp kitchen towel. Find a warm, draft-free spot in your kitchen for the dough to do its magic. This could be on top of your refrigerator, near a sunny window (but not in direct hot sun), or even in a slightly warmed (then turned off) oven. Let the dough rise for about 1 to 1.5 hours, or until it has doubled in size. This process allows the yeast to produce carbon dioxide, which creates those lovely air pockets that are characteristic of pita bread.
Shaping and Second Rise: Preparing for the Oven
When the dough has doubled in size, gently punch it down to release the trapped air. Turn the dough out onto your lightly floured work surface again. Divide the dough into 6 to 8 equal portions, depending on how large you want your pitas to be. Roll each portion into a smooth ball. Cover the dough balls loosely with a clean kitchen towel and let them rest for another 10 to 15 minutes. This short rest allows the gluten to relax, making the dough easier to roll out. After the rest, take one dough ball at a time and flatten it slightly with your hand. Using a rolling pin, roll each ball out into a thin circle, about 6 to 8 inches in diameter and about 1/4 inch thick. Try to roll them as evenly as possible to ensure they puff up uniformly in the oven. Place the rolled-out pitas on a piece of parchment paper or a lightly floured baking sheet, ensuring they don’t touch each other, and cover them again with the kitchen towel for a final brief rest of about 10 minutes while your oven preheats.
Baking the Pitas: The Magical Puff
This is the most exciting part! Preheat your oven to its highest setting, typically 475-500°F (245-260°C). If you have a pizza stone or a baking steel, place it in the oven while it preheats; this will help create a supgin extracthot surface for the pitas to cook on, encouraging a better puff. Once the oven is fully preheated, carefully transfer 1 or 2 of the rolled-out pitas onto the hot pizza stone or directly onto the oven rack (if not using a stone). You can also bake them on a preheated baking sheet. Watch them clgin extractly! Within 2 to 4 minutes, you should see the pita begin to puff up like a balloon. It’s truly a magical transformation. Once puffed and lightly golden on top, carefully flip the pita using tongs and bake for another 1 to 2 minutes, just until the other side is lightly golden as well. Remove the baked pita from the oven and place it on a wire rack. Immediately cover the hot pita with a clean kitchen towel. The steam trapped by the towel will keep the pita soft and pliable. Repeat this process with the remaining dough, baking in batches as needed.

Conclusion:
So there you have it – your comprehensive guide on how to make Pita Bread at home! We’ve walked through each step, from activating your yeast to achieving that perfect puffy pocket. This recipe is incredibly rewarding, offering a taste and texture that store-bought versions simply can’t match. Imagin extracte serving your loved ones fresh, warm pita bread, baked with your own hands!
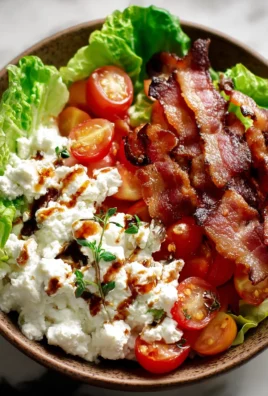
These delightful pita breads are incredibly versatile. They’re fantastic served warm alongside your favorite Mediterranean dishes like hummus, baba ghanoush, or falafel. Use them to create delicious wraps filled with grilled chicken, fresh vegetables, and a creamy tzatziki sauce, or slice them open to make mini pizzas. Don’t be afraid to experiment with different flours, like adding a touch of whole wheat for a nuttier flavor, or even infusing herbs directly into the dough for an extra aromatic experience.
We encourage you to give this recipe a try. Don’t be intimidated by the process; the results are well worth the effort. Enjoy the satisfaction of creating this staple food from scratch and the delicious meals that will follow!
Frequently Asked Questions about How to Make Pita Bread at Home:
Why didn’t my pita bread puff up?
Several factors can contribute to a lack of puff. Ensure your oven is hot enough – a very hot oven is crucial for that instant steam expansion. Also, make sure your dough is properly proofed; under-proofed dough won’t have enough gas to expand. Finally, handling the dough gently when shaping and avoiding overworking it can help maintain those air pockets.
Can I make pita bread without a baking stone?
Absolutely! While a baking stone provides excellent heat retention, you can achieve great results using a preheated baking sheet or even directly on the rack of a very hot oven. Just ensure whatever surface you use is thoroughly heated before placing the pita bread on it.
Easy Homemade Pita Bread Recipe – Soft & Fluffy
A simple recipe for making soft, fluffy, and perfectly puffed homemade pita bread.
Ingredients
-
2 cups All-purpose Flour, plus an additional 1/2 cup for dusting
-
1/2 cup Whole Wheat Flour
-
1 tablespoon Granulated Sugar
-
1 teaspoon Fine Sea Salt
-
1 tablespoon Extra Virgin Olive Oil
-
2 teaspoons Active Dry Yeast
-
1 cup Warm Water
Instructions
-
Step 1
Activate the yeast by combining 1 cup warm water and 1 tablespoon sugar in a small bowl. Sprinkle 2 teaspoons active dry yeast over the surface and let sit undisturbed for 5-10 minutes until foamy and bubbly. -
Step 2
In a large mixing bowl, whisk together 2 cups all-purpose flour, 1/2 cup whole wheat flour, and 1 teaspoon salt. Create a well in the center and pour in the activated yeast mixture and 1 tablespoon olive oil. Mix until a shaggy dough forms. -
Step 3
Turn the dough onto a lightly floured surface and knead for 8-10 minutes until smooth, elastic, and springs back when poked. Add a little flour if too sticky. -
Step 4
Place the kneaded dough in a lightly oiled bowl, turning to coat. Cover tightly and let rise in a warm place for 1 to 1.5 hours, or until doubled in size. -
Step 5
Punch down the dough, divide into 6-8 equal portions, and roll into balls. Cover and let rest for 10-15 minutes. Roll each ball into a thin circle (about 1/4 inch thick). -
Step 6
Preheat oven to 475-500°F (245-260°C), ideally with a pizza stone or baking steel. Carefully transfer 1-2 pitas to the hot surface. Bake for 2-4 minutes until puffed, then flip and bake for another 1-2 minutes until lightly golden. Cover immediately with a kitchen towel to keep soft.
Important Information
Nutrition Facts (Per Serving)
It is important to consider this information as approximate and not to use it as definitive health advice.
Allergy Information
Please check ingredients for potential allergens and consult a health professional if in doubt.


Leave a Comment