

Homemade Fruit Leather Recipe. Remember those bright, chewy strips of fruity goodness from your childhood? That’s exactly the nostalgic magic we’re going to recreate today with this incredibly simple homemade fruit leather recipe. There’s something utterly satisfying about transforming fresh, vibrant fruit into a concentrated burst of flavor that you can pull apart and savor. It’s the perfect way to use up ripe produce, especially when it’s at its peak sweetness, and the results are so much more delightful than anything store-bought. What truly makes this special is the pure, unadulterated taste of fruit, with no artificial flavors or excessive sugars. Plus, it’s a fantastic healthy snack option for both kids and adults alike, making it a truly rewarding culinary adventure.

Homemade Fruit Leather Recipe
Making your own fruit leather at home is a wonderfully rewarding and surprisingly simple process. It’s a fantastic way to preserve fresh fruit, avoid unnecessary preservatives and artificial colors often found in store-bought versions, and create a healthy, delicious snack that everyone will love. Imagin extracte vibrant, chewy strips bursting with the natural sweetness of your favorite fruits – that’s the magic of homemade fruit leather! This recipe is incredibly versatile, allowing you to experiment with a wide array of fruits, from classic strawberries and apples to more exotic mangoes and berries. Plus, it’s a fun activity to do with kids, teaching them about healthy eating and the joy of creating something from scratch. Get ready to impress yourself and your family with this delightful treat!
Ingredients:
Preparing Your Fruit
The first step in creating fantastic fruit leather is choosing and preparing your fruit. For this recipe, you’ll need approximately 2 cups of chopped fruit. I highly recommend using ripe, in-season fruits for the best flavor and natural sweetness. This will also help you reduce the amount of added sugar.
Consider combinations! While a single fruit like strawberries or peaches makes a wonderfully pure flavor, don’t be afraid to mix and match. A blend of strawberries and peaches, or mango and raspberry, can create truly unique and delicious taste sensations. If you’re using fruits that are naturally tart, like raspberries or cranberries, you might want to lean towards the higher end of the sugar adjustment. Conversely, if you’re using very sweet fruits like ripe mangoes or very ripe peaches, you might be able to get away with a little less sugar, or even none at all if you prefer a less sweet treat.
Once you’ve chosen your fruit, it’s time to chop it up. If you’re using berries, a simple rinse will suffice. For fruits like peaches or apples, you’ll want to remove the pits or cores. Don’t worry about making the pieces perfectly uniform; everything will be pureed later. The goal here is simply to get the fruit ready for cooking.
Cooking and Pureeing the Fruit
Now that your fruit is prepped, it’s time to start cooking it down. This process softens the fruit, making it easier to puree, and helps to reduce some of its water content, which is crucial for achieving the right chewy texture in your fruit leather.
Step 1: Cook the Fruit
In a medium saucepan, combine your chopped fruit with the white sugar and lemon juice. The lemon juice is a secret weapon here! It not only adds a bright, fresh flavor that complements most fruits beautifully, but it also acts as a natural preservative, helping your fruit leather last longer. Stir everything together. Place the saucepan over medium heat. Bring the mixture to a gentle simmer, stirring occasionally. You’ll want to cook the fruit until it begin extracts to soften and break down. This typically takes about 10-15 minutes, depending on the type of fruit you’re using. If you’re using firmer fruits like apples, it might take a little longer. If you see a lot of liquid releasing from the fruit, that’s perfectly normal and a good sign that it’s cooking down.
Step 2: Cool and Blend
Once the fruit has softened and is easily mashed with a spoon, remove the saucepan from the heat. Allow the fruit mixture to cool down slightly. This is important before you attempt to blend it, especially if you’re using a blender, as hot liquids can expand and create pressure. Once it has cooled enough to handle, carefully transfer the cooked fruit mixture to a blender or food processor. You can also use an immersion blender directly in the saucepan if you prefer. Blend the fruit until it is completely smooth and pureed. There should be no chunks remaining. If the mixture seems too thick to blend easily, you can add a tablespoon or two of water, but try to keep the liquid content as low as possible at this stage.
Drying and Finishing Your Fruit Leather
This is where the magic truly happens, transforming your vibrant fruit puree into delicious, chewy fruit leather. Patience is key in this phase!
Step 3: Prepare for Drying
Preheat your oven to its lowest possible temperature, typically around 170°F (75°C). If your oven doesn’t go that low, you can also use a dehydrator. Line a baking sheet with parchment paper or a silicone baking mat. Make sure the lining extends slightly up the sides of the baking sheet. This will help prevent the fruit leather from sticking and make it easier to peel off later.
Step 4: Spread the Puree
Pour the fruit puree onto the prepared baking sheet. Using an offset spatula or the back of a spoon, spread the puree evenly into a thin layer. Aim for a thickness of about ¼ inch. Try to get the layer as uniform as possible, as this will ensure even drying. A thinner layer will result in a crispier fruit leather, while a slightly thicker layer will yield a chewier texture. You want to cover as much of the baking sheet as you can without the puree becoming too thin in any one spot.
Step 5: Bake and Monitor
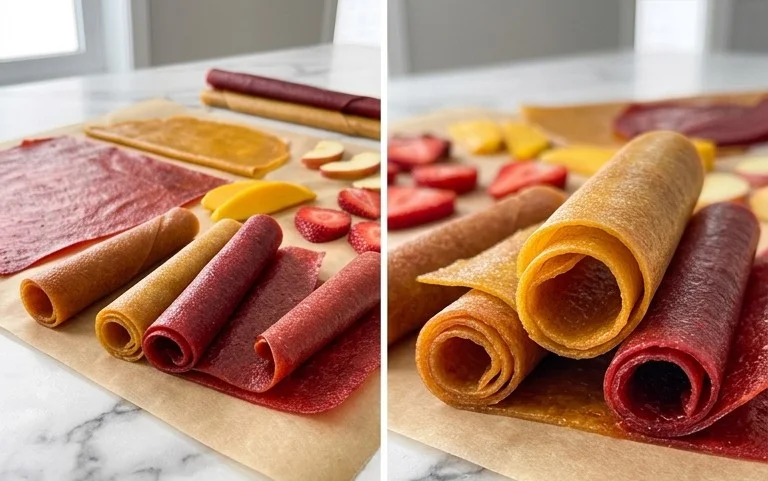
Carefully place the baking sheet in the preheated oven. Bake for 4-6 hours, or until the fruit leather is no longer sticky to the touch and is pliable. The exact drying time will vary depending on your oven, the thickness of your fruit leather, and the moisture content of your fruit. You’ll want to check on it periodically, especially after the first 3 hours. If you notice some spots drying faster than others, you can gently rotate the baking sheet. The fruit leather is ready when it can be peeled away from the parchment paper cleanly and feels leathery, not wet or gummy.
Once it’s done, carefully remove the baking sheet from the oven. Allow the fruit leather to cool completely on the baking sheet. This is crucial because it will continue to firm up as it cools.
Storing Your Homemade Fruit Leather
Once your fruit leather has completely cooled, it’s time to cut it into manageable portions. You can cut it into strips, squares, or any shape you desire. Use a sharp knife or a pizza cutter for easy slicing.
To store your homemade fruit leather, wrap individual pieces tightly in plastic wrap or parchment paper. You can then store them in an airtight container. Properly stored fruit leather can last for several weeks at room temperature, or for even longer if stored in the refrigerator. Enjoy this delightful, homemade treat anytime you crave a burst of fruity goodness!
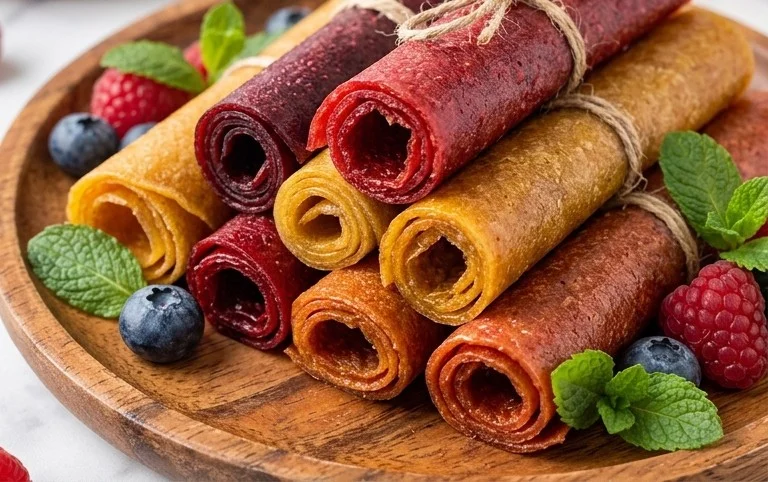
Conclusion:
Making your own homemade fruit leather is a truly rewarding experience! It’s a fantastic way to preserve the vibrant flavors of seasonal fruits, reduce food waste, and create a healthier alternative to store-bought snacks. The process is surprisingly simple, yielding delicious, chewy strips bursting with natural sweetness and goodness. This recipe is a winner because it’s customizable, budget-friendly, and offers a fun, hands-on activity for the whole family. Plus, the satisfaction of pulling your perfectly set fruit leather from the oven is unparalleled!
Enjoy your homemade fruit leather straight from the roll, cut into fun shapes, or even chopped and sprinkled over yogurt or ice cream. It’s a wonderful addition to lunchboxes, trail mix, or just a delightful treat for any time of day. Don’t be afraid to experiment with different fruit combinations; berries, apples, peaches, and even tropical fruits like mango and pineapple all work beautifully. This homemade fruit leather recipe is your gateway to endless fruity possibilities!
Frequently Asked Questions:
How long does homemade fruit leather last?
When stored properly in an airtight container at room temperature, your homemade fruit leather can last for 1-2 weeks. For longer storage, you can refrigerate it for up to a month, or even freeze it for several months.
Can I make fruit leather without a dehydrator?
Absolutely! As demonstrated in this recipe, your oven on its lowest setting is a perfectly effective tool for making delicious fruit leather. Just be sure to monitor it closely to prevent burning.
My fruit leather is too sticky. What went wrong?
A sticky texture often indicates that the fruit leather wasn’t cooked long enough. Ensure the mixture is thick and leathery before removing it from the oven. You can test this by touching a small portion; it should feel dry and slightly firm.
Homemade Fruit Leather
A simple and delicious recipe for homemade fruit leather using fresh fruit and a touch of sweetness.
Ingredients
-
2 cups fruit, chopped
-
3 tbsp white sugar
-
½ whole lemon, just the juice
-
1/4 cup water
-
1 tsp vanilla extract
Instructions
-
Step 1
Combine the chopped fruit, white sugar, lemon juice, and water in a saucepan. -
Step 2
Cook over medium heat, stirring occasionally, until the fruit has broken down and the mixture has thickened, about 10-15 minutes. -
Step 3
Stir in the vanilla extract. -
Step 4
Puree the mixture using an immersion blender or transfer to a regular blender until smooth. -
Step 5
Pour the puree onto a baking sheet lined with parchment paper, spreading it thinly and evenly. -
Step 6
Bake in a preheated oven at 170°F (77°C) for 3-5 hours, or until the fruit leather is no longer sticky and can be peeled from the parchment paper. -
Step 7
Let cool completely before cutting into strips.
Important Information
Nutrition Facts (Per Serving)
It is important to consider this information as approximate and not to use it as definitive health advice.
Allergy Information
Please check ingredients for potential allergens and consult a health professional if in doubt.



Leave a Comment