
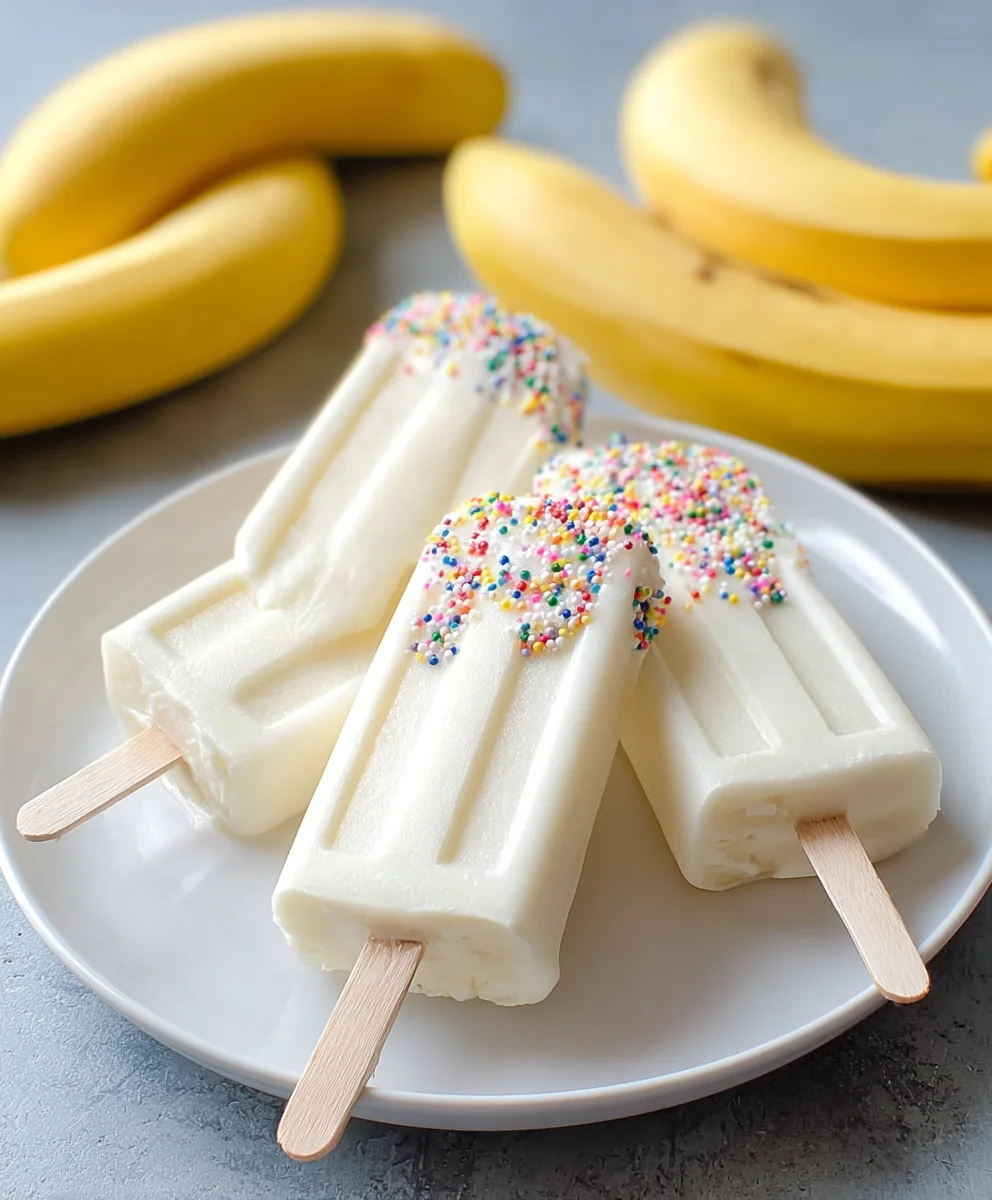
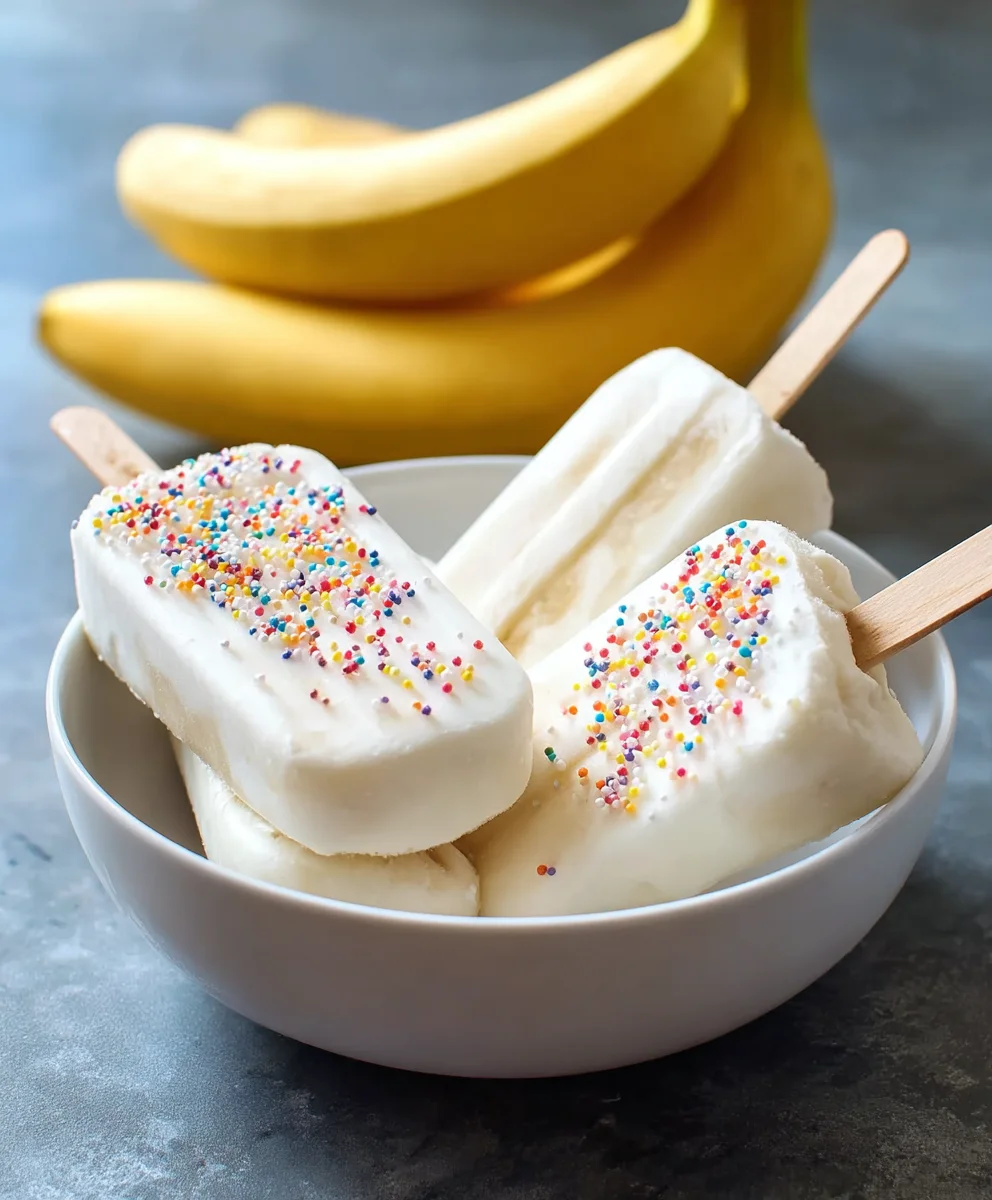
Frozen Banana Yogurt Pops are the ultimate summer treat, and for good reason! They’re incredibly simple to make, ridiculously refreshing, and a fantastic way to satisfy that sweet craving without any guilt. Imagin extracte biting into a creamy, cool pop that tastes like a decadent dessert but is packed with the goodness of fruit and yogurt. That’s the magic of these delightful Frozen Banana Yogurt Pops. They’re a crowd-pleaser for all ages, from little ones who love a fruity snack to adults seeking a healthy indulgence after a long day. What truly sets them apart is their customizable nature; you can play with different yogurt flavors, add a swirl of honey, or even sprinkle in some chia seeds for an extra nutritional boost. The natural sweetness of the bananas combined with the tangy creaminess of yogurt creates a perfectly balanced flavor profile that’s both comforting and invigorating, making these Frozen Banana Yogurt Pops an absolute must-try when the temperature rises.

Ingredients:
- 3 ripe bananas, peeled and cut in half crosswise
- 3/4 cup vanilla yogurt (or your favorite flavor, like strawberry or Greek yogurt for extra creaminess)
- Colorful sprinkles, chopped nuts, or mini chocolate chips for decorating (optional)
- 6 popsicle sticks
Preparing the Bananas for Freezing
Step 1: Get Your Bananas Ready
The first step to making these delightful Frozen Banana Yogurt Pops is to prepare your bananas. We’re going to start with three ripe bananas. You know they’re ripe when they have plenty of brown spots; this means they’ll be wonderfully sweet and creamy, perfect for freezing. Take your bananas and peel them. Once peeled, you’ll want to cut each banana in half. These halves will serve as the base for our pops. This size is ideal for a satisfying treat without being too large. If you’re using extra-large bananas, you might even consider cutting them into thirds, but halves generally work best for even freezing and easy handling. Ensure your cuts are relatively clean so they sit nicely on the popsicle stick later.
Step 2: Adding the Yogurt Coating
Now it’s time to coat those banana halves. Grab your vanilla yogurt – or whatever flavor tickles your fancy! For this recipe, 3/4 cup of yogurt should be sufficient to coat all the banana pieces. You have a couple of options here for applying the yogurt. You can carefully spoon the yogurt over each banana half, making sure to get an even coating all the way around. Alternatively, and often a bit less messy, you can place the yogurt in a small bowl and gently roll each banana half in the yogurt until it’s well covered. Don’t worry if it’s not perfectly smooth; a little texture is nice. If you want a thicker coating, you can dip them twice. For those who love a firmer yogurt texture, you might want to chill the yogurt slightly before using it, as this can help it adhere better and freeze more solidly.
Assembling and Decorating Your Pops
Step 3: Inserting the Popsicle Sticks
With your yogurt-coated banana halves ready, it’s time to add the structure that will turn them into pops! Take your six popsicle sticks. Carefully insert one popsicle stick into the cut end of each banana half. Push it in about halfway, ensuring it’s firm enough to hold the banana without it slipping out once frozen. You want the stick to be securely embedded in the banana flesh. If the yogurt coating is thick, you might need to gently wiggle the stick to get it in place. This step is crucial for easy handling once these frozen treats are ready to be enjoyed. If you’re worried about the sticks becoming loose, you can even freeze the yogurt-coated bananas for about 30 minutes before inserting the sticks; this will firm up the yogurt slightly, making insertion easier and more stable.
Step 4: Applying Your Favorite Toppings
This is where you get to unleash your creativity and personalize your Frozen Banana Yogurt Pops! If you’ve opted for toppings, now is the time to add them. Have your colorful sprinkles, chopped nuts, or mini chocolate chips ready. Gently roll or press the yogurt-coated side of each banana onto your chosen toppings. For sprinkles, you can simply sprinkle them over the yogurt. For chopped nuts or chocolate chips, you might want to press them gently into the yogurt to ensure they stick. This step is best done while the yogurt is still soft and pliable. If you want a mix of toppings, you can add them to different pops for variety. Don’t be afraid to mix and match; the more colorful and interesting, the better!
Freezing and Enjoying
Step 5: The Freezing Process
Once your beautiful Frozen Banana Yogurt Pops are assembled and decorated, it’s time for them to achieve their ultimate frozen destiny. You’ll need a baking sheet lined with parchment paper or wax paper. This lining is important because it prevents the pops from sticking to the baking sheet as they freeze, making them easy to remove later. Carefully place each decorated banana pop onto the prepared baking sheet, ensuring they have a little space between them. This prevents them from freezing together into one giant banana blob! Now, carefully place the baking sheet into your freezer. Allow them to freeze for at least 2 to 3 hours, or until they are completely solid. The longer they freeze, the firmer they will become. For best results, aim for a full freeze.
Step 6: Storing Your Frozen Delights
After your Frozen Banana Yogurt Pops have achieved that perfect, solid state, you’ll want to store them properly so you can enjoy them whenever a craving strikes. Once they are fully frozen, you can transfer them from the baking sheet into an airtight container or a freezer-safe resealable bag. This helps to prevent freezer burn and keeps them fresh. If you’re stacking them, you can place a layer of parchment paper between each layer to prevent them from sticking to each other. They will keep well in the freezer for several weeks, making them a fantastic make-ahead treat for hot days or after-school snacks. When you’re ready to enjoy one, simply take it out of the freezer and let it sit for just a minute or two at room temperature to soften slightly before taking a delicious bite.
Conclusion:
And there you have it – the simplest, most refreshing way to enjoy a healthy treat with these Frozen Banana Yogurt Pops! We’ve journeyed through creating these delightful frozen delights, and I truly hope you find them as satisfying to make as they are to eat. These pops are perfect for a quick breakfast on-the-go, a post-workout recovery snack, or a guilt-free dessert on a warm afternoon. Feel free to get creative with your toppings – a drizzle of honey, a sprinkle of granola, or some chocolate chips can elevate your Frozen Banana Yogurt Pops even further. Don’t be afraid to experiment with different yogurt flavors or add in a handful of berries for extra bursts of flavor and nutrients. The beauty of this recipe lies in its adaptability, so make it your own! I encourage you to whip up a batch today and experience the pure joy of these homemade frozen wonders.
Frequently Asked Questions:
Q1: Can I make these Frozen Banana Yogurt Pops without a blender?
Absolutely! While a blender makes it easiest to get a smooth consistency, you can achieve a similar result by very finely mashing the bananas with a fork until they are as smooth as possible. Then, gently stir in your yogurt and any other desired additions. The texture might be slightly chunkier, but the taste will still be delicious!
Q2: How long do these Frozen Banana Yogurt Pops typically last in the freezer?
When stored properly in an airtight container or freezer bag, these Frozen Banana Yogurt Pops can last for up to 1-2 weeks. Beyond that, while they will still be safe to eat, the texture might become a bit icier and less creamy.
Easy Frozen Banana Yogurt Popsicles – Healthy Treat
A simple and healthy frozen treat made with ripe bananas and yogurt, perfect for a hot day.
Ingredients
-
3 ripe bananas, peeled and cut in half
-
3/4 cup vanilla yogurt
-
Colorful sprinkles, for decorating (optional)
-
Chopped nuts, for decorating (optional)
-
Mini chocolate chips, for decorating (optional)
-
6 popsicle sticks
Instructions
-
Step 1
Peel three ripe bananas and cut each in half crosswise. -
Step 2
Coat each banana half with 3/4 cup vanilla yogurt. You can spoon it on or roll the bananas in a small bowl of yogurt. -
Step 3
Insert one popsicle stick into the cut end of each yogurt-coated banana half, pushing it in about halfway. -
Step 4
If using toppings, gently roll or press the yogurt-coated side of each banana onto your chosen sprinkles, nuts, or mini chocolate chips. -
Step 5
Place the decorated banana pops on a baking sheet lined with parchment paper and freeze for at least 2 to 3 hours, or until completely solid. -
Step 6
Once frozen solid, transfer the popsicles to an airtight container or freezer-safe resealable bag for storage.
Important Information
Nutrition Facts (Per Serving)
It is important to consider this information as approximate and not to use it as definitive health advice.
Allergy Information
Please check ingredients for potential allergens and consult a health professional if in doubt.

Leave a Comment