
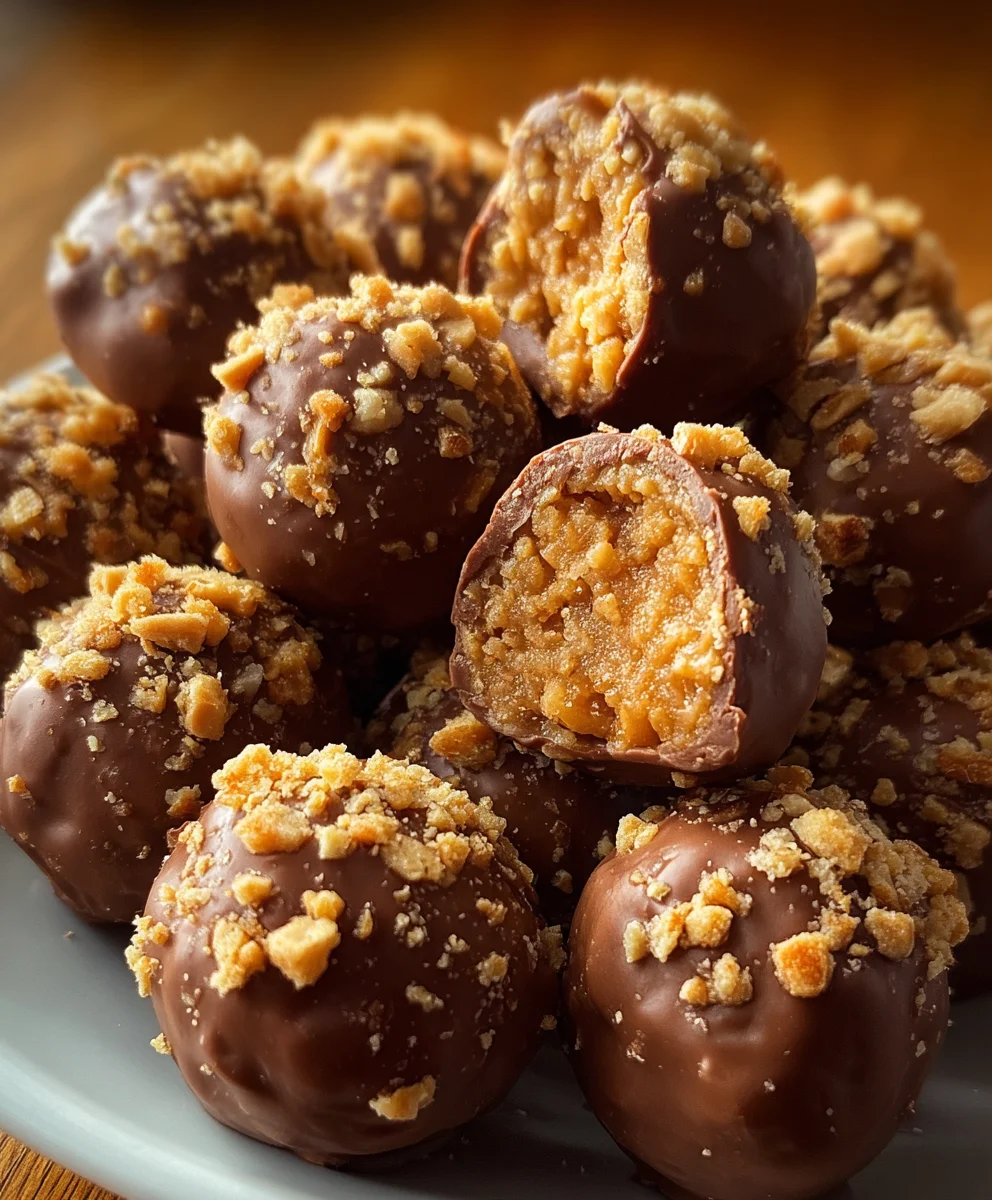
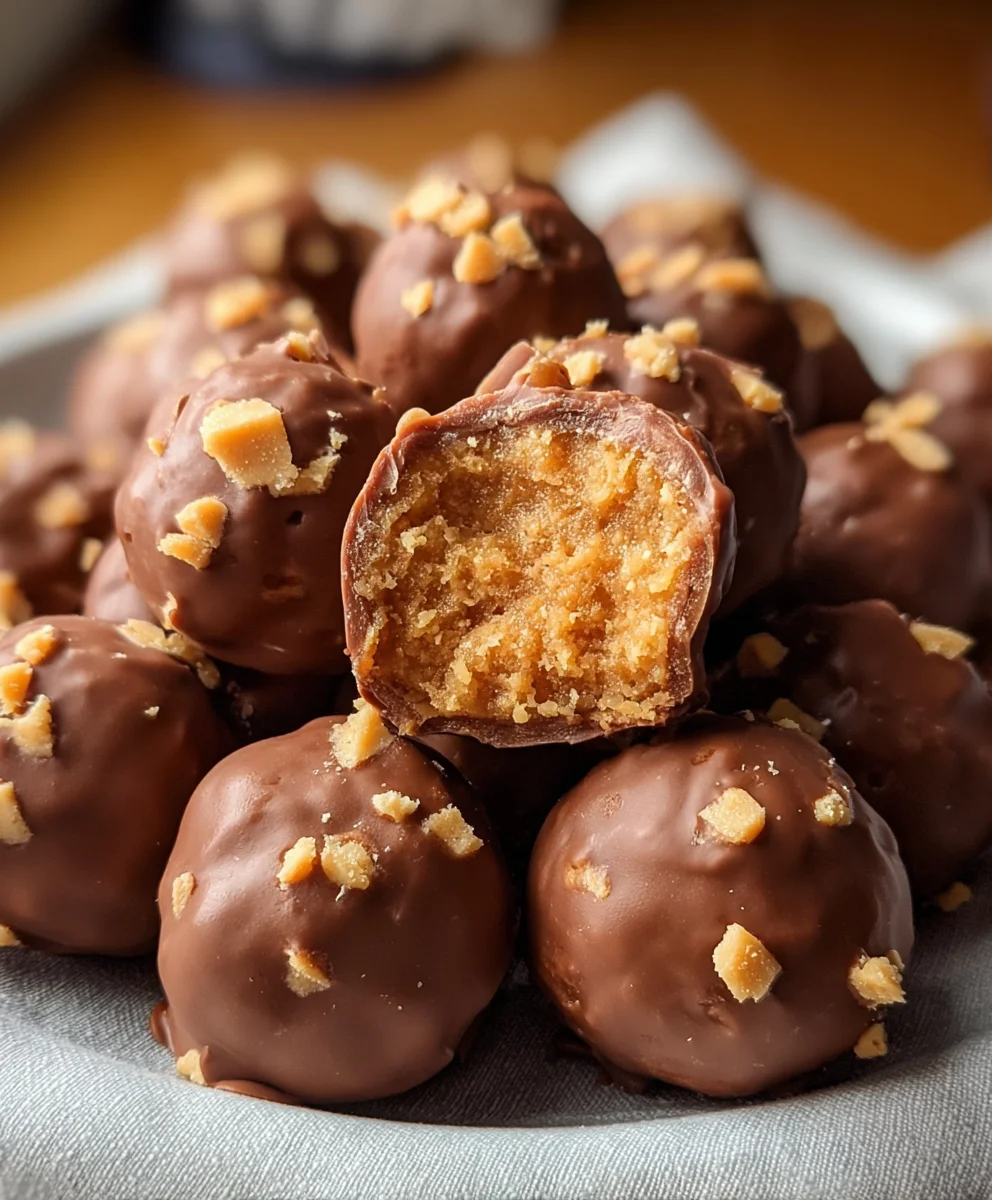
Butterfinger Balls are more than just a treat; they’re a delightful explosion of crunchy, chocolatey goodness that brings out the inner child in all of us. Who can resist that iconic crispety, crunchety Butterfinger flavor, now miniaturized and made even more irresistible? These little spheres of joy are the perfect answer to your sweet cravings, offering a satisfying texture and a taste that’s both nostalgic and utterly addictive. They’re the ultimate no-bake dessert that transforms your favorite candy bar into bite-sized wonders, perfect for parties, potlucks, or simply for indulging in a moment of pure bliss. What truly sets these Butterfinger Balls apart is their incredible simplicity and the sheer joy they bring with every single bite, making them a guaranteed crowd-pleaser.
Why You’ll Love Making and Eating These Butterfinger Balls
Get ready for a flavor sensation!

Ingredients:
- 4 tablespoons softened butter (½ stick)
- 1 teaspoon vanilla extract
- 8 ounces chocolate bark or chocolate chips
- ½ cup Butterfinger bars (crushed)
- 1 cup powdered sugar
- 1 cup peanut butter (avoid all-natural varieties)
- ¾ cup crumbs from graham crackers
- Optional garnishes: additional crushed Butterfinger bars, festive sprinkles, or coarse sea salt
Preparing the Butterfinger Balls
Step 1: Creaming the Base
The foundation of our delicious Butterfinger Balls lies in achieving a smooth and creamy base. In a medium-sized mixing bowl, add the 4 tablespoons of softened butter. Make sure your butter is truly softened, not melted. This means it should be pliable and easy to press with your finger. If it’s too cold, it will be difficult to incorporate, and if it’s too warm, it might make the mixture too greasy. To this softened butter, add the 1 cup of peanut butter. It’s crucial to use a standard peanut butter like Jif or Skippy, as the oils in all-natural varieties can separate and affect the texture of our balls, making them less cohesive and prone to falling apart. Cream these two ingredients together thoroughly. You can use an electric mixer on medium speed for about 2-3 minutes, or a sturdy spatula and some elbow grease for about 5 minutes. You’re looking for a light, fluffy mixture that’s well combined and uniform in color. Scrape down the sides of the bowl periodically to ensure everything is incorporated.
Step 2: Incorporating Sweetness and Flavor
Once your butter and peanut butter are beautifully creamed, it’s time to add the elements that will bring our Butterfinger Balls to life. First, gently fold in the 1 teaspoon of vanilla extract. This seemingly small addition plays a significant role in enhancing the overall flavor profile, adding a warm, sweet aroma and depth to the peanut butter. Next, gradually sift in the 1 cup of powdered sugar. Sifting the powdered sugar is an important step to prevent any lumps from forming, ensuring a perfectly smooth texture. Add it in two or three additions, mixing well after each addition. Continue to mix until the powdered sugar is completely incorporated into the peanut butter and butter mixture. The consistency at this stage should be thick and somewhat stiff, almost like a dough.
Step 3: Adding the Crunchy Elements
Now comes the fun part – incorporating the signature crunch that makes these treats so irresistible! Gently fold in the ½ cup of crushed Butterfinger bars. For best results, crush the Butterfinger bars into small, manageable pieces. You can do this by placing them in a resealable plastic bag and gently pounding them with a rolling pin or the bottom of a heavy pan. Avoid crushing them into a powder; you want distinct pieces for that signature Butterfinger texture. Alongside the Butterfinger, we’ll add the ¾ cup of graham cracker crumbs. These crumbs contribute a subtle sweetness and a wonderfully crumbly texture that complements the crispiness of the Butterfinger. Stir everything together until the crushed Butterfinger and graham cracker crumbs are evenly distributed throughout the peanut butter mixture. Be gentle during this mixing process to avoid overworking the dough.
Step 4: Chilling and Shaping the Balls
At this point, the mixture will be quite sticky and difficult to handle. To make shaping easier, cover the bowl tightly with plastic wrap and refrigerate for at least 30 minutes, or until firm enough to roll. Once chilled, scoop out portions of the mixture using a small cookie scoop or a tablespoon. Roll each portion between your palms to form small, uniform balls, approximately 1-inch in diameter. If the mixture starts to soften too much while you’re rolling, return the bowl to the refrigerator for a few minutes to firm up again. Place the formed balls on a baking sheet lined with parchment paper. This prevents them from sticking and makes for easy cleanup.
Step 5: The Chocolatey Coating
This is the final, decadent layer that transforms our peanut butter and Butterfinger bites into true Butterfinger Balls. In a microwave-safe bowl, melt the 8 ounces of chocolate bark or chocolate chips. If using chocolate bark, it typically melts more smoothly. If using chocolate chips, you might need to add a teaspoon of vegetable oil or shortening to help achieve a smoother consistency. Microwave in 30-second intervals, stirring well after each interval, until the chocolate is completely melted and smooth. Be careful not to overheat the chocolate, as it can seize and become grainy. Once melted, dip each chilled peanut butter ball into the melted chocolate, using a fork or a dipping tool to coat it completely. Allow any excess chocolate to drip back into the bowl. Place the chocolate-coated balls back onto the parchment-lined baking sheet. If you’re feeling festive, now is the time to add your optional garnishes! Sprinkle additional crushed Butterfinger bars, colorful festive sprinkles, or a pinch of coarse sea salt over the wet chocolate before it sets. The sea salt, in particular, offers a delightful sweet and salty contrast. Once all balls are coated and garnished, refrigerate the baking sheet for at least 15-20 minutes, or until the chocolate coating is completely firm.
Conclusion:
And there you have it! Our delightful recipe for Butterfinger Balls is ready to impress. This no-bake treat is wonderfully simple to whip up, making it perfect for last-minute cravings or a fun activity with loved ones. The irresistible combination of creamy peanut butter, sweet condensed milk, and the signature crunch of crushed Butterfinger candy bars creates a flavor explosion that’s hard to resist.
I love serving these Butterfinger Balls chilled, allowing them to firm up for the perfect texture. They make a fantastic addition to any dessert platter, cookie exchange, or just a sweet afternoon pick-me-up. For variations, feel free to experiment with other candy bars like Reese’s Cups or Snickers for a different flavor profile. You could also add a sprinkle of sea salt on top before chilling for a delightful sweet and salty contrast. Don’t be afraid to get creative! I truly hope you enjoy making and devouring these scrumptious Butterfinger Balls as much as I do. Happy baking – or in this case, no-baking!
Frequently Asked Questions:
How do I store leftover Butterfinger Balls?
To store your delicious Butterfinger Balls, simply place them in an airtight container in the refrigerator. They will stay fresh and maintain their delightful texture for up to a week. This also helps them stay firm and prevents them from becoming too soft.
Can I freeze Butterfinger Balls?
Absolutely! Butterfinger Balls freeze exceptionally well. Arrange them in a single layer on a baking sheet and freeze until solid. Then, transfer them to a freezer-safe bag or container. They can be enjoyed directly from the freezer for a chilled treat or thawed in the refrigerator for about 30 minutes before serving. Freezing is a great way to have these on hand whenever a craving strikes!
Easy Butterfinger Balls – Delicious No-Bake Treats
Indulge in these delightful no-bake Butterfinger Balls, featuring a creamy peanut butter and graham cracker base coated in rich chocolate and studded with crunchy Butterfinger pieces.
Ingredients
-
4 tablespoons softened butter (½ stick)
-
1 teaspoon vanilla extract
-
8 ounces chocolate bark or chocolate chips
-
½ cup Butterfinger bars (crushed)
-
1 cup powdered sugar
-
1 cup peanut butter (avoid all-natural varieties)
-
¾ cup crumbs from graham crackers
-
Optional garnishes: additional crushed Butterfinger bars, festive sprinkles, or coarse sea salt
Instructions
-
Step 1
In a medium bowl, cream together 4 tablespoons of softened butter and 1 cup of peanut butter until light and fluffy. -
Step 2
Gently fold in 1 teaspoon of vanilla extract, then gradually sift in 1 cup of powdered sugar, mixing until well combined and the mixture is thick. -
Step 3
Gently fold in ½ cup of crushed Butterfinger bars and ¾ cup of graham cracker crumbs until evenly distributed. -
Step 4
Cover the bowl and refrigerate for at least 30 minutes, or until firm enough to roll. Scoop and roll into 1-inch balls, placing them on a parchment-lined baking sheet. -
Step 5
Melt 8 ounces of chocolate bark or chocolate chips in the microwave, stirring every 30 seconds until smooth. Dip each chilled ball into the melted chocolate, allowing excess to drip off. -
Step 6
Place the chocolate-coated balls back onto the parchment-lined baking sheet. Immediately add optional garnishes like crushed Butterfinger, sprinkles, or sea salt before the chocolate sets. -
Step 7
Refrigerate the baking sheet for at least 15-20 minutes, or until the chocolate coating is completely firm.
Important Information
Nutrition Facts (Per Serving)
It is important to consider this information as approximate and not to use it as definitive health advice.
Allergy Information
Please check ingredients for potential allergens and consult a health professional if in doubt.

Leave a Comment