
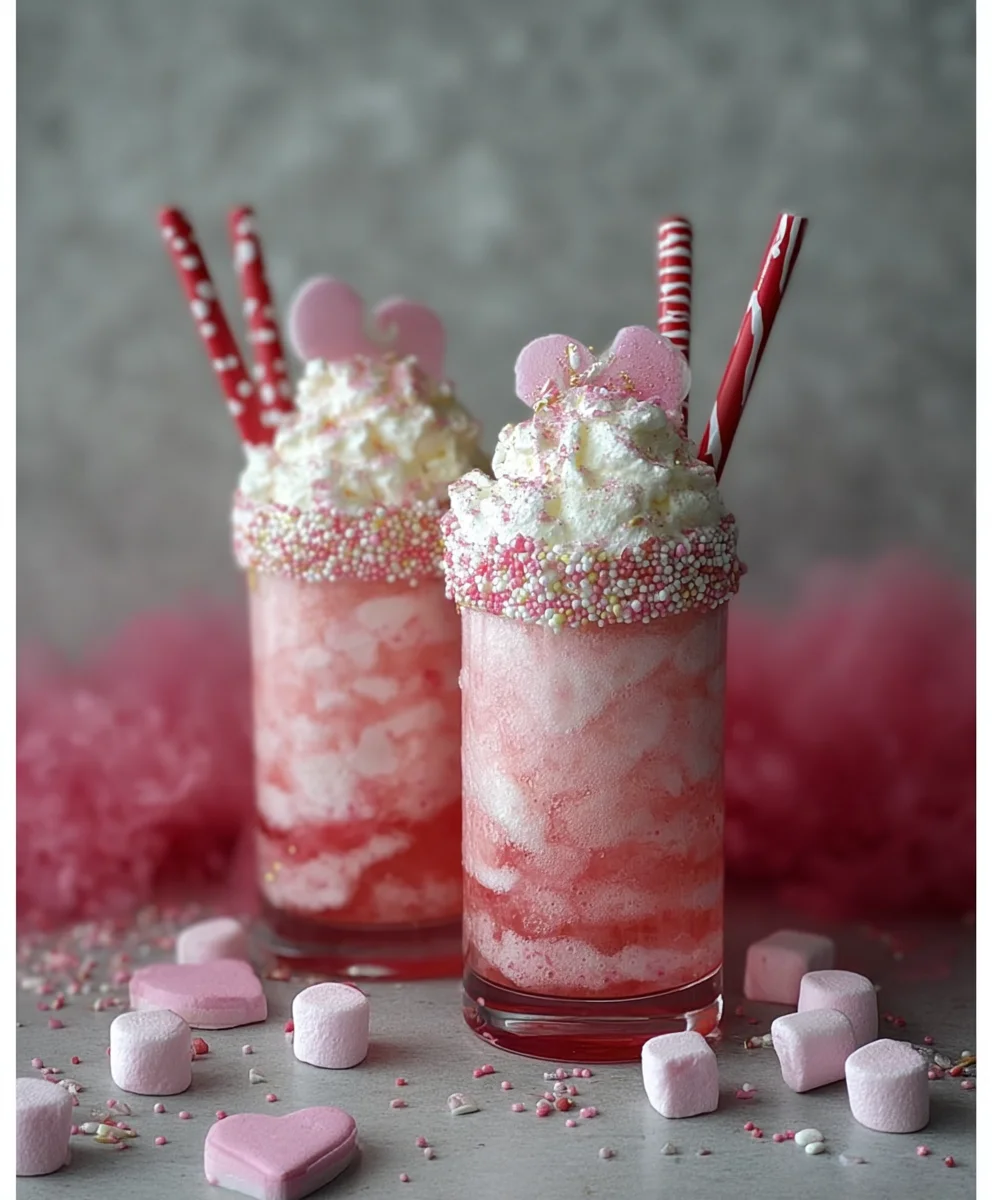
Cupid’s Potion Float! is more than just a drink; it’s a whisper of romance, a delightful indulgence designed to capture hearts and ignite smiles. Imagin extracte the sheer joy of sipping on something so visually stunning and delightfully decadent, a perfect embodiment of love and celebration. This isn’t your everyday soda; it’s an experience, a playful yet sophisticated treat that evokes a sense of whimsical magic. People adore this float because it’s a vibrant explosion of flavor and texture, combining creamy sweetness with a refreshing fizz that dances on the palate. What truly makes our Cupid’s Potion Float! special is the unexpected harmony of its components, a carefully curated blend that surprises and delights with every spoonful and sip. Get ready to fall in love with this enchanting concoction!

Ingredients:
- 1 cup fresh strawberries, hulled and quartered
- 1/2 cup fresh raspberries
- 1/4 cup granulated sugar (or to taste)
- 1 tablespoon fresh lemon juice
- 2 cups vanilla ice cream
- 1 cup chilled pink lemonade
- Whipped cream, for topping
- Fresh mint sprigs, for garnish (optional)
- Edible glitter (pink or iridescent), for garnish (optional)
Preparing the Strawberry-Raspberry Coulis
Step 1: Mashing the Fruit
First, we’ll create a vibrant, naturally sweet coulis to form the base of our Cupid’s Potion Float. In a medium bowl, combine the hulled and quartered fresh strawberries and the fresh raspberries. Using a potato masher or the back of a sturdy fork, gently mash the berries until they release their juices and form a chunky mixture. Don’t worry about making it perfectly smooth; a little texture adds to the charm of this delightful drink. The goal here is to break down the berries enough to meld their flavors and create a luscious sauce.
Step 2: Sweetening and Brightening the Coulis
Once the berries are mashed, we’ll add the sugar and lemon juice. Sprinkle the granulated sugar over the mashed berries. The amount of sugar can be adjusted based on the sweetness of your berries and your personal preference. If your berries are particularly ripe and sweet, you might opt for a little less sugar. Conversely, if they’re a bit tart, you can add a touch more. Then, add the fresh lemon juice. The lemon juice is crucial here; it doesn’t just add a hint of tangin extractess, but it also brightens the berry flavors and helps to preserve their vibrant color. Stir everything together thoroughly, ensuring the suggin extractis beginning to dissolve into the berry juices. Allow this mixture to sit for about 10-15 minutes at room temperature. This resting period allows the sugar to work its magic, drawing out more of the fruit’s natural sweetness and creating a syrupy consistency.
Assembling the Cupid’s Potion Float
Step 3: Layering the Base
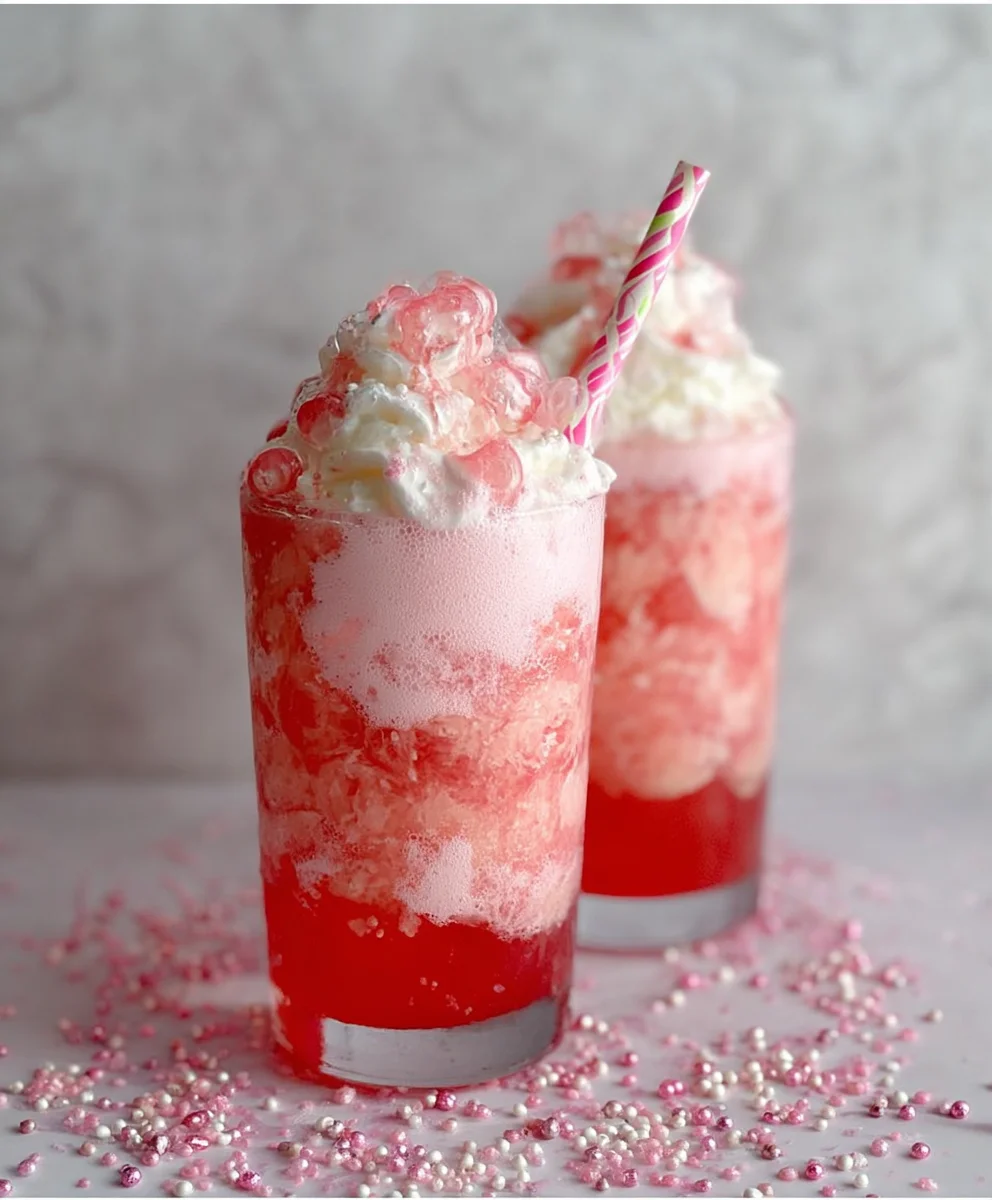
Now for the fun part – assembling our Cupid’s Potion Float! Grab two tall, clear glasses. This allows you to see the beautiful layers of your creation. Spoon about half of the prepared strawberry-raspberry coulis into the bottom of each glass. Aim to distribute it evenly, ensuring a good amount of fruit and syrup in each serving. This fruity layer will provide a burst of intense berry flavor with every sip. You can gently press down on the coulis with a spoon to create a slightly more compact base, or leave it as is for a more rustic look.
Step 4: Adding the Creamy Indulgence
Next, it’s time to add the creamy, dreamy element. Scoop generous portions of the vanilla ice cream directly on top of the fruit coulis in each glass. You should aim for about one cup of ice cream per glass, or enough to fill about two-thirds of the glass. Don’t be shy with the ice cream; it’s a key component of any good float! If you want to be fancy, you can use an ice cream scoop for perfectly round balls, or simply spoon it in. Try to create a bit of a well or indentation in the center of the ice cream; this will help when we pour in the liquid. The contrast between the cold, sweet ice cream and the slightly tart, fruity coulis is what makes this float so irresistible.
Step 5: Pouring the Pink Lemonade and Garnishing
The final step is to bring it all together with the pink lemonade and some delightful finishing touches. Slowly and carefully pour the chilled pink lemonade over the ice cream in each glass. Pour it gently down the side of the glass or directly into the indentation you created in the ice cream. You want to fill the remaining space in the glass, allowing the lemonade to fizz and mingle with the ice cream, creating that signature float effervescence. Watch as the pink lemonade creates a beautiful swirling effect with the ice cream and the coulis below. Top each float generously with whipped cream. For an extra touch of elegance and a hint of freshness, garnish with a sprig of fresh mint. If you want to add a touch of sparkle, a sprinkle of edible glitter in pink or iridescent shades will make your Cupid’s Potion Float truly magical and perfect for any romantic occasion or a fun treat. Serve immediately and enjoy the delightful blend of flavors and textures!
Conclusion:
I hope you’ve enjoyed learning how to create the delightful Cupid’s Potion Float! This recipe is perfect for adding a touch of whimsy and sweetness to any occasion, from a romantic evening to a fun afternoon with friends. The creamy vanilla ice cream swirled with bubbly strawberry soda and topped with a dollop of whipped cream and maraschino cherries creates a visually appealing and utterly delicious treat. It’s incredibly easy to assemble, making it a fantastic option for last-minute celebrations or simply when you need a little pick-me-up.
For serving, I recommend presenting your Cupid’s Potion Float in tall, clear glasses so everyone can admire the vibrant colors. You can further elevate the presentation with a sprinkle of edible glitter or a few fresh berries. This float is wonderfully versatile. If strawberry isn’t your favorite, feel free to experiment with other red or pink sodas like cherry or raspberry. For an extra decadent touch, consider adding a drizzle of chocolate syrup or a splash of flavored syrup like raspberry or vanilla. Don’t be afraid to get creative and make it your own! I encourage you to try this recipe and share the joy it brings.
Frequently Asked Questions:
What kind of ice cream works best for the Cupid’s Potion Float?
While vanilla is a classic and highly recommended choice for its creamy texture and ability to complement the soda’s flavor, you could also try a strawberry or a cheesecake-flavored ice cream for an even more intense berry experience. Ensure the ice cream is well-frozen for the best float consistency.
Can I make this a non-non-non-alcoholic alternativeic version?
Absolutely! You can non-alcoholic alternativemake a non-alcoholicolic Cupid’s Potion Float by using a sparkling raspberry lemonade or a strawberry-flavored sparkling water instead of soda. The key is to maintain that effervescence and fruity flavor profile.
Cupid’s Potion Float
A delicious and delightful non-alcoholic float with a vibrant strawberry-raspberry base, creamy vanilla ice cream, and refreshing pink lemonade, perfect for any occasion.
Ingredients
-
1 cup fresh strawberries, hulled and quartered
-
1/2 cup fresh raspberries
-
1/4 cup granulated sugar
-
1 tablespoon fresh lemon juice
-
2 cups vanilla ice cream
-
1 cup chilled pink lemonade
-
Whipped cream, for topping
-
Fresh mint sprigs, for garnish
-
Edible glitter (pink or iridescent), for garnish
Instructions
-
Step 1
In a medium bowl, combine hulled strawberries and raspberries. Gently mash with a potato masher or fork until chunky and juicy. -
Step 2
Add granulated sugar and fresh lemon juice to the mashed berries. Stir well and let sit for 10-15 minutes to allow sugar to dissolve and flavors to meld. -
Step 3
Spoon about half of the prepared strawberry-raspberry coulis into the bottom of two tall, clear glasses. -
Step 4
Scoop generous portions of vanilla ice cream on top of the coulis in each glass, filling about two-thirds of the way. Create a slight indentation in the center. -
Step 5
Slowly pour chilled pink lemonade over the ice cream in each glass. Top with whipped cream, a fresh mint sprig, and edible glitter, if desired. Serve immediately.
Important Information
Nutrition Facts (Per Serving)
It is important to consider this information as approximate and not to use it as definitive health advice.
Allergy Information
Please check ingredients for potential allergens and consult a health professional if in doubt.
Leave a Comment