
Chicken Fried Chicken. Just saying those words conjures up images of golden-brown perfection, a crispy crust giving way to impossibly tender chicken within. It’s more than just a meal; it’s comfort food royalty, a dish that speaks to the soul with every satisfying bite. But what is it about Chicken Fried Chicken that makes it such a universally beloved classic? It’s the glorious contrast of textures – that shatteringly crisp exterior harmonizing with the juicy, succulent meat. It’s the rich, creamy gravy that often accompanies it, adding another layer of decadent flavor. And it’s the sheer, unadulterated joy it brings to the table, making any ordinary day feel like a special occasion. Today, we’re diving deep into how to create this iconic dish in your own kitchen, ensuring yours is just as spectacular.

Chicken Fried Chicken
There’s something undeniably comforting about a plate piled high with crispy, golden chicken, smothered in creamy, peppery gravy. Chicken Fried Chicken is a classic for a reason, and today, we’re going to tackle it head-on to create a version that’s both incredibly satisfying and surprisingly achievable in your own kitchen. Forget those diner versions that leave you feeling heavy and greasy; this recipe focuses on creating that perfect crunch on the outside and tender, juicy chicken on the inside. We’ll walk through every step, from prepping the chicken to whipping up a luscious gravy that’s the perfect counterpoint to the fried goodness. Get ready to impress yourself and anyone lucky enough to share this meal with you.
Ingredients:
Getting Started: Prepping the Chicken
The foundation of any great Chicken Fried Chicken is, of course, the chicken itself. We’re using thin-sliced chicken breasts here, which cook quickly and evenly, ensuring they remain tender and juicy. If your chicken breasts are a bit thicker, you can pound them out to about 1/2 inch thickness between two pieces of plastic wrap using a meat mallet or the flat side of a heavy pan. This ensures consistent cooking.
The Crispy Coating
This is where the magic happens. We’re creating a seasoned flour mixture that will give our chicken that signature crispy crust. In a shallow dish or a large resealable plastic bag, combine the 2 cups of flour, baking powder, baking soda, salt, pepper, and garlic powder. The baking powder and baking soda work together to create a lighter, crispier coating. Whisk or shake well to distribute the seasonings evenly.
In a separate bowl, whisk together the buttermilk, egg, and hot sauce. The buttermilk adds a subtle tang and helps tenderize the chicken, while the egg acts as a binder. The hot sauce, surprisingly, doesn’t make the chicken spicy but rather enhances the overall flavor profile without adding noticeable heat.
Now, it’s time to coat the chicken. Take each thin chicken breast and dredge it thoroughly in the seasoned flour mixture, pressing gently to ensure it adheres. Shake off any excess flour. Then, dip the floured chicken into the buttermilk mixture, letting any excess drip off. Finally, dredge the chicken back into the seasoned flour mixture, making sure it’s completely coated. Press the flour onto the chicken to create a good, even layer. This double-dredgin extractg is key to achieving that thick, craggy, and incredibly crispy exterior. Set the coated chicken aside on a wire rack while you heat the oil.
Frying to Perfection
Heating the oil is crucial for a successful fry. In a large, heavy-bottomed skillet or Dutch oven, add enough oil to come about 1 to 1 1/2 inches up the sides of the pan. Heat the oil over medium-high heat until it reaches about 350°F (175°C). If you don’t have a thermometer, you can test the oil by dropping a small pinch of flour into it; it should sizzle immediately and float to the surface.
Carefully place a few pieces of the coated chicken into the hot oil, being careful not to overcrowd the pan. Overcrowding will lower the oil temperature and result in greasy chicken. Fry the chicken for about 3-5 minutes per side, or until golden brown and cooked through. The exact cooking time will depend on the thickness of your chicken. You want to see a beautiful, deep golden-brown crust. As each batch is done, remove the chicken from the oil and place it on a wire rack set over a baking sheet. This allows air to circulate, keeping the chicken crispy.
Making the Velvety Gravy
While the chicken is frying or resting, we’ll make the gravy. This is where we capture all those delicious browned bits from the pan and turn them into something truly special. Carefully pour out about 1/4 cup of the reserved frying oil into a separate saucepan, leaving the rest in the skillet for now. Add the 1/3 cup of flour to the saucepan with the reserved oil. Whisk constantly over medium heat for about 1-2 minutes until the flour and oil mixture (this is called a roux) turns a light golden color. This cooks out the raw flour taste.
Gradually whisk in the 2 cups of milk, a little at a time, to prevent lumps from forming. Continue to whisk and cook until the gravy thickens to your desired consistency. Season generously with salt and pepper. You can also add a pinch of garlic powder if you like. For an extra bit of flavor, you can pour any accumulated juices from the chicken resting on the wire rack into the gravy. This adds a wonderful depth of flavor.
Serving Your Masterpiece
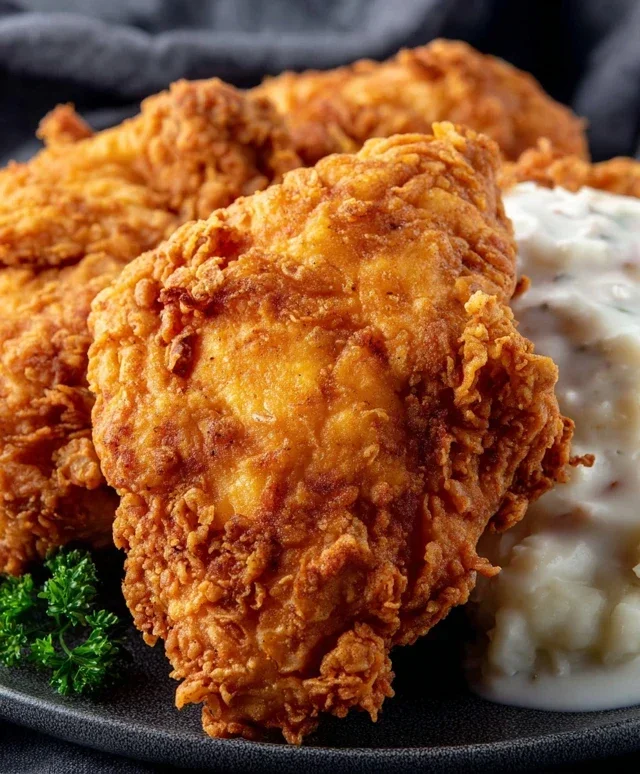
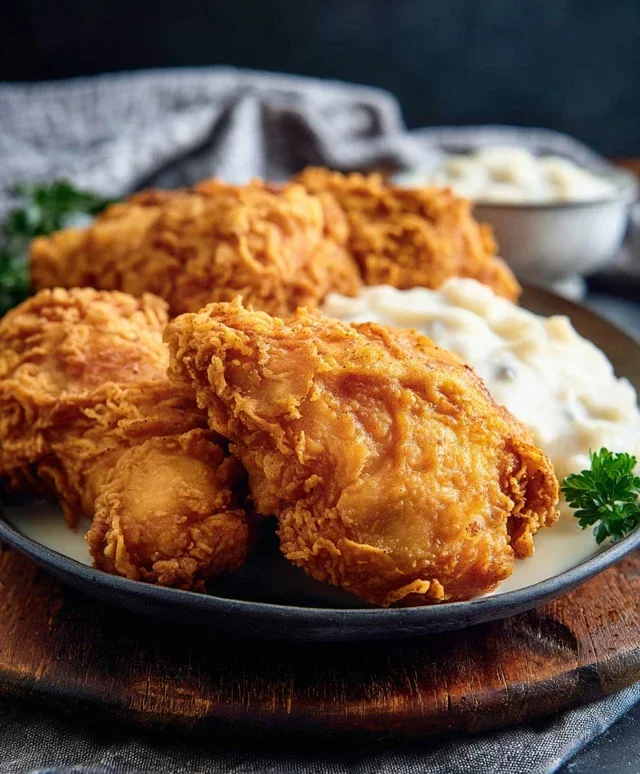
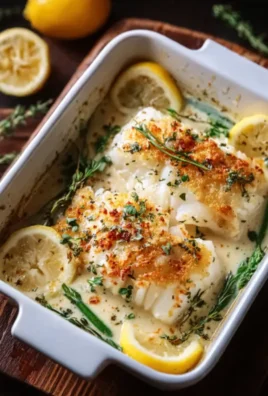
Once all the chicken is fried and the gravy is ready, it’s time to plate your glorious Chicken Fried Chicken. Place a piece or two of the crispy chicken onto a plate and generously ladle the warm, creamy gravy over the top. This dish is fantastic served with mashed potatoes, biscuits, or a simple side salad to balance out the richness. Enjoy every bite of your homemade Chicken Fried Chicken – you’ve earned it!
Conclusion:
There you have it! This Chicken Fried Chicken recipe is truly a winner, offering that perfect crispy exterior and incredibly juicy interior that makes this classic comfort food so beloved. The combination of tender chicken, a seasoned flour coating, and a rich, flavorful gravy makes it an absolute delight for any meal. It’s a fantastic dish that’s surprisingly achievable in your own kitchen and is sure to impress your family and friends. Don’t shy away from giving it a try; the reward of that first bite is absolutely worth it!
For serving, I love pairing my Chicken Fried Chicken with creamy mashed potatoes, a side of steamed green beans, or a fresh, crisp coleslaw. It’s a complete and satisfying meal that hits all the right comfort food notes. If you’re feeling adventurous, consider a spicy buttermilk brine for an extra kick, or a sprinkle of smoked paprika in your flour dredge for a deeper flavor profile. No matter how you prepare it, this recipe is a crowd-pleaser.
Frequently Asked Questions:
Can I make Chicken Fried Chicken ahead of time?
While it’s best enjoyed fresh for maximum crispiness, you can prepare some components in advance. You can cut and bread the chicken a few hours ahead and keep it refrigerated on a wire rack. However, frying just before serving is key to that perfect crunch. The gravy can also be made a day in advance and reheated gently.
What’s the secret to super crispy chicken?
The secret lies in a few key steps. Ensure your oil is at the correct temperature (around 350°F or 175°C) before frying. Don’t overcrowd the pan, as this will lower the oil temperature and result in soggy chicken. Also, letting the breaded chicken rest for a few minutes before frying can help the coating adhere better.
Chicken Fried Chicken
Crispy, golden-fried chicken breasts coated in a seasoned flour mixture, served with a creamy milk-based gravy.
Ingredients
-
6-8 thin sliced chicken breasts
-
2 cups flour
-
2 tsp baking powder
-
1 tsp baking soda
-
1 tsp salt
-
1 tsp pepper
-
1 tsp garlic powder
-
1 1/2 cup buttermilk
-
1 egg
-
1 Tbs hot sauce
-
Oil for frying
-
1/4 cup reserved oil from frying
-
1/3 cup flour
-
2 cup milk
-
Salt & pepper
Instructions
-
Step 1
In a shallow dish, whisk together 2 cups flour, baking powder, baking soda, salt, pepper, and garlic powder for the chicken coating. -
Step 2
In another shallow dish, whisk together buttermilk, egg, and hot sauce for the dredge. -
Step 3
Dip each chicken breast into the buttermilk mixture, then dredge it thoroughly in the seasoned flour mixture, ensuring it’s fully coated. Set aside on a plate. -
Step 4
Heat oil in a large skillet over medium-high heat. Fry chicken pieces for 3-5 minutes per side, until golden brown and cooked through. Drain on paper towels. -
Step 5
Reserve 1/4 cup of the frying oil in the skillet. Discard the rest. -
Step 6
Whisk 1/3 cup flour into the reserved oil over medium heat until smooth, forming a roux. Cook for 1 minute. -
Step 7
Gradually whisk in milk until smooth. Bring to a simmer, stirring constantly, until the gravy thickens. Season with salt and pepper to taste. -
Step 8
Serve the fried chicken hot, drizzled with the prepared gravy.
Important Information
Nutrition Facts (Per Serving)
It is important to consider this information as approximate and not to use it as definitive health advice.
Allergy Information
Please check ingredients for potential allergens and consult a health professional if in doubt.
Leave a Comment