
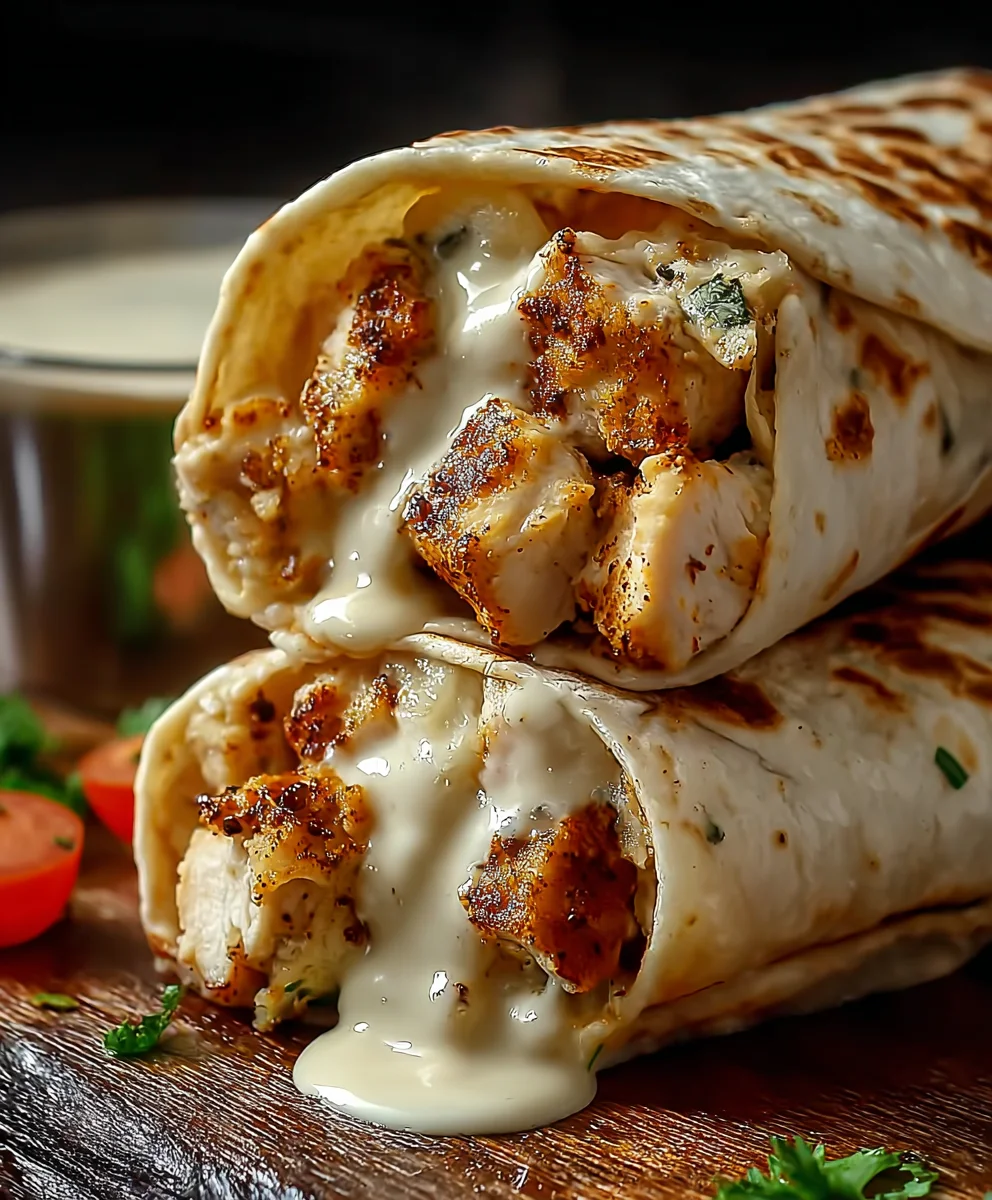
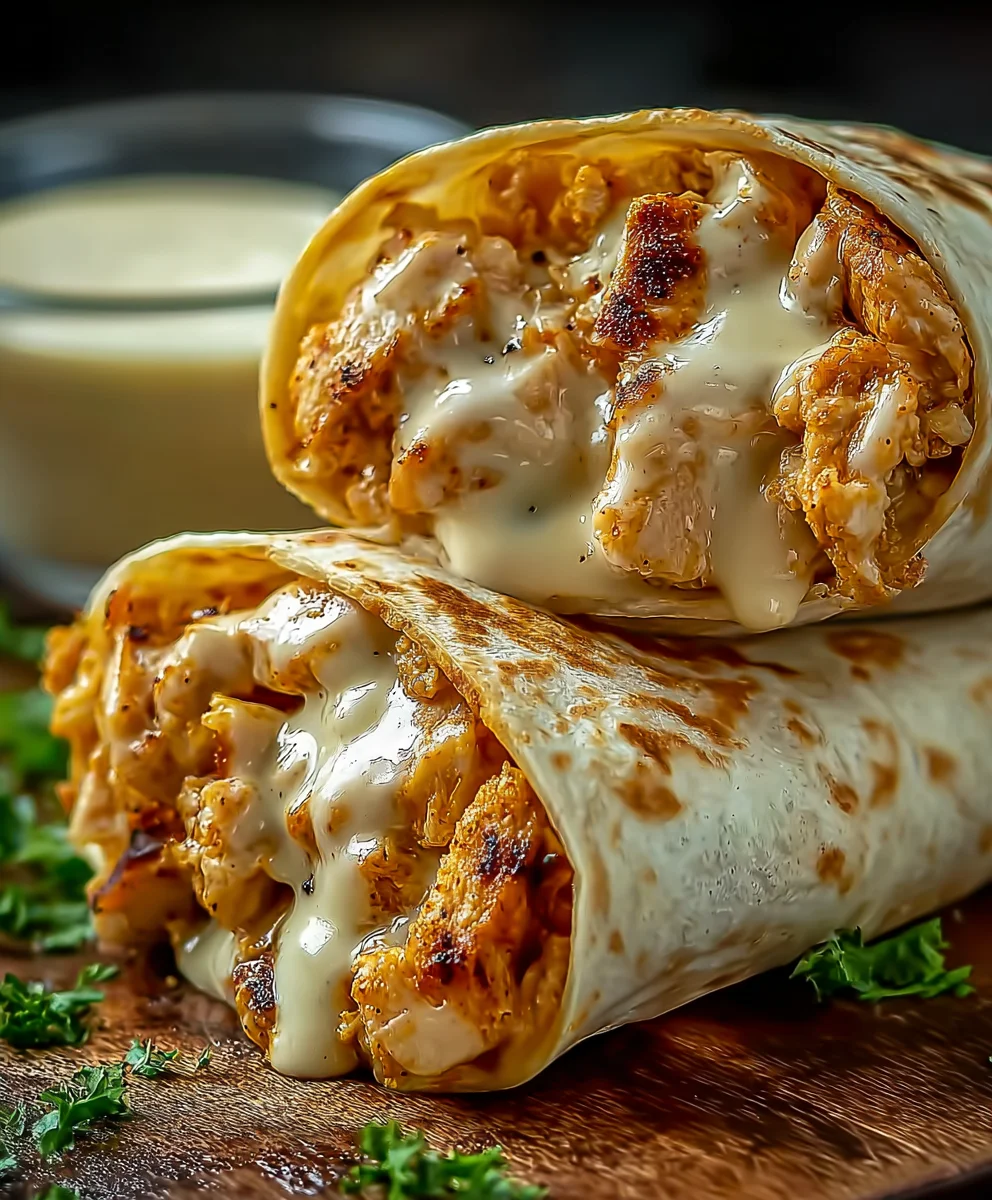
Cheesy Garlic Chicken Wraps are more than just a quick meal; they’re a culinary hug in a tortilla, a symphony of savory flavors that will have you coming back for more. Have you ever craved something that’s both comforting and incredibly satisfying, something that hits all the right notes of cheesy goodness and aromatic garlic without requiring hours in the kitchen? That’s precisely where these delightful wraps shine. People absolutely adore them for their unparalleled simplicity and the sheer explosion of taste they deliver. It’s that perfect balance – tender, juicy chicken infused with the irresistible essence of garlic, all enveloped in a gooey, melted cheese and a soft, pliable tortilla. What truly makes these Cheesy Garlic Chicken Wraps special is their versatility; they’re fantastic for a speedy weeknight dinner, a delightful packed lunch, or even a casual get-together with friends. Get ready to discover your new favorite go-to recipe!

Ingredients:
- 2 cups cooked chicken (shredded or diced)
- 1 ½ cups shredded mozzarella or cheddar cheese (or a blend of both for extra flavor!)
- ¼ cup cream cheese, softened (this is key for a creamy, bindable filling)
- 2 tbsp butter, melted (for sautéing and richness)
- 3 cloves garlic, minced (fresh garlic offers the best punch of flavor)
- ¼ cup sour cream (adds a tangy creaminess and moisture)
- 1 tsp garlic powder (enhances the garlic flavor without overdoing the fresh garlic)
- 1 tsp Italian seasoning (a blend of herbs like oregano, basil, and thyme for that classic Italian twist)
- 4 large tortillas (your vehicle for all this deliciousness)
- Salt and freshly ground black pepper, to taste (essential for bringin extractg out all the flavors)
- Fresh parsley, chopped (for garnish, optional, but adds a lovely pop of color and freshness)
Preparing the Cheesy Garlic Chicken Filling
Step 1: Sauté the Aromatics
Let’s get started by building the flavor base for our Cheesy Garlic Chicken Wraps. Grab a medium-sized skillet and place it over medium heat. Add your melted butter to the skillet. Once the butter is shimmering, add your minced fresh garlic. We only want to sauté this for about 30-60 seconds, just until it becomes fragrant and slightly golden. Be careful not to burn it, as burnt garlic can turn bitter. This quick sauté releases the delicious oils from the garlic, infusing the butter with its wonderful aroma.
Step 2: Combine the Filling Ingredients
Now that our garlic is fragrant, it’s time to bring everything else together for the filling. Add the softened cream cheese directly into the skillet with the garlic butter. Stir it around gently to allow it to start melting and incorporating with the butter and garlic. Next, add your cooked chicken to the skillet. Stir well to coat the chicken with the melting cream cheese mixture. Following that, add in the shredded mozzarella or cheddar cheese. Stir continuously until the cheese is mostly meltegin extractnd begins to create a wonderfully gooey binder for the chicken.
Step 3: Season and Add Creaminess
Once the cheese is starting to melt and bind everything together, it’s time for our seasonings and that extra touch of creaminess. Sprinkle in the garlic powder and the Italian seasoning over the chicken and cheese mixture. Add your sour cream to the skillet. The sour cream will not only add a delightful tangy note but also ensure the filling isn’t too dry and has a lovely smooth consistency. Stir everything together thoroughly, making sure all the ingredients are evenly distributed. Season generously with salt and freshly ground black pepper to your personal taste. Remember, you can always add more salt, but you can’t take it away! Taste a small bit of the filling (carefully, it’s hot!) to ensure the seasoning is just right before moving on.
Assembling and Cooking the Wraps
Step 4: Warming the Tortillas and Filling the Wraps
To make sure our tortillas are pliable and don’t tear when we roll them, we need to warm them up. You can do this one of two ways: either quickly heat them in a dry skillet over medium-low heat for about 30 seconds per side, or wrap them in a damp paper towel and microwave them for about 20-30 seconds until they are warm and flexible. Once your tortillas are warmed, lay them flat on a clean surface. Spoon a generous portion of the cheesy garlic chicken filling down the center of each tortilla, leaving a little space at the top and bottom for easier rolling. Don’t overfill, or they’ll be difficult to wrap!
Step 5: Rolling and Grilling the Wraps
Now for the satisfying part – rolling and grilling our Cheesy Garlic Chicken Wraps! To roll them, fold in the sides of the tortilla over the filling, then tightly roll it up from the bottom, tucking the filling in as you go. Once rolled, place the wraps seam-side down in the same skillet you used for the filling (you might want to wipe it clean first, or use a new one) over medium heat. You can add a tiny bit more butter to the skillet if you like, for extra crispiness. Grill the wraps for about 2-3 minutes per side, or until they are golden brown and beautifully crispy. This process not only toasts the tortilla to perfection but also ensures the cheese inside is beautifully melted and gooey. You should see a lovely golden-brown char on the tortillas, indicating they’re ready. Carefully flip them using a spatula to get an even cook on all sides.
Conclusion:
There you have it – a simple yet incredibly satisfying recipe for Cheesy Garlic Chicken Wraps! We hope you enjoyed exploring the ease and deliciousness of this versatile dish. Whether you’re looking for a quick weeknight dinner, a fun lunch option, or even a crowd-pleasing appetizer, these wraps are sure to be a hit. The combination of tender, garlicky chicken, melted cheese, and your favorite fresh toppings wrapped in a warm tortilla is simply irresistible. We encourage you to get creative and make these wraps your own!
For serving suggestions, consider pairing your Cheesy Garlic Chicken Wraps with a side of crisp salad, crunchy tortilla chips, or even some sweet potato fries for a complete and balanced meal. For variations, feel free to experiment with different cheeses like Monterey Jack or pepper jack for a spicy kick, or add in some sautéed bell peppers and onions for extra texture and flavor. Don’t be afraid to swap out the chicken for seasoned ground beef or even a vegetarian option like seasoned black beans. The possibilities are truly endless!
Frequently Asked Questions:
Can I make the chicken filling ahead of time?
Absolutely! The garlicky chicken filling for the Cheesy Garlic Chicken Wraps can be prepared a day in advance and stored in an airtight container in the refrigerator. Simply reheat it gently before assembling your wraps.
What kind of tortillas work best for these wraps?
All-purpose flour tortillas are generally the best choice for Cheesy Garlic Chicken Wraps as they are pliable and hold up well to the filling. You can also use whole wheat tortillas for a healthier option, or even large lettuce leaves for a low-carb alternative.
Cheesy Garlic Chicken Wraps – Easy & Delicious
Easy and delicious cheesy garlic chicken wraps with a creamy, flavorful filling.
Ingredients
-
2 cups cooked chicken (shredded or diced)
-
1 ½ cups shredded mozzarella or cheddar cheese
-
1/4 cup cream cheese, softened
-
2 tbsp butter, melted
-
3 cloves garlic, minced
-
1/4 cup sour cream
-
1 tsp garlic powder
-
1 tsp Italian seasoning
-
4 large tortillas
-
Salt and freshly ground black pepper, to taste
-
Fresh parsley, chopped (optional)
Instructions
-
Step 1
Sauté minced garlic in melted butter over medium heat for 30-60 seconds until fragrant. -
Step 2
Add softened cream cheese to the skillet and stir until melting. Add cooked chicken and stir to coat. -
Step 3
Add shredded cheese and stir until mostly melted and gooey. Sprinkle in garlic powder and Italian seasoning. -
Step 4
Stir in sour cream. Season with salt and pepper to taste. Mix thoroughly. -
Step 5
Warm tortillas in a skillet or microwave until pliable. Spoon filling down the center of each tortilla. -
Step 6
Fold in the sides of the tortilla, then tightly roll it up from the bottom. -
Step 7
Grill the wraps seam-side down in a skillet over medium heat for 2-3 minutes per side, or until golden brown and crispy.
Important Information
Nutrition Facts (Per Serving)
It is important to consider this information as approximate and not to use it as definitive health advice.
Allergy Information
Please check ingredients for potential allergens and consult a health professional if in doubt.
Leave a Comment