
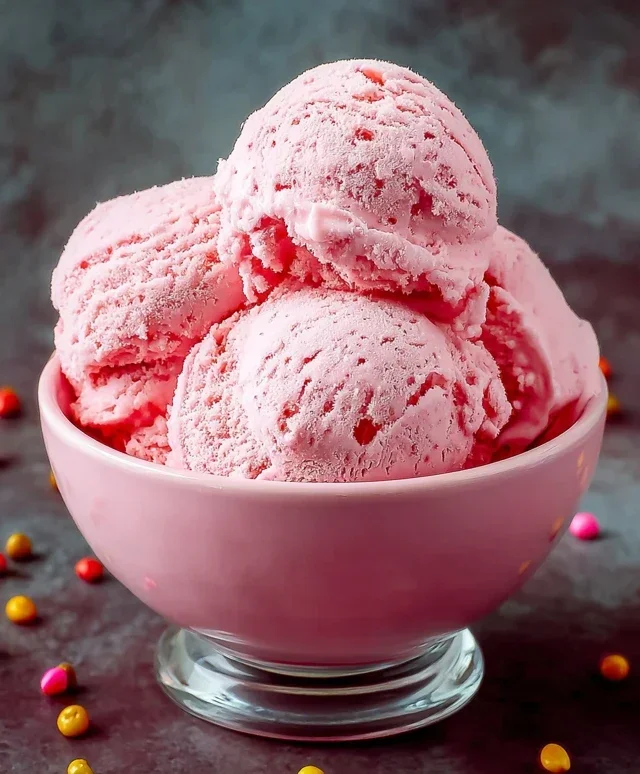
Bubblegum Ice Cream is more than just a frozen treat; it’s a delightful trip down memory lane, a vibrant swirl of childhood nostalgia captured in a creamy, dreamy dessert. Remember those carefree days, the taste of sweet, sugary bubblegum on your tongue, the sheer joy of blowing the biggest bubble you could? That’s precisely the feeling we’re bottling up in this recipe. What makes bubblegum ice cream so utterly irresistible? It’s that uncanny ability to transport us back to simpler times, where the biggest decision of the day was which flavor of gum to chew. It’s the playful pink hue, the bursts of familiar sweetness, and the sheer fun of it all. This isn’t your average vanilla; this is an experience, a celebration of pure, unadulterated joy. Get ready to whip up a batch that will have everyone smiling, from the youngest to the youngest at heart, proving that sometimes, the sweetest memories are the ones you can taste.

Bubblegum Ice Cream
Get ready for a nostalgic trip back to childhood with this vibrant and delightfully sweet Bubblegum Ice Cream recipe! It’s the perfect treat for a summer day, a fun party, or whenever you need a burst of playful flavor. This recipe is surprisingly simple to make at home, and the result is a creamy, dreamy ice cream that tastes just like your favorite bubblegum. We’ll be using real ingredients to achieve that signature flavor and fun, colorful appearance. So, let’s dive in and create some frozen magic!
Ingredients:
Getting Started: The Base
The foundation of any great ice cream is a well-balanced custard base. For this bubblegum delight, we’re keeping things straightforward and focusing on maximizing that fun flavor. The heavy cream and whole milk will provide that luxurious creaminess, while the granulated sugar balances the sweetness and also helps with the ice cream’s texture, preventing it from becoming too icy. Don’t skip the kosher salt; it might seem counterintuitive in a sweet recipe, but a tiny pinch actually enhances all the other flavors and prevents the ice cream from tasting flat.
Crafting the Flavor and Color
This is where the magic truly happens! The bubblegum flavoring is key to achieving that iconic taste. I recommend using a good quality bubblegum extract for the best results. You can adjust the amount slightly depending on your preference and the potency of your flavoring. The vanilla extract acts as a wonderful complement, adding depth and rounding out the bubblegum notes. And of course, for that quintessential bubblegum look, we’ll be adding food coloring. Start with a few drops of pink or red food coloring and add more until you achieve your desired shade of vibrant bubblegum pink. Remember, you can always add more, but you can’t take it away, so start conservatively.
Incorporating the Fun Bits
What’s bubblegum without the sprinkles? We’ll be adding some confetti sprinkles to the base for little pops of color and texture throughout the ice cream. Save the rest of the sprinkles and the gumballs for the final decorating stage – they’re essential for that complete bubblegum experience.
Step-by-Step Ice Cream Making
Here’s how we’ll bring it all together:
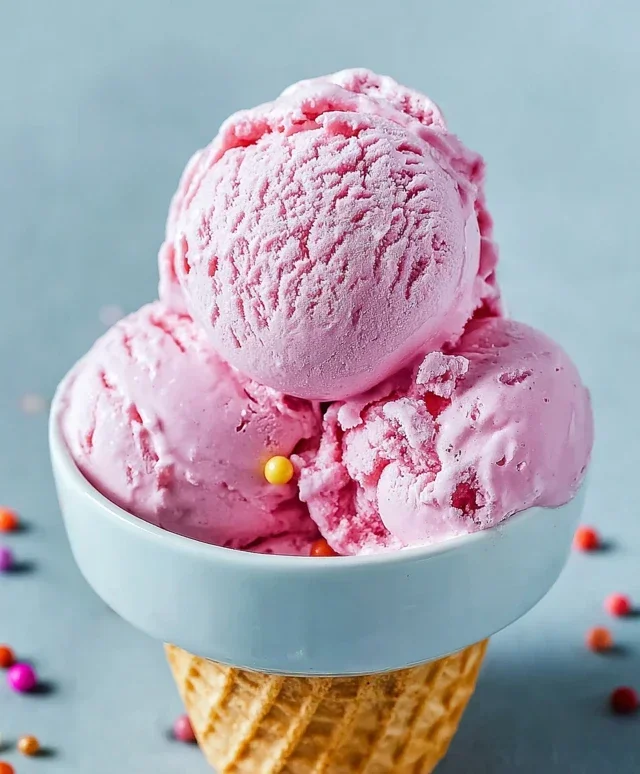
Enjoy your homemade Bubblegum Ice Cream! It’s wonderfully fun and surprisingly easy to make. Serve scoops in cones or bowls and feel free to top with extra sprinkles or even a few more gumballs for an extra festive treat. This ice cream is sure to bring smiles to everyone’s faces.
Conclusion:
And there you have it – your very own batch of homemade Bubblegum Ice Cream! I’m so excited for you to try this recipe. It’s truly a fantastic way to bring a burst of fun and nostalgia to your kitchen. The vibrant color and sweet, distinctive flavor are guaranteed crowd-pleasers, perfect for birthdays, summer days, or just when you need a sweet escape. Imagin extracte the delighted faces of your family and friends as they dig into this delightful treat!
This bubblegum ice cream recipe is wonderfully versatile. Serve it in classic cones, bowls, or get creative with fun toppings like sprinkles, mini marshmallows, or even a swirl of whipped cream. For a delightful twist, consider adding chopped pieces of actual bubblegum (just be mindful of texture and chegrape juicess!) or mixing in some fruity candy. You can also experiment with different shades of pink or even blue for a truly whimsical creation. So don’t hesitate, grab your ingredients and whip up a batch of this amazing bubblegum ice cream today. You won’t regret it!
Frequently Asked Questions:
Can I make this bubblegum ice cream without an ice cream maker?
Absolutely! If you don’t have an ice cream maker, you can still achieve a delicious result. Pour the mixture into a shallow freezer-safe container. Every 30-45 minutes for the first 3-4 hours, vigorously whisk the mixture to break up ice crystals. This will give you a creamier texture. It might not be as perfectly smooth as machine-churned, but it will still be wonderfully tasty!
How long does homemade bubblegum ice cream last?
Your homemade bubblegum ice cream should stay fresh in the freezer for about 1 to 2 weeks. For best results, store it in an airtight container to prevent freezer burn and keep it well-covered. Enjoy it while it’s freshest!
Bubblegum Ice Cream
A fun and whimsical bubblegum-flavored ice cream, swirled with colorful sprinkles and topped with gumballs. Perfect for a playful dessert!
Ingredients
-
2 cups heavy cream
-
1 cup whole milk
-
3/4 cup granulated sugar
-
2 teaspoons bubblegum flavoring
-
1 teaspoon vanilla extract
-
1/4 teaspoon kosher salt
-
Pink or red food coloring (to taste)
-
1/2 cup confetti sprinkles, divided
-
1 cup gumballs (for decoration)
Instructions
-
Step 1
In a medium bowl, whisk together the heavy cream, whole milk, granulated sugar, bubblegum flavoring, vanilla extract, and kosher salt until the sugar is dissolved. -
Step 2
Add a few drops of pink or red food coloring to achieve your desired bubblegum pink hue. Stir well. -
Step 3
Pour the mixture into an ice cream maker and churn according to the manufacturer’s instructions. -
Step 4
During the last few minutes of churning, add half of the confetti sprinkles. -
Step 5
Transfer the churned ice cream to a freezer-safe container. Swirl in the remaining confetti sprinkles. -
Step 6
Cover and freeze for at least 4 hours, or until firm. Garnish with gumballs before serving.
Important Information
Nutrition Facts (Per Serving)
It is important to consider this information as approximate and not to use it as definitive health advice.
Allergy Information
Please check ingredients for potential allergens and consult a health professional if in doubt.
Leave a Comment