
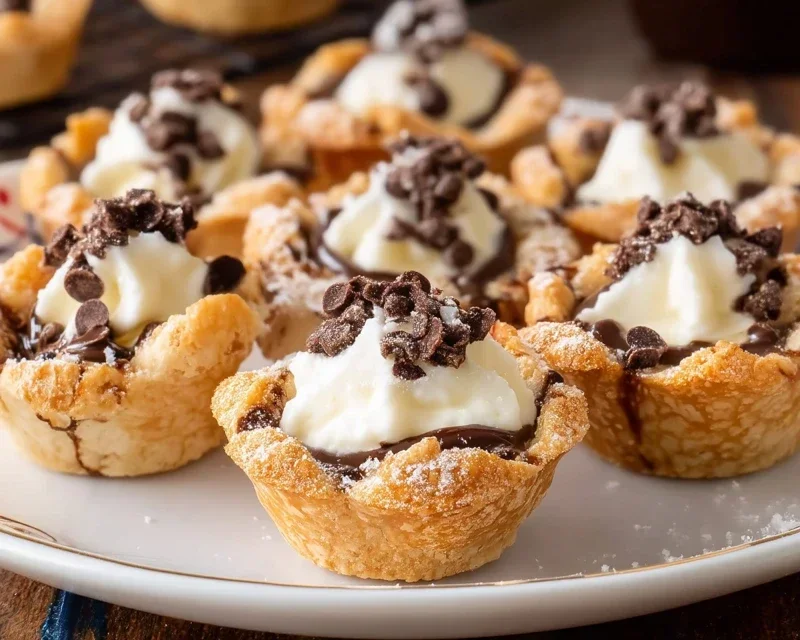
Mini cannoli cups are a delightful way to experience the classic Italian treat without the fuss of traditional rolling and frying. There’s something undeniably charming about these bite-sized wonders, aren’t there? They capture all the irresistible flavors and textures we adore about authentic cannoli – the crisp, sweet shell giving way to a creamy, luscious ricotta filling. We love them because they offer that perfect balance of sweet and creamy, a satisfying crunch followed by a velvety smooth interior. What truly makes mini cannoli cups special is their versatility. They’re ideal for parties, dessert buffets, or even just a special weeknight indulgence. You get all the joy of a classic cannoli in a perfectly portioned, incredibly easy-to-make package. Get ready to impress yourself and your loved ones with these adorable mini cannoli cups!

Mini Cannoli Cups
Get ready to delight your taste buds with these adorable and incredibly easy Mini Cannoli Cups! Forget the hassle of rolling and frying traditional cannoli shells. We’re taking a shortcut with store-bought pie crusts, transforming them into crisp, golden cups that are the perfect vessel for a luscious, creamy ricotta filling. These little treats are ideal for parties, dessert buffets, or just a special indulgence any time of the week. They offer all the classic cannoli flavor you love, but with a fraction of the effort.
Ingredients:
Creating the Creamy Ricotta Filling
The heart of any cannoli is its rich and sweet filling. For our mini cups, we’re making a simple yet spectacular version. First, it’s crucial to ensure your ricotta cheese is well-drained. This is the secret to a thick, luscious filling that won’t weep or become watery. You can drain it by placing it in a fine-mesh sieve lined with cheesecloth or a coffee filter over a bowl in the refrigerator for at least an hour, or even overnight for the best results. Once your ricotta is nicely drained, transfer it to a medium bowl. Add the powdered sugar and granulated sugar. The combination of both sugars provides a lovely sweetness and a smooth texture. Next, stir in the finely grated orange or lemon zest. I love the bright citrus notes it adds, cutting through the richness of the cheese and chocolate. You can use either orange or lemon, or even a blend of both, depending on your preference. Finally, add the vanilla extract for that classic comforting aroma and flavor. Use a spatula or a whisk to gently combine all the ingredients until everything is just incorporated and smooth. Be careful not to overmix, as this can sometimes make the filling a bit too soft. Once mixed, cover the bowl and refrigerating it while you prepare the crusts. This allows the flavors to meld beautifully.
Crafting the Crispy Pie Crust Cups
Now for the clever part – our shortcut to those delightful cannoli shells! We’re using refrigerated pie crusts. Make sure to follow the package directions for softening them, as this will make them much easier to work with. Unroll your softened pie crusts onto a lightly floured surface. You’ll want to cut out circles from the pie crusts. A biscuit cutter or a round cookie cutter works perfectly for this. Aim for circles that are about 3 to 3.5 inches in diameter. The exact size will depend on the muffin tin you’re using. You should get about 12-18 circles from each pie crust, depending on the size of your cutter. Gently press each circle of dough into the cups of a mini muffin tin. You want the dough to line the bottom and sides of each cup, creating a small, edible container. It’s okay if the edges go up a little higher than the muffin tin cups; they will bake into a lovely edge. For a beautiful finish and a delightful crunch, we’ll create a spiced sugar coating for the outside of our cups. In a small bowl, combine the turbinado sugar and ground cinnamon. This mixture will be sprinkled onto the outside of the crusts before baking.
Baking the Golden Cups
This is where the magic happens! Once your mini muffin tin is filled with the pie crust circles, it’s time to get them into the oven. Preheat your oven to 375°F (190°C). Now, carefully sprinkle the cinnamon-turbinado sugar mixture evenly over the bottom and slightly up the sides of each unbaked pie crust cup. This will give them a wonderfully caramelized and spiced exterior. You can also brush the outside of the dough with a tiny bit of water before sprinkling the sugar to help it adhere better, but it’s usually not necessary. Place the mini muffin tin onto a baking sheet. This is a good practice to catch any potential drips and makes it easier to get the tin in and out of the oven. Bake for 12-16 minutes, or until the pie crusts are golden brown and puffed. Keep a close eye on them, as they can brown quickly. Once they are beautifully golden and appear crisp, carefully remove the baking sheet from the oven.
Cooling and Filling the Cups
After baking, you’ll need to let the cups cool slightly in the muffin tin before attempting to remove them. This is important to prevent them from breaking. Let them cool for about 5-10 minutes. Then, carefully invert the muffin tin onto a wire rack to release the mini cannoli cups. If any seem a little stuck, gently loosen the edges with a small offset spatula or a butter knife. Allow the cups to cool completely on the wire rack. This is a crucial step, as filling warm cups will cause the ricotta to melt and become runny. While they are cooling, you can prepare your garnishes. If you’re using chocolate chips, ensure they are miniature for easy fitting. If you’re using pistachios, give them a quick chop. Once the cups are completely cool to the touch, it’s time to fill them. You can spoon the ricotta filling directly into each cup, or for a neater presentation, transfer the filling into a piping bag fitted with a large round tip. Generously fill each cannoli cup with the creamy ricotta mixture.
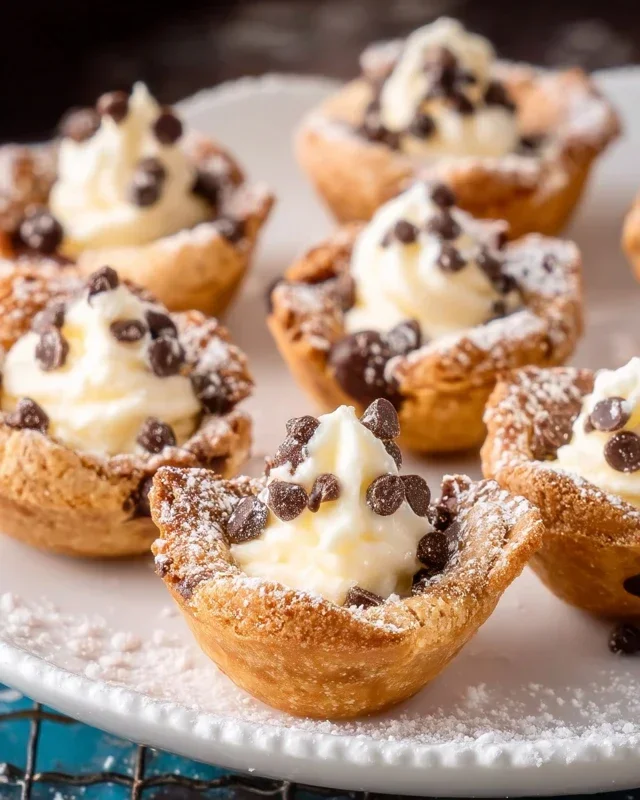
Garnishing and Serving Your Mini Cannoli Cups
The final flourish is the most fun part! To add that signature cannoli touch, you can dip the ends of the filled cannoli cups into the miniature chocolate chips or finely chopped pistachios. This not only looks beautiful but also adds a delightful texture and flavor contrast. Alternatively, you can just sprinkle them over the top of the filling. For an extra touch of elegance and a classic cannoli finish, dust the tops of your Mini Cannoli Cups generously with additional powdered sugar using a fine-mesh sieve. Serve immediately for the best texture, or they can be kept in an airtight container in the refrigerator for a few hours before serving. The crusts will soften slightly over time, but they are still incredibly delicious. Enjoy these delightful bites of Italian-inspired bliss!
Conclusion:
So there you have it – your guide to creating these delightful Mini Cannoli Cups! I truly hope you’re as excited to try this recipe as I am to share it. These bite-sized wonders are an absolute triumph because they deliver all the classic, creamy, crunchy goodness of traditional cannoli without the fuss of rolling and frying delicate shells. They’re perfect for parties, potlucks, or even just a special treat after a long week. Imagin extracte serving these at your next gathering – they’re sure to be a showstopper!
For serving suggestions, I love to arrange them on a tiered stand, showcasing their miniature perfection. They’re fantastic alongside a cup of espresso or a glass of sweet dessert grape juice. For variations, don’t be afraid to get creative! Consider adding finely chopped pistachios, mini chocolate chips, or even a hint of orange zest to the ricotta filling. You could also dust them with a little cocoa powder or sprinkles for an extra festive touch. I wholeheartedly encourage you to give these Mini Cannoli Cups a go; they are surprisingly easy to make and incredibly rewarding.
Frequently Asked Questions:
Can I make the cannoli shells ahead of time?
Absolutely! You can bake the mini cannoli shells up to 2-3 days in advance and store them in an airtight container at room temperature. Just be sure they are completely cooled before storing to maintain their crispness.
How should I store the filled Mini Cannoli Cups?
It’s best to fill the cannoli cups just before serving to prevent the shells from becoming soggy. If you need to make them slightly ahead, store the filled cups in the refrigerator for a few hours, but be aware that the shells may soften slightly.
Can I use a different type of cheese for the filling?
While ricotta is traditional and provides the perfect creamy texture, some people have experimented with cream cheese. However, ricotta is highly recommended for the authentic cannoli flavor and consistency.
Mini Cannoli Cups
Delightful mini cannoli cups featuring a creamy ricotta filling encased in crisp pie crust shells, perfect for a sweet treat.
Ingredients
-
1 container whole-milk ricotta cheese (15 oz., drained)
-
1/2 cup powdered sugar
-
2 tablespoons granulated sugar
-
1 teaspoon finely grated orange or lemon zest
-
1/2 teaspoon vanilla extract
-
1 box refrigerated pie crusts, softened as directed on box (2 count )
-
3 tablespoons turbinado sugar (raw sugar)
-
1 teaspoon ground cinnamon
-
1/4 cup miniature semisweet chocolate chips or finely chopped pistachios
-
additional powdered sugar
Instructions
-
Step 1
Preheat oven to 375°F (190°C). Grease and lightly flour muffin tins. -
Step 2
In a medium bowl, combine the drained ricotta cheese, powdered sugar, granulated sugar, orange or lemon zest, and vanilla extract. Stir until well combined and smooth. -
Step 3
Unroll the refrigerated pie crusts. Cut each crust into 4 equal squares. Press the squares into the prepared muffin tin cups, forming shells. -
Step 4
Bake for 10-12 minutes, or until the crusts are golden brown and crisp. -
Step 5
While the crusts are still warm, carefully remove them from the muffin tins and let them cool completely on a wire rack. -
Step 6
In a small bowl, combine the turbinado sugar and ground cinnamon. Mix well. -
Step 7
Once the cannoli cups have cooled, fill each with the ricotta mixture. Sprinkle the tops with miniature chocolate chips or chopped pistachios. -
Step 8
Dust generously with additional powdered sugar before serving.
Important Information
Nutrition Facts (Per Serving)
It is important to consider this information as approximate and not to use it as definitive health advice.
Allergy Information
Please check ingredients for potential allergens and consult a health professional if in doubt.
Leave a Comment