
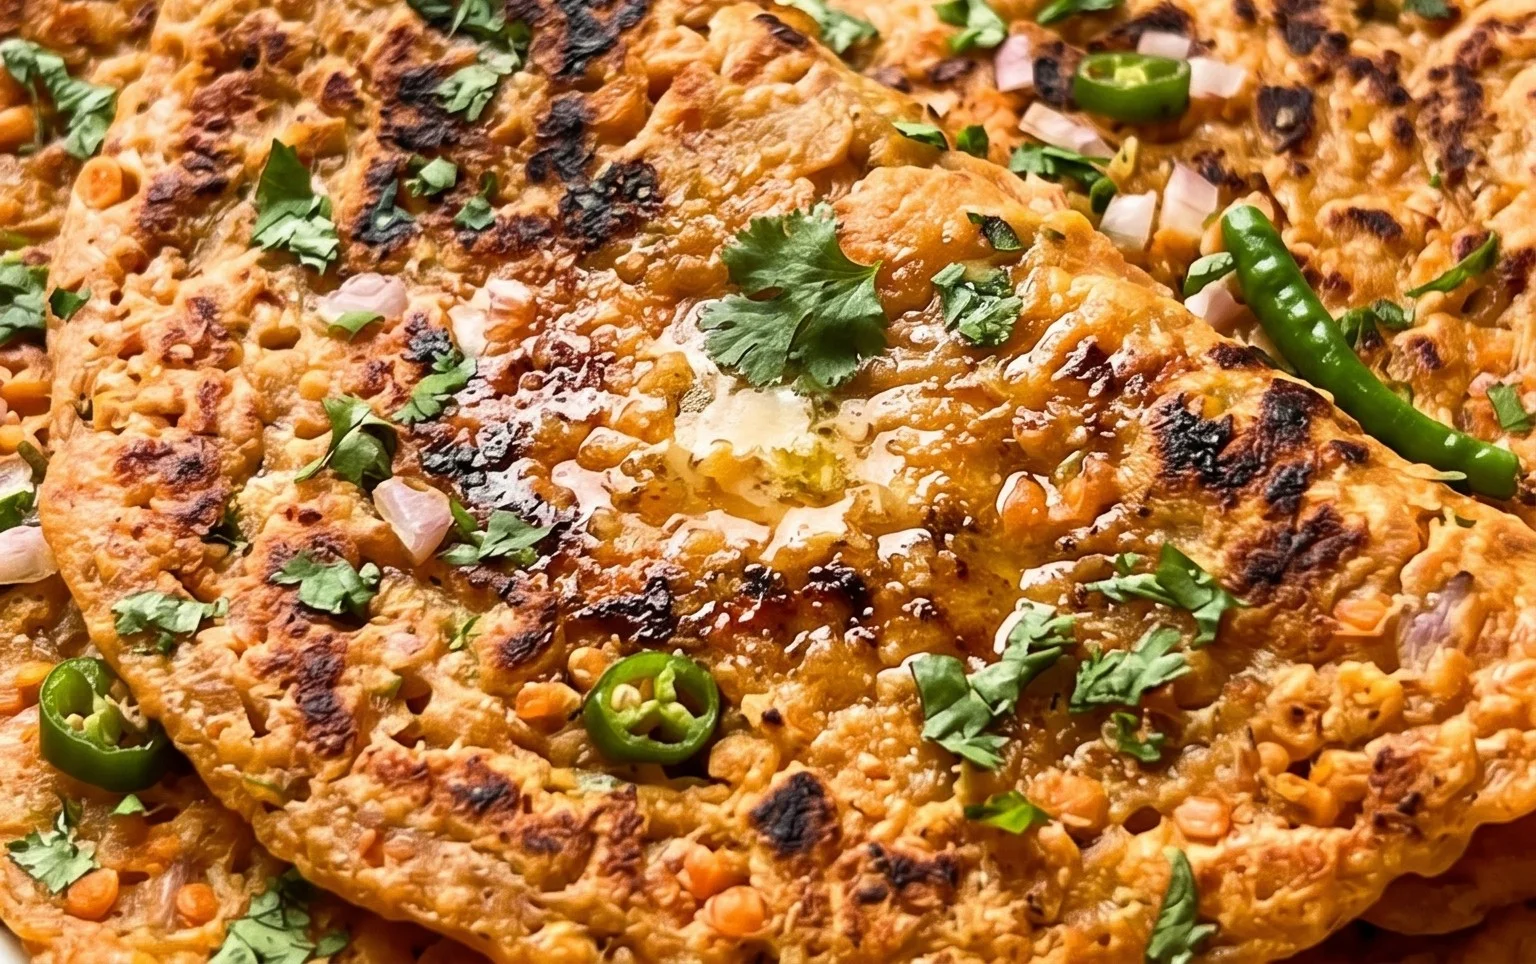
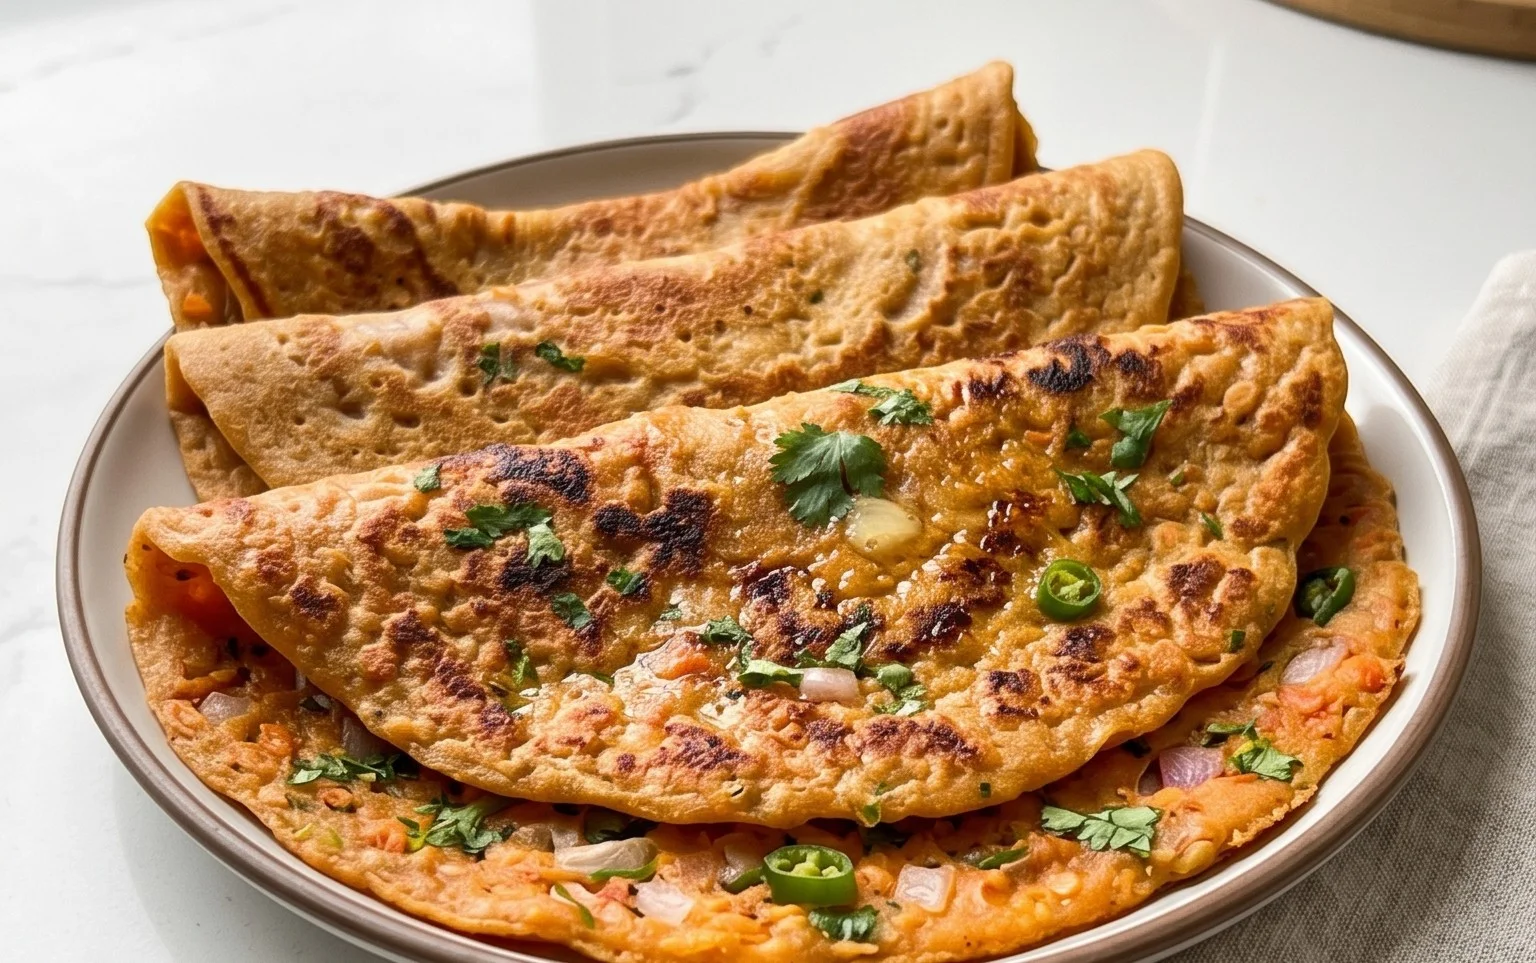
Masoor Dal Chilla | Savory Red Lentil Pancakes are a true revelation in my kitchen, and I’m so excited to share this incredibly versatile recipe with you! Forget your usual breakfast or snack routine; this dish offers a delightful departure with its vibrant flavors and satisfying texture. What makes Masoor Dal Chilla so beloved? It’s the perfect marriage of wholesome nutrition and irresistible taste. These savory red lentil pancakes are packed with protein and fiber from the masoor dal, making them a wonderfully filling and guilt-free option. Beyond their nutritional punch, they boast a subtly earthy flavor profile that pairs beautifully with a wide array of accompaniments, from simple chutneys to creamy yogurt dips. Their slightly crispy edges and soft, yielding center create a textural symphony that’s simply addictive. You’ll find yourself reaching for this Masoor Dal Chilla recipe again and again, whether for a quick weeknight dinner or a relaxed weekend brunch.

Masoor Dal Chilla | Savory Red Lentil Pancakes
Welcome to a delightful and healthy breakfast or snack option that’s incredibly easy to make! Today, we’re diving into the world of Masoor Dal Chilla, also known as savory red lentil pancakes. These are a fantastic way to pack in protein and flavor with simple ingredients. They’re naturally gluten-free and vegan-friendly, making them a crowd-pleaser for almost everyone. I love how versatile these chillas are; you can enjoy them plain, with a side of yogurt or chutney, or even stuffed with your favorite vegetables. Let’s get started on creating these wholesome and delicious pancakes!
Ingredients:
Preparation and Grinding
The first crucial step in making perfect Masoor Dal Chilla is preparing the red lentils. Start by thoroughly rinsing the 1 cup of split red lentils under cool running water. You’ll want to rinse them at least 2-3 times, or until the water runs clear. This process helps to remove any dust or impurities. Once rinsed, place the lentils in a bowl and add the 3 cups of water for soaking. Let them soak for at least 4 hours, or preferably overnight. Soaking is essential because it softens the lentils, making them easier to grind into a smooth batter and also aids in digestion.
After the lentils have soaked sufficiently, drain them completely. Now it’s time to blend them into a batter. You’ll need a blender or food processor for this. Add the soaked and drained red lentils to your blender. Next, prepare your aromatics: roughly chop the 1 green chilli and the 1 inch piece of gin extractger. You can adjust the amount of green chilli based on your spice preference. If you like it mild, use half a chilli, or if you love a kick, use a whole one. Add the chopped green chilli and gin extractger to the blender along with the lentils.
Now, it’s time to add the seasoning. Add the 1 teaspoon of kosher salt to the blender. Kosher salt dissolves well and provides a good, clean saltiness. Pour in ½ cup of water to help facilitate the grinding process. Start by blending on a lower speed, then gradually increase to high until you achieve a smooth, thick batter. It should have a consistency similar to dosa batter – thick enough to coat the back of a spoon but still pourable. If the batter seems too thick, you can add a tablespoon or two of water at a time, blending after each addition, until you reach the desired consistency. Be careful not to make it too watery, as this will make the chillas difficult to flip.
Once the batter is smooth, stir in the 2 tablespoons of finely chopped cilantro. The fresh cilantro adds a wonderful burst of flavor and a beautiful green hue to the chillas. Give the batter a good mix to ensure the cilantro is evenly distributed. At this point, you can also taste the batter and adjust the salt if necessary, keeping in mind that the flavors will meld further as it cooks. If you’re not cooking the chillas immediately, you can cover the batter and refrigerate it for up to a day.
Cooking the Chillas
Now that our batter is ready, let’s get cooking! Heat a non-stick skillet or a well-seasoned cast-iron griddle over medium heat. Add about ½ tablespoon of the 2 tablespoons of oil and spread it evenly across the surface of the pan. Once the pan is hot, pour about ½ cup of the lentil batter onto the center of the skillet. Using the back of a ladle or spoon, gently spread the batter outwards in a circular motion to form a thin, even pancake, about 6-7 inches in diameter. Don’t worry if your first chilla isn’t perfectly round; practice makes perfect!
Allow the chilla to cook undisturbed for about 2-3 minutes, or until the edges start to look slightly dry and you see small bubbles forming on the surface. This is your cue that it’s time to flip. Carefully slide a spatula underneath the chilla and flip it over. Drizzle a little more oil, about ½ teaspoon, around the edges of the chilla. Cook the other side for another 1-2 minutes, or until it’s golden brown and cooked through. You’ll notice a lovely crisp texture developing.
Repeat this process for the remaining batter. For each chilla, make sure the pan is heated and lightly oiled before pouring in the batter. This ensures each pancake cooks evenly and prevents sticking. You should aim for a medium heat throughout the cooking process. If the heat is too high, the chillas will burn on the outside before the inside is cooked. If the heat is too low, they will become soggy. Adjust the heat as needed. You’ll get faster with practice, and soon you’ll be making these delicious chillas in no time. The aroma filling your kitchen will be absolutely delightful!
Serving Suggestions
Once your Masoor Dal Chillas are cooked to a beautiful golden-brown, they are ready to be served! These savory pancakes are best enjoyed hot off the griddle. You can serve them as they are, or with a dollop of plain yogurt or a side of your favorite chutney – mint, tamarind, or even a spicy tomato chutney are excellent choices. For a more substantial meal, consider serving them with a side of pickled onions or a simple salad. They also make a fantastic base for a light lunch; just top with some sautéed vegetables or a sprinkle of cheese if you’re not keeping them strictly vegan. Enjoy every delicious bite!
Conclusion:
I hope you’ve enjoyed learning how to make these delicious Masoor Dal Chilla! This recipe is truly a winner because it’s incredibly healthy, packed with protein from the red lentils, and surprisingly easy to whip up, making it perfect for busy weeknights or a wholesome breakfast. The slightly crispy edges and tender interior create a delightful texture, and the savory flavor is wonderfully satisfying. These Masoor Dal Chilla are so versatile; you can serve them as is, or get creative with your accompaniments. They pair beautifully with a dollop of cooling yogurt or a spicy mint chutney. For a heartier meal, consider filling them with grated vegetables like carrots and zucchini, or a sprinkle of paneer. Don’t hesitate to experiment with your spices too – a pinch of asafoetida or some finely chopped cilantro can add an extra layer of flavor. I highly encourage you to give this recipe a try; I’m confident you’ll find it a fantastic addition to your culinary repertoire!
Frequently Asked Questions:
Q1: Can I make these Masoor Dal Chilla ahead of time?
While the batter can be prepared a day in advance and stored in the refrigerator, it’s best to cook the chilla fresh for optimal texture and flavor. The batter might thicken overnight, so you may need to add a little water before cooking.
Q2: What are some good gluten-free serving options for these savory red lentil pancakes?
These Masoor Dal Chilla are naturally gluten-free! They are fantastic served with a fresh cucumber raita, a simple tomato salsa, or even a side of steamed vegetables. Avocado slices are another wonderful gluten-free pairing.
Q3: How can I make the chilla spicier?
To add a kick of heat, you can finely chop a green chili pepper and add it to the batter. Alternatively, you could incorporate a pinch of red chili powder or a dash of your favorite hot sauce into the batter or serve it as a spicy dipping sauce alongside the chilla.
Masoor Dal Chilla | Savory Red Lentil Pancakes
Delicious and healthy savory pancakes made from red lentils, spiced with green chili and ginger.
Ingredients
-
1 cup split red lentils (masoor dal)
-
3 cups water (for soaking lentils)
-
1 green chilli
-
1 inch ginger
-
1 teaspoon kosher salt
-
½ cup water (for grinding)
-
2 tablespoons cilantro (finely chopped)
-
2 tablespoons oil
Instructions
-
Step 1
Rinse the masoor dal thoroughly and soak it in 3 cups of water for at least 4 hours, or preferably overnight. -
Step 2
Drain the soaked lentils and grind them into a smooth batter using a blender or food processor. Add ½ cup of water as needed for grinding. -
Step 3
Finely chop the green chili and grate or finely chop the ginger. Add them to the lentil batter along with kosher salt and finely chopped cilantro. -
Step 4
Mix everything well to combine. The batter should have a pouring consistency, similar to dosa batter. -
Step 5
Heat 1 tablespoon of oil in a non-stick skillet or tawa over medium heat. -
Step 6
Pour a ladleful of batter onto the hot skillet and spread it evenly in a circular motion to form a thin pancake (chilla). -
Step 7
Cook for 2-3 minutes until the edges start to lift and the underside is golden brown. Flip and cook the other side for another 1-2 minutes. -
Step 8
Repeat with the remaining batter, adding a little oil for each chilla. Serve hot.
Important Information
Nutrition Facts (Per Serving)
It is important to consider this information as approximate and not to use it as definitive health advice.
Allergy Information
Please check ingredients for potential allergens and consult a health professional if in doubt.

Leave a Comment