
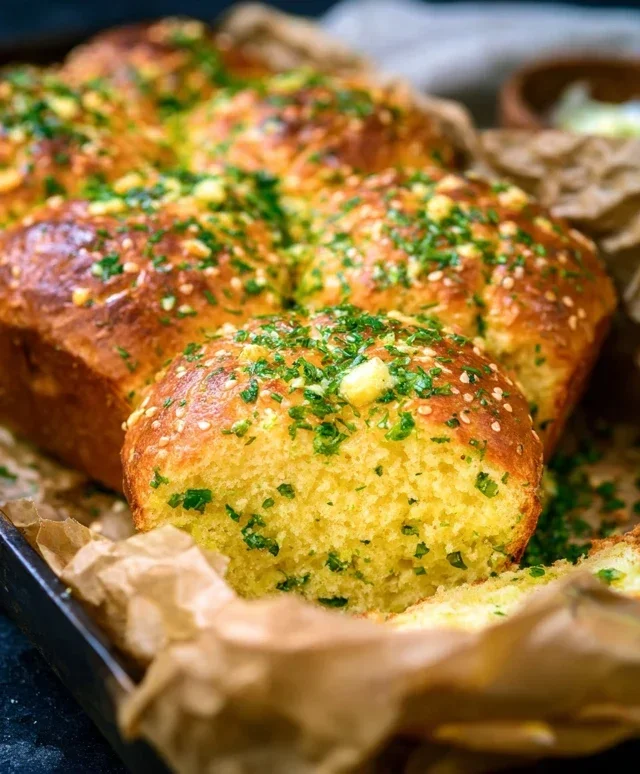
Garlic Butter Keto Bread is about to become your new best friend. If you’ve been missing that satisfying carb-laden crunch and rich, savory flavor that comes with traditional bread, then prepare to have your keto world rocked. This isn’t just another bland alternative; this Garlic Butter Keto Bread is a true revelation. We’re talking about a bread that’s impossibly tender on the inside, boasts a delightful crust, and is infused with the non-intoxicating aroma and taste of garlic and butter. It’s the perfect vehicle for your favorite keto dips, a satisfying side to any meal, or even a delightful snack all on its own. Forget dry, crum extractbly disappointments – this recipe delivers pure indulgence without the carb guilt. Get ready to experience the joy of truly delicious keto bread.

Garlic Butter Keto Bread
Welcome to a game-changer for your keto journey! If you’ve been missing the comforting, satisfying chew of freshly baked bread, then prepare to have your mind blown. This Garlic Butter Keto Bread recipe is incredibly simple, uses readily available keto-friendly ingredients, and delivers a delicious, fragrant loaf that’s perfect for dipping, toasting, or enjoying on its own. It’s moist, flavorful, and has a texture that will surprise and delight you. Forget those crum extractbly, dry keto breads of the past; this recipe is designed for success and pure enjoyment.
Ingredients:
Cooking Instructions:
This recipe is surprisingly straightforward, and the results are absolutely worth the minimal effort. We’ll start by combining our dry ingredients, then move on to the wet, and finally bring it all together to create our magical keto bread dough.
Step 1: Prepare Your Dry Ingredients
First things first, let’s get our dry ingredients ready. In a medium-sized mixing bowl, I like to whisk together the almond flour, psyllium husk powder, baking powder, and salt. Whisking them thoroughly ensures that all the ingredients are evenly distributed. This is important because it prevents pockets of leavening agent or unmixed flour, leading to a more consistent and well-risen loaf. The psyllium husk powder is our key to achieving that bread-like texture and binding everything together, so make sure you’re using the powder form, not whole husks.
Step 2: Combine Your Wet Ingredients
Now, let’s move on to the wet ingredients. In a separate bowl, I gently whisk the four large eggs until they are just combined. You don’t need to beat them into a frothy meringue; a simple whisking will do. To the beaten eggs, I add the melted unsalted butter and the apple cider vinegar. The apple cider vinegar is a secret weapon in keto baking. It reacts with the baking powder to create extra lift and also helps to neutralize any potential “eggy” taste from the eggs, resulting in a cleaner, fresher flavor. Give this mixture a good stir to incorporate everything.
Step 3: Marry the Dry and Wet Ingredients
This is where the magic really starts to happen. Pour the wet ingredients into the bowl with the dry ingredients. Now, using a sturdy spoon or a spatula, begin extract to mix everything together. At first, it might seem like it’s not coming together, but keep mixing! The psyllium husk powder will start to absorb the liquid, and the mixture will transform into a sticky, dough-like consistency. You want to mix until there are no dry streaks of flour remaining and you have a cohesive dough. This process usually takes a minute or two of good stirring. Don’t overmix at this stage; just ensure everything is well combined.
Step 4: Incorporate the Garlic and Parsley Flavor
Now for the flavor explosion! Add the minced garlic and chopped fresh parsley directly into the dough. Gently fold these aromatics into the dough until they are evenly distributed. I like to make sure each little bite gets a burst of that savory garlic and fresh parsley goodness. This is also the time to add any optional toppings you might be using, like sesame seeds or everything bagel seasoning. You can gently press them into the top of the dough before shaping.
Step 5: Shape and Prepare for Baking
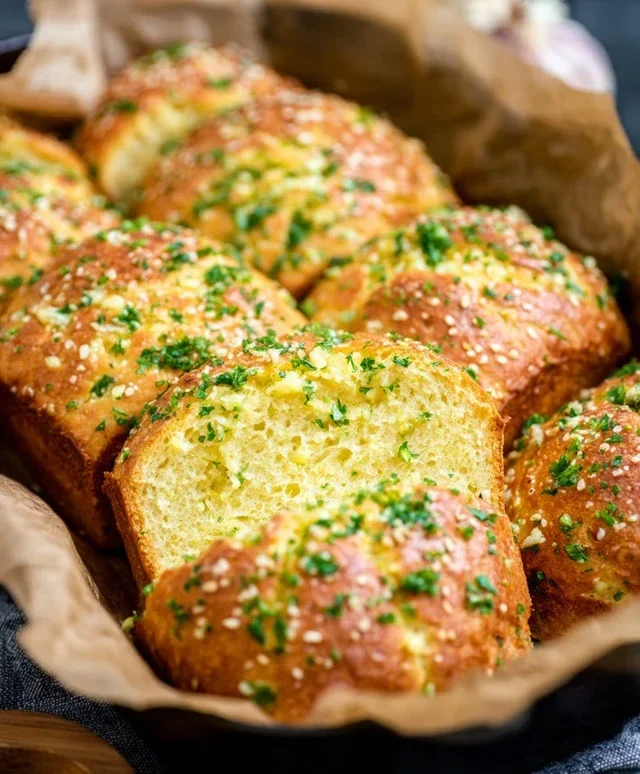
The dough will be quite sticky, so I find it easiest to work with slightly damp hands or by using a piece of parchment paper to help shape the loaf. Transfer the dough onto a baking sheet lined with parchment paper. You can shape it into a round loaf, an oval, or even divide it into smaller rolls if you prefer. I usually aim for a classic round loaf, about 1 to 1.5 inches high. Once shaped, I like to brush the top generously with a little extra melted butter. This not only adds richness but also helps to create a beautiful, golden-brown crust. For an extra garlic kick, you can even mix a tiny bit of minced garlic into this melted butter before brushing.
Step 6: Bake to Golden Perfection
Preheat your oven to 375°F (190°C). Place the shaped loaf into the preheated oven and bake for approximately 30-35 minutes. You’ll know it’s ready when the crust is a deep golden brown and sounds hollow when tapped. The internal temperature should reach around 205-210°F (96-99°C). Baking time can vary slightly depending on your oven and the thickness of your loaf, so keep an eye on it. If the top is browning too quickly, you can loosely tent it with aluminum foil for the last 10 minutes of baking.
Step 7: Cool and Enjoy!
This is perhaps the hardest step: waiting for the bread to cool. Once it’s out of the oven, transfer the loaf to a wire rack to cool completely. I know it’s tempting to slice into it immediately, but allowing it to cool fully is crucial for the texture. If you cut into it while it’s still warm, it can be a little gummy. Once completely cool, slice it with a serrated knife. This Garlic Butter Keto Bread is absolutely divine served warm with a slather of butter, used for avocado toast, or alongside your favorite keto meal. Enjoy every delicious, low-carb bite!
Conclusion:
There you have it – your guide to creating the most delicious and satisfying Garlic Butter Keto Bread! This recipe is truly a game-changer for anyone following a ketogenic lifestyle or simply looking for a healthier, low-carb bread option. It delivers all the savory, buttery goodness you crave without the carb overload. The simplicity of the ingredients, combined with the incredible aroma that fills your kitchen as it bakes, makes this a truly rewarding culinary experience. I’ve found it to be the perfect accompaniment to so many meals. Imagin extracte it toasted and topped with avocado for breakfast, alongside a hearty soup for lunch, or even as a base for your favorite keto appetizers.
Don’t be afraid to experiment with variations! You can add a pinch of dried herbs like rosemary or oregano to the dough for an extra layer of flavor. Some people even like to mix in a little shredded cheese for a cheesy garlic butter keto bread. I highly encourage you to give this recipe a try. It’s surprisingly easy to make and the results are absolutely phenomenal. You’ll be amazed at how a few simple ingredients can transform into something so incredibly tasty and versatile.
Frequently Asked Questions:
How long does this Garlic Butter Keto Bread last?
Stored in an airtight container at room temperature, it typically stays fresh for 2-3 days. For longer storage, you can refrigerate it for up to a week or freeze slices for up to a month. Reheating in a toaster or oven will bring back its delightful crispness.
Can I make this recipe dairy-free?
Yes, you absolutely can! You can substitute the butter with a good quality vegan butter or coconut oil. Ensure your liquid egg substitute is also dairy-free if you’re using one. This will still result in a wonderfully flavorful garlic butter keto bread.
What is the best way to serve this keto bread?
The possibilities are endless! It’s fantastic on its own, toasted with a spread of butter, or used as a base for garlic bread. It’s also wonderful alongside chilis, stews, salads, or as a sandwich bread alternative. Dip it into your favorite soups or pasta sauces for an extra treat.
Garlic Butter Keto Bread
A delicious and easy keto bread recipe with a rich garlic butter flavor. Perfect for a low-carb lifestyle.
Ingredients
-
1 ½ cups almond flour
-
½ cup coconut flour
-
1 ½ teaspoons baking powder
-
½ teaspoon salt
-
4 large eggs
-
½ cup unsalted butter, melted
-
¼ cup heavy cream
-
2 cloves garlic, minced
-
2 tablespoons chopped fresh parsley
Instructions
-
Step 1
Preheat oven to 350°F (175°C). Grease and flour a 9×5 inch loaf pan. -
Step 2
In a large bowl, whisk together almond flour, coconut flour, baking powder, and salt. -
Step 3
In a separate bowl, whisk together eggs, melted butter, and heavy cream until well combined. -
Step 4
Pour the wet ingredients into the dry ingredients and mix until just combined. Do not overmix. -
Step 5
Fold in minced garlic and chopped parsley. -
Step 6
Pour the batter into the prepared loaf pan and spread evenly. -
Step 7
Bake for 25-30 minutes, or until a toothpick inserted into the center comes out clean. -
Step 8
Let cool in the pan for 10 minutes before transferring to a wire rack to cool completely.
Important Information
Nutrition Facts (Per Serving)
It is important to consider this information as approximate and not to use it as definitive health advice.
Allergy Information
Please check ingredients for potential allergens and consult a health professional if in doubt.


Leave a Comment