
Chinese Orange Chicken is a dish that truly needs no introduction, but I’ll give it one anyway because it’s just that good! If you’ve ever found yourself craving that perfect balance of sweet, tangy, and savory, with a hint of citrusy zest, then you know exactly why this iconic entrée has captured hearts (and taste buds) around the globe. It’s the star of many a takeout order, and for good reason – that crispy, golden chicken coated in a glossy, vibrant orange sauce is simply irresistible. What makes our Chinese Orange Chicken recipe so special? We’ve cracked the code to achieving that restaurant-quality crunch at home, while also dialing up the authentic orange flavor that makes this dish a true standout. Get ready to elevate your weeknight dinners or impress your guests with this beloved classic!

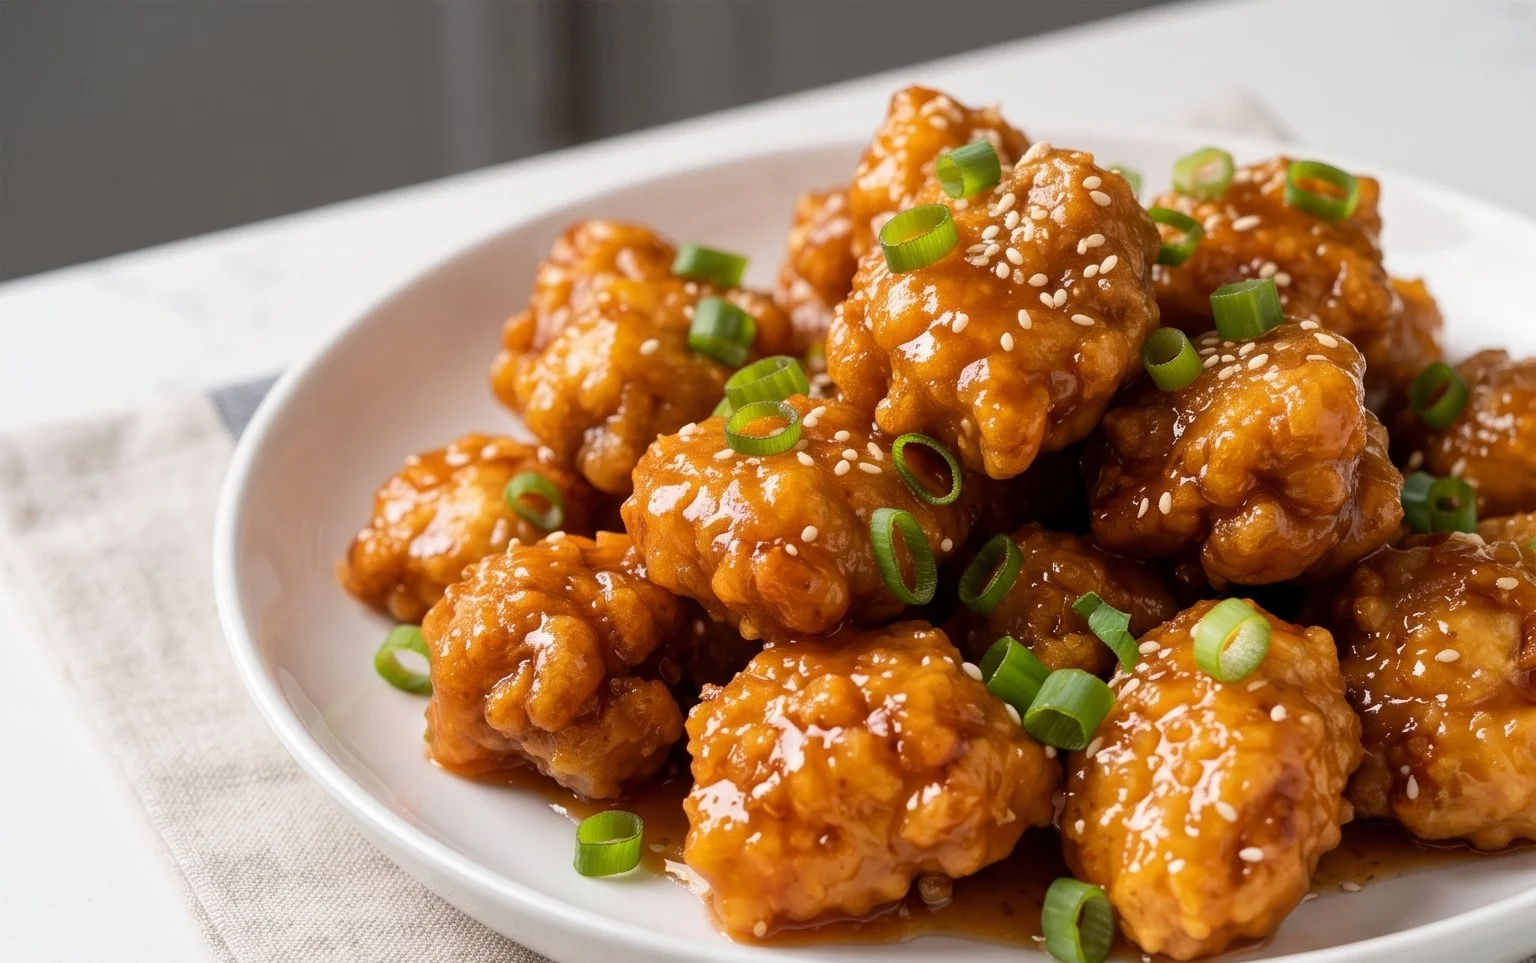
Chinese Orange Chicken
There’s something incredibly satisfying about a plate of glistening, sweet-and-tangy orange chicken. It’s a popular takeout dish for a reason, but recreating that deliciousness at home is more achievable than you might think! This recipe breaks down the process into simple steps, ensuring you get that perfect crispy coating and vibrant orange sauce every time. Forget the delivery apps; you’re about to become your own favorite Chinese takeout chef!
This isn’t just about replicating a dish; it’s about understanding the balance of flavors and textures that make orange chicken so irresistible. The crispy fried chicken pieces, coated in a rich, zesty, and slightly spicy sauce – it’s a symphony of tastes and sensations. We’ll start by preparing the chicken for that crucial crispy exterior, then move on to crafting the star of the show: the homemade orange sauce.
Ingredients:
Cooking Instructions:
Step 1: Prepare the Chicken Coating
First things first, let’s get our chicken ready for its crispy transformation. In a medium bowl, whisk together the 1/3 cup of cornstarch, 1/3 cup of flour, and a good pinch of salt. This dry mixture will be our dredgin extractg station. In a separate shallow bowl or pie plate, whisk the 3 eggs. Now, take your bite-sized chicken pieces and season them lightly with salt. Working in batches, dip each chicken piece first into the whisked eggs, ensuring it’s fully coated. Then, transfer the egg-coated chicken to the dry cornstarch and flour mixture. Toss gently until each piece is thoroughly covered. Press the coating onto the chicken lightly to help it adhere. This double coating is essential for achieving that satisfying crunch. Once coated, you can either fry them immediately or set them on a wire rack for about 10-15 minutes to allow the coating to set a bit, which further enhances crispiness.
Step 2: Fry the Chicken to Golden Perfection
Now it’s time to get frying! Heat about 2-3 inches of oil in a large, heavy-bottomed pot or Dutch oven over medium-high heat. The oil is ready when a small piece of chicken sizzles immediately upon contact. Carefully, in batches (don’t overcrowd the pot, as this will lower the oil temperature and result in greasy chicken), add the coated chicken pieces to the hot oil. Fry for about 5-7 minutes, flipping occasionally, until the chicken is golden brown and cooked through. You’re looking for a beautiful, even color. Use a slotted spoon or spider strainer to remove the fried chicken from the oil and place it on a wire rack set over a baking sheet. This allows excess oil to drain away, keeping your chicken delightfully crispy. Repeat with the remaining chicken.
Step 3: Craft the Irresistible Orange Sauce
While your fried chicken rests and stays wonderfully crispy, let’s focus on the star of the show: the sauce! In a medium saucepan, combine the 1 cup of orange juice, 1/2 cup of sugar, 2 tablespoons of rice vinegar, and 2 tablespoons of soy sauce. Add the 1/4 teaspoon of gin extractger extract (or fresh gin extractger), 1/4 teaspoon of garlic powder (or diced garlic), and the 1/2 teaspoon of red chili flakes. Stir everything together to combine. Bring this mixture to a simmer over medium heat, stirring occasionally to dissolve the sugar. Let it simmer gently for about 5 minutes to allow the flavors to meld.
Step 4: Thicken and Infuse the Sauce
To get that beautiful, glossy coating for our orange chicken, we need to thicken the sauce. In a small bowl, whisk together the 1 tablespoon of cornstarch with 2 tablespoons of cold water until smooth, creating a cornstarch slurry. Slowly pour this slurry into the simmering orange sauce while whisking constantly. Continue to whisk and cook the sauce over medium-low heat until it thickens to a nice, syrupy consistency. It should coat the back of a spoon. This usually takes another 2-3 minutes. The sauce should be thick enough to cling to the chicken but not so thick that it becomes gummy.
Step 5: The Grand Finnon-alcoholic ale: Coating the Chicken
This is the moment you’ve been waiting for! Once the sauce has thickened, stir in the orange zest. This adds a burst of fresh, aromatic orange flavor that truly elevates the dish. Now, add the fried chicken pieces back into the saucepan with the thickened orange sauce. Gently toss the chicken to coat each piece thoroughly in the glistening sauce. Make sure every bit of crispy chicken is enveloped in that sweet, tangy, and slightly spicy goodness. Serve immediately while the chicken is still wonderfully crispy and the sauce is warm and inviting.
Enjoy your homemade Chinese Orange Chicken! It’s fantastic served over steamed white or brown rice, perhaps with some steamed broccoli or snap peas for a complete and delicious meal.

Conclusion:
There you have it – your guide to creating delicious, authentic Chinese Orange Chicken right in your own kitchen! This recipe is fantastic because it balances that irresistible sweet and tangy orange glaze with perfectly crispy chicken, offering a truly satisfying meal that rivals your favorite takeout. It’s surprisingly achievable, even for home cooks, and the aroma as it simmers is simply divine.
I love serving this vibrant Orange Chicken over fluffy steamed jasmine rice, perhaps with a side of stir-fried bok choy or green beans for a complete and colorful meal. Feel free to get creative with variations! For a spicier kick, add a pinch of red pepper flakes to the sauce. If you’re looking for a healthier option, consider baking or air-frying the chicken before coating it in the sauce.
I truly hope you’ll give this recipe a try. It’s a guaranteed crowd-pleaser and a wonderful way to bring a taste of your favorite Chinese restaurant home. Don’t be intimidated; the results are incredibly rewarding!
Frequently Asked Questions:
Can I make the orange sauce ahead of time?
Absolutely! The orange sauce can be prepared a day or two in advance and stored in an airtight container in the refrigerator. You might need to gently reheat it and whisk it together before coating the chicken, as it can thicken when chilled.
What kind of chicken is best for this recipe?
Boneless, skinless chicken thighs are my top recommendation for this Chinese Orange Chicken. They stay incredibly moist and tender, which is crucial for that perfect bite. However, chicken breast can also be used, though you’ll want to be extra careful not to overcook it to prevent dryness.
How can I make the chicken extra crispy?
To achieve that sought-after crispy texture, ensure your oil is at the correct temperature (around 350-375°F or 175-190°C) before frying the chicken. Don’t overcrowd the pan, as this will lower the oil temperature and result in soggy chicken. Frying in batches is key!
Chinese Orange Chicken
A classic sweet and savory Chinese orange chicken recipe, perfect for a weeknight meal.
Ingredients
-
4 Boneless Skinless Chicken Breasts (cut into bite-size pieces)
-
3 Eggs (whisked)
-
1/3 cup Cornstarch
-
1/3 cup Flour
-
Salt
-
Oil (for frying)
-
1 cup Orange Juice
-
1/2 cup Sugar
-
2 Tablespoons Rice Vinegar
-
2 Tablespoons Soy Sauce
-
1/4 teaspoon Ginger Extract
-
1/4 teaspoon Garlic Powder
-
1/2 teaspoon Red Chili Flakes
-
Orange Zest (from 1 orange)
-
1 Tablespoon Cornstarch
Instructions
-
Step 1
In a bowl, combine the chicken pieces with 1 whisked egg and a pinch of salt. In a separate shallow dish, mix the 1/3 cup cornstarch and 1/3 cup flour. Dredge the chicken pieces in the cornstarch and flour mixture, ensuring they are well coated. -
Step 2
Heat about 1-2 inches of oil in a wok or deep skillet over medium-high heat until shimmering. Carefully add the coated chicken pieces in batches, being careful not to overcrowd the pan. Fry until golden brown and cooked through, about 3-4 minutes per batch. Remove chicken with a slotted spoon and drain on paper towels. -
Step 3
In a medium saucepan, combine the orange juice, sugar, rice vinegar, soy sauce, ginger extract, garlic powder, red chili flakes, and orange zest. Bring to a simmer over medium heat, stirring until the sugar dissolves. -
Step 4
In a small bowl, whisk together the 1 tablespoon of cornstarch with 2 tablespoons of cold water to create a slurry. Slowly whisk the slurry into the simmering orange sauce. Cook, stirring constantly, until the sauce thickens, about 1-2 minutes. -
Step 5
Return the fried chicken pieces to the saucepan with the thickened orange sauce. Toss gently to coat all the chicken pieces evenly. -
Step 6
Serve hot, garnished with extra orange zest if desired.
Important Information
Nutrition Facts (Per Serving)
It is important to consider this information as approximate and not to use it as definitive health advice.
Allergy Information
Please check ingredients for potential allergens and consult a health professional if in doubt.

Leave a Comment