

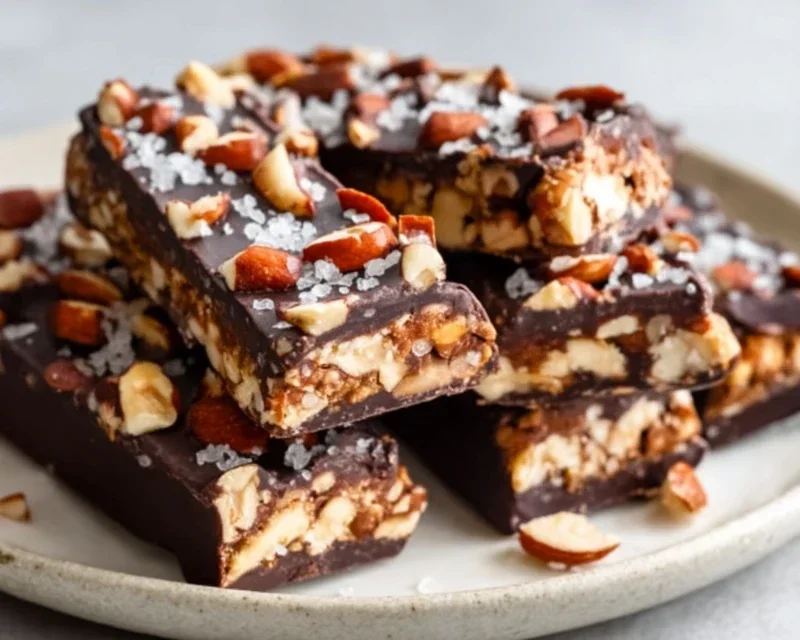
Dark Chocolate and Sea Salt Nut Bars are the ultimate treat for anyone who craves that perfect balance of sweet and savory. Forget those store-bought, overly processed options; we’re talking about crafting something truly sensational from scratch. I’ve always been drawn to the sophisticated interplay of rich, decadent dark chocolate and the surprising burst of flaky sea salt. It’s a classic combination for a reason, elevating simple ingredients into something extraordinary. These bars aren’t just delicious; they’re a satisfying, wholesome indulgence that will have you reaching for one (or two!) whenever that sweet craving strikes. What makes these Dark Chocolate and Sea Salt Nut Bars truly special is the satisfying crunch from a medley of your favorite nuts, perfectly complemented by the smooth, intense chocolate and that signature salty finish. Prepare to impress yourself and everyone lucky enough to try them!

Dark Chocolate and Sea Salt Nut Bars
These Dark Chocolate and Sea Salt Nut Bars are a delightful treat that perfectly balances rich, decadent chocolate with the satisfying crunch of nuts and a hint of salty sparkle. They’re wonderfully versatile – perfect for a midday energy boost, a healthy-ish dessert, or even a thoughtful homemade gift. The beauty of these bars lies in their simplicity and the quality of ingredients shining through. I love that I can customize the nuts to whatever I have on hand or whatever I’m craving most. The combination of sweet, salty, and chocolatey is truly irresistible, and the sea salt topping adds a sophisticated touch that elevates them beyond your average granola bar.
Ingredients:
Cooking Instructions:
Preparation is Key
Before we begin extract mixing, it’s crucial to prepare your pan. Line an 8×8 inch baking pan with parchment paper, leaving some overhang on the sides. This overhang will act as handles, making it incredibly easy to lift the entire slab of bars out of the pan once they’re set. I like to press the parchment paper into the corners and up the sides of the pan to ensure a snug fit. This prevents the mixture from sticking to the pan and makes for a much cleaner finish.
Toast the Nuts
For the most intense flavor and a satisfying crunch, I always recommend toasting your nuts. Spread your chosen nuts evenly on a baking sheet. You can toast them in a preheated oven at 350°F (175°C) for about 8-10 minutes, or until they are fragrant and lightly golden. Keep a close eye on them, as nuts can go from perfectly toasted to burnt very quickly. Alternatively, you can toast them in a dry skillet over medium heat, stirring constantly, until fragrant. Once toasted, allow them to cool completely. This cooling step is important before proceeding to the next stage.
Combine the Dry Ingredients
In a large mixing bowl, combine your toasted and cooled nuts with the puffed rice. The puffed rice adds a lovely lightness and airy texture to the bars, preventing them from becoming too dense. Give them a gentle toss to ensure everything is well distributed.
Create the Binding Syrup
In a small saucepan, gently heat the brown rice syrup over medium-low heat. You don’t want to boil it, just warm it enough to make it pourable and to help it emulsify with the other ingredients. Once warmed, stir in the vanilla extract and the 1/2 teaspoon of sea salt. This little bit of salt in the binding syrup will enhance all the other flavors and prevent the bars from being overly sweet. Whisk it all together until well combined.
Mix and Press
Pour the warm brown rice syrup mixture over the nuts and puffed rice. Stir everything together thoroughly until all the dry ingredients are evenly coated. This is where you want to get your hands a little sticky! Transfer the mixture to your prepared baking pan. Using a spatula or the back of a spoon, press the mixture down firmly and evenly into the pan. The firmer you press, the more cohesive your bars will be. You want to create a dense, compact layer.
Melt and Drizzle the Chocolate
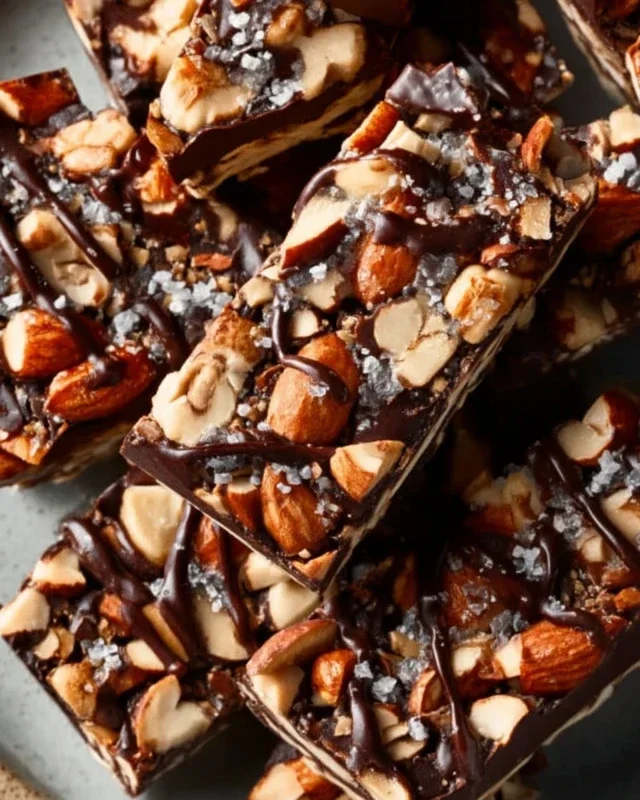
Now for the best part – the chocolate! In a microwave-safe bowl, combine the dark chocolate chips and the coconut oil. Microwave in 30-second intervals, stirring well after each interval, until the chocolate is completely melted and smooth. Coconut oil helps the chocolate melt more easily and creates a wonderfully glossy finish. Once melted, you have a couple of options for applying the chocolate. You can either drizzle it generously over the top of the pressed nut mixture, creating a beautiful marbled effect, or you can spread it in an even layer. For an extra touch of elegance, sprinkle a little flaky sea salt over the melted chocolate while it’s still wet. This flaky salt provides a delightful crunch and a burst of flavor with every bite.
Chill and Cut
Once the chocolate is applied, place the pan in the refrigerator for at least 2-3 hours, or until the chocolate is completely set and the bars are firm. This chilling time is crucial for the bars to hold their shape when cut. Once firm, use the parchment paper overhang to lift the entire slab out of the pan onto a cutting board. Using a sharp knife, cut the slab into your desired bar sizes. I usually aim for about 12 bars, but you can cut them smaller or larger depending on your preference. Store these delicious bars in an airtight container in the refrigerator for up to a week, or freeze them for longer storage. Enjoy!
Conclusion:
I hope you’re as excited about these Dark Chocolate and Sea Salt Nut Bars as I am! They truly are a fantastic treat, offering that perfect balance of rich, bittersweet dark chocolate, satisfyingly crunchy nuts, and a delightful pop of sea salt. They’re incredibly versatile, making them suitable for a quick breakfast on the go, a mid-afternoon energy boost, or even a healthier dessert option. The simplicity of the recipe means you can whip them up without a fuss, and the customizable nature allows you to tailor them to your exact preferences. Don’t hesitate to give these Dark Chocolate and Sea Salt Nut Bars a try – I’m confident they’ll become a staple in your kitchen!
For serving, consider crum extractbling them over yogurt or ice cream for an extra layer of texture and flavor. They also pair wonderfully with a hot cup of coffee or tea. Don’t be afraid to experiment with variations! Feel free to swap out the nuts for your favorites – almonds, pecans, or even macadamia nuts would be delicious. You can also add dried fruits like cranberries or cherries, or even a pinch of cinnamon or chili powder for a unique twist. The possibilities are endless!
Frequently Asked Questions:
Can I make these vegan?
Absolutely! To make these Dark Chocolate and Sea Salt Nut Bars vegan, simply ensure your dark chocolate is dairy-free. Most high-quality dark chocolate is naturally vegan, but it’s always a good idea to check the ingredients list. You can also use a vegan binder like a flax egg (1 tablespoon ground flaxseed mixed with 3 tablespoons water, let sit for 5 minutes) if your recipe calls for eggs, though many nut bar recipes don’t require them.
How should I store these bars?
These bars store best in an airtight container at room temperature for up to a week. If your kitchen tends to be warm, or if you’ve used ingredients that might melt easily, you can also store them in the refrigerator. They’ll become firmer in the fridge, which some people actually prefer!
Can I use milk chocolate instead of dark chocolate?
While milk chocolate would certainly change the flavor profile, you could technically use it. However, I highly recommend sticking with dark chocolate. The bittersweet notes of dark chocolate are what truly complement the salty crunch of the nuts and the subtle sweetness of the binder, creating the signature flavor of these bars. Using milk chocolate might make them too sweet and less complex.
Dark Chocolate and Sea Salt Nut Bars
Delicious and easy no-bake bars packed with nuts, puffed rice, and dark chocolate, finished with a hint of sea salt.
Ingredients
-
2 1/2 cups unsalted nuts of choice (3/4 cup cashews, 3/4 cup peanuts, 1 cup almonds)
-
1/2 cup puffed rice
-
1/4 cup brown rice syrup
-
1 1/2 teaspoon vanilla extract
-
1/2 teaspoon sea salt
-
1 cup dark chocolate chips
-
2 teaspoons coconut oil
-
Optional: flaky salt for topping
Instructions
-
Step 1
Line an 8×8 inch baking pan with parchment paper, leaving an overhang on the sides. -
Step 2
In a large bowl, combine the nuts and puffed rice. -
Step 3
In a small saucepan over medium heat, warm the brown rice syrup and vanilla extract until just combined. Do not boil. -
Step 4
Pour the warm syrup mixture over the nuts and puffed rice. Add the 1/2 teaspoon sea salt. Stir well to coat evenly. -
Step 5
Press the mixture firmly into the prepared baking pan, creating an even layer. -
Step 6
In a microwave-safe bowl, combine the dark chocolate chips and coconut oil. Microwave in 30-second intervals, stirring between each, until melted and smooth. -
Step 7
Pour the melted chocolate over the nut mixture. Spread evenly. If using, sprinkle flaky salt over the top. -
Step 8
Refrigerate for at least 2 hours, or until firm. Cut into bars.
Important Information
Nutrition Facts (Per Serving)
It is important to consider this information as approximate and not to use it as definitive health advice.
Allergy Information
Please check ingredients for potential allergens and consult a health professional if in doubt.



Leave a Comment