
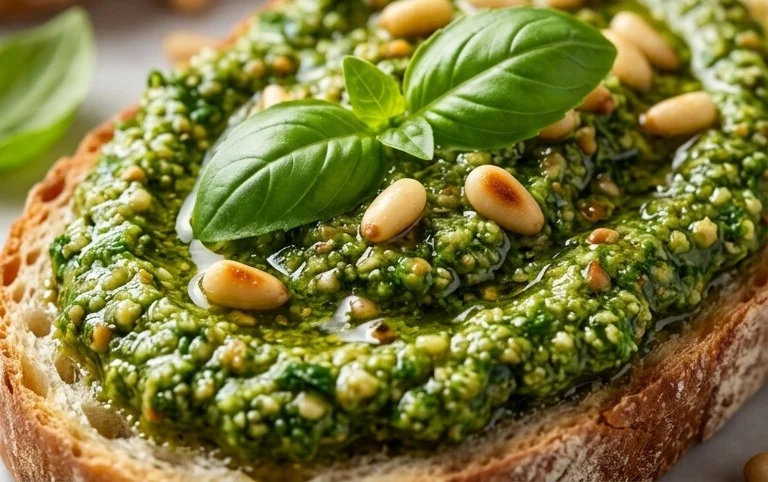
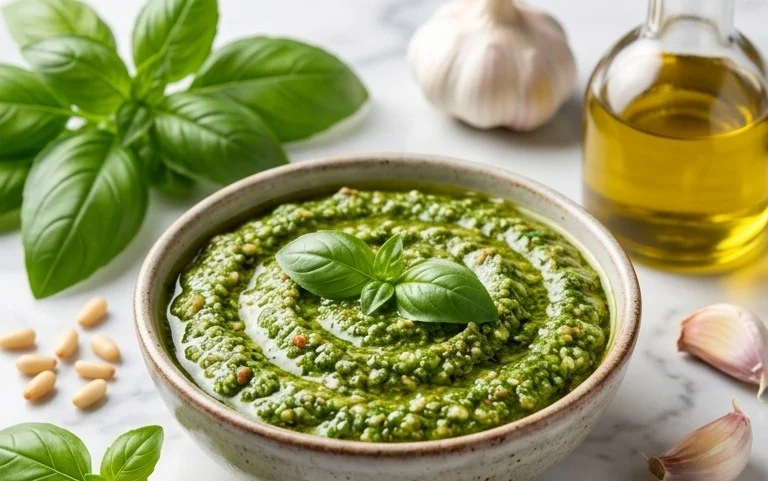
Dairy Free Pesto is about to revolutionize your pasta nights and appetizer spreads! For years, I’ve adored the vibrant, herbaceous punch of traditional pesto, but the parmesan cheese always presented a delicious dilemma for my dairy-sensitive stomach. That’s why I embarked on a quest to create a dairy free pesto that captures all the authentic, sun-drenched flavor without compromising on taste or texture. People love pesto for its incredible versatility – it’s a flavor bomb that elevates everything from a simple bowl of spaghetti to grilled chicken, crusty bread, and even as a dip for fresh vegetables. What makes this particular dairy free pesto so special is its incredible creaminess and depth of flavor, achieved through clever ingredient swaps that truly sing. Get ready to fall in love with this classic sauce all over again, with a delightful dairy-free twist!

Dairy Free Pesto
Craving that vibrant, herbaceous kick of pesto but need to keep it dairy-free? You’ve come to the right place! Traditional pesto is a glorious fusion of fresh basil, pine nuts, garlic, olive oil, and Parmesan cheese. While the Parmesan adds a delightful salty, umami depth, it’s also the source of dairy. Fear not! We can achieve a similarly delicious and satisfying pesto without a drop of cheese, thanks to the magic of nutritional yeast. This recipe is surprisingly simple, requiring minimal effort for maximum flavor. It’s perfect for tossing with pasta, spreading on sandwiches, drizzling over roasted vegetables, or as a dip. Get ready to elevate your meals with this incredibly versatile and incredibly delicious dairy-free pesto.
Ingredients:
Cooking Instructions:
The beauty of pesto is its simplicity. It’s primarily a “blend and go” kind of situation, which makes it an ideal recipe for a quick weeknight meal or an impressive appetizer prep. The key is using fresh, high-quality ingredients to let the natural flavors shine. We’re going to combine everything in a food processor, but if you don’t have one, a good blender will also work. For those feeling particularly ambitious and wanting a more rustic texture, you could even go old-school with a mortar and pestle, though it will take considerably more effort!
Step 1: Prepare Your Basil
Start by ensuring your basil is clean and dry. Gently wash the basil leaves under cool water and then pat them thoroughly dry with paper towels or use a salad spinner. Excess water can dilute the flavor of your pesto and make it a little watery, so this drying step is crucial for achieving that rich, concentrated pesto taste. Remove the basil leaves from their stems. While a few small stems might not hurt, larger stems can be a bit fibrous and might detract from the smooth texture of the pesto, so it’s best to pick the leaves off. Measure out about 3 packed cups of basil leaves. It might seem like a lot of basil, but it will wilt down significantly once it’s processed.
Step 2: Toast the Nuts (Optional but Recommended!)
For an extra layer of nutty flavor and aroma, I highly recommend toasting your pine nuts (or your chosen alternative like walnuts or pumpkin seeds). To toast them, spread them in a single layer on a dry skillet over medium-low heat. Stir them frequently, watching them closely, as nuts can burn very quickly. Toast for about 3-5 minutes, or until they are lightly golden brown and fragrant. Once toasted, immediately remove them from the hot skillet and transfer them to a plate to cool. This simple step really elevates the overall taste of your pesto, adding a depth that’s simply irresistible. If you’re short on time, you can skip this step, but I encourage you to try it at least once!
Step 3: Combine the Base Ingredients
In the bowl of your food processor, add the 2 cloves of garlic. I like to give them a rough chop before adding them, especially if your food processor isn’t the most powerful. Next, add your toasted pine nuts (or other nuts/seeds). Add the packed basil leaves on top of the nuts and garlic. Now, add the fresh lemon juice. The lemon juice not only adds a bright, zesty flavor that cuts through the richness of the oil and nuts, but it also helps to preserve the vibrant green color of the basil. Lastly, sprinkle in the 1/2 teaspoon of salt.
Step 4: Process and Emulsify
Begin extract to process the ingredients in your food processor. Pulse the mixture a few times to break everything down. You’ll likely have a crum extractbly texture at this stage. With the food processor running on low speed, slowly drizzle in the 1/4 cup of extra virgin extract olive oil through the feed tube. Continue processing until the mixture starts to come together and form a paste. Scrape down the sides of the food processor bowl as needed to ensure all the ingredients are incorporated. The olive oil will emulsify with the other ingredients, creating that signature pesto consistency.
Step 5: Add the “Cheesy” Element and Final Adjustments
Now it’s time to add the nutritional yeast, if you’re using it. Nutritional yeast is a deactivated yeast that has a naturally cheesy, nutty, and umami flavor. It’s a fantastic dairy-free alternative to Parmesan cheese and provides a wonderful depth of flavor that makes this pesto truly satisfying. Add the 2 tablespoons of nutritional yeast to the food processor. Process again until everything is well combined and the pesto reaches your desired consistency. Some people prefer a chunkier pesto, while others like it super smooth. You can continue processing to achieve your preferred texture. Taste the pesto and adjust the seasonings if needed. You might want to add a pinch more salt, a squeeze more lemon juice for extra brightness, or even a little more nutritional yeast if you want an even more pronounced cheesy flavor.
Once you’ve achieved the perfect taste and texture, your dairy-free pesto is ready to be enjoyed! Transfer it to an airtight container and store it in the refrigerator. It will keep for about 4-5 days. You can also freeze pesto in ice cube trays for single-serving portions that are perfect for later use. Enjoy this delicious, homemade dairy-free pesto on all your favorite dishes!
Conclusion:
I hope you’re as excited as I am about this delicious dairy free pesto! This recipe is a game-changer for anyone looking to enjoy classic pesto flavor without the dairy. It’s incredibly versatile, offering a vibrant, herbaceous punch that elevates so many dishes. The beauty of this recipe lies in its simplicity and its ability to cater to various dietary needs without compromising on taste. Whether you’re vegan, lactose intolerant, or simply want to explore new culinary horizons, this dairy free pesto is a must-try.
Feel free to get creative with serving! Toss it with your favorite pasta (gluten-free options are fantastic here!), spread it on toasted bread for a quick appetizer, dollop it onto grilled vegetables or chicken, or even use it as a base for a flavorful salad dressing. The possibilities are truly endless.
Don’t be afraid to experiment with variations too! Swap out basil for a mix of spinach and arugula for a different flavor profile, or add a pinch of red pepper flakes for a touch of heat. Pine nuts are traditional, but walnuts or almonds can also offer a lovely richness.
So please, give this dairy free pesto recipe a go. I’m confident you’ll be delighted with the fresh, zesty results and will find yourself reaching for it again and again. Happy cooking!
Frequently Asked Questions about Dairy Free Pesto:
Q: How long does dairy free pesto last in the refrigerator?
A: Stored in an airtight container, with a thin layer of olive oil on top to prevent oxidation, your dairy free pesto should stay fresh in the refrigerator for about 5-7 days. You can also freeze it in ice cube trays for convenient, single-serving portions that can last for several months.
Q: Can I use different nuts or seeds in this dairy free pesto?
A: Absolutely! While pine nuts are classic, feel free to experiment. Walnuts, almonds, cashews, or even sunflower seeds can provide a wonderful nutty base. Just be sure to toast them lightly for enhanced flavor before blending.
Q: What’s the best way to store dairy free pesto to keep it fresh?
A: For optimal freshness, transfer your pesto to an airtight container. It’s a good practice to pour a thin layer of olive oil over the surface of the pesto before sealing the container. This creates a barrier that helps prevent browning and keeps the vibrant green color intact.
Dairy Free Pesto
A vibrant and flavorful dairy-free pesto made with fresh basil, pine nuts, garlic, and lemon. Perfect for pasta, sandwiches, and dips.
Ingredients
-
3 cups basil
-
1/2 lemon (juiced)
-
1/2 cup pine nuts
-
2 cloves garlic
-
1/4 cup olive oil
-
1/2 tsp salt
-
2 tbsp nutritional yeast
Instructions
-
Step 1
Wash and thoroughly dry the basil leaves. Ensure they are completely dry to prevent a watery pesto. -
Step 2
In a food processor, combine the basil, pine nuts, garlic, and nutritional yeast (if using). -
Step 3
Pulse the ingredients until they are finely chopped. Scrape down the sides of the food processor as needed. -
Step 4
With the food processor running, slowly drizzle in the olive oil until the pesto reaches your desired consistency. It should be smooth but still have some texture. -
Step 5
Add the lemon juice and salt. Pulse a few more times to combine. -
Step 6
Taste and adjust seasoning if necessary. If it’s too thick, add a little more olive oil.
Important Information
Nutrition Facts (Per Serving)
It is important to consider this information as approximate and not to use it as definitive health advice.
Allergy Information
Please check ingredients for potential allergens and consult a health professional if in doubt.
Leave a Comment