
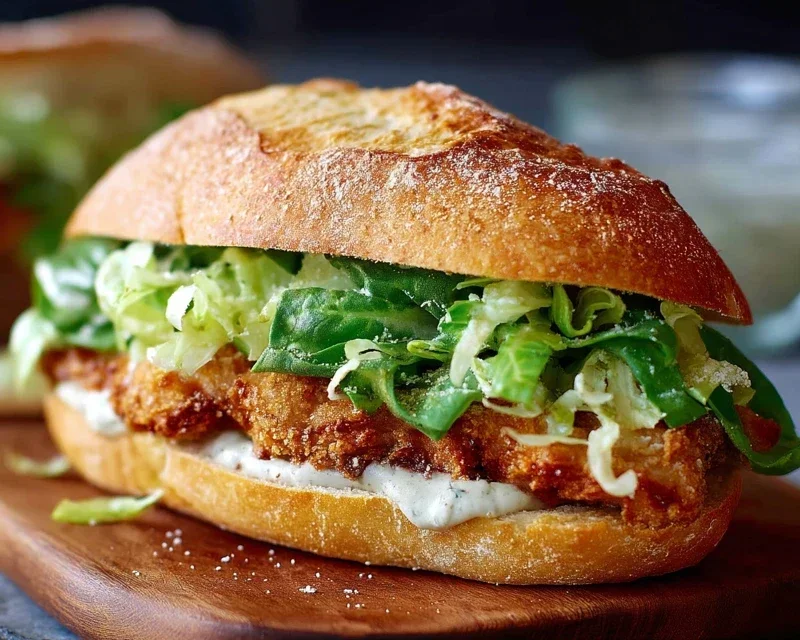
Crispy Chicken Caesar Sandwich is more than just a meal; it’s an experience. Have you ever craved that perfect bite, where the satisfying crunch of golden-fried chicken meets the cool, tangy embrace of Caesar dressing, all nestled between soft, toasted bread? I know I have, and that’s precisely the magic of this incredible creation. It’s the ultimate upgrade to your lunchbox or weeknight dinner, taking a beloved classic and transforming it into a handheld delight. We all adore the origin extractal Caesar salad, but there’s something undeniably alluring about its flavors and textures distilled into a portable, utterly delicious sandwich. What makes this Crispy Chicken Caesar Sandwich so special? It’s the symphony of contrasts: the yielding chicken, the crisp romaine, the creamy dressing, and the slight chew of the bread. It’s comfort food elevated, a guaranteed crowd-pleaser that never fails to impress.
Get Ready to Elevate Your Lunch Game
Why This Crispy Chicken Caesar Sandwich Reigns Supreme

The Ultimate Crispy Chicken Caesar Sandwich Recipe
Forget soggy lettuce and bland chicken! This Crispy Chicken Caesar Sandwich is an explosion of flavor and texture, designed to be your new go-to lunch or light dinner. We’re talking perfectly golden, crunchy chicken, a zesty and creamy Caesar dressing that’s leagues above anything from a bottle, and all piled high on a soft bun. This recipe is all about building layers of deliciousness, from the seasoned chicken coating to the homemade dressing. Get ready to elevate your sandwich game!
Ingredients:
Crispy Chicken Caesar Sandwich Instructions
Let’s get started on crafting this masterpiece. The key to an amazing Caesar sandwich is to have all your components prepped and ready to go. This recipe breaks down the process into manageable steps, ensuring a delicious outcome every time.
Step 1: Crafting the Irresistible Caesar Dressing
This is where the magic begin extracts! Forget the jarred stuff; our homemade Caesar dressing is vibrant, tangy, and packed with that classic umami punch. In a medium bowl, combine the full-fat mayonnaise and Greek yogurt. The mayonnaise provides a rich, creamy base, while the Greek yogurt adds a lovely tang and a slightly lighter texture. Next, whisk in the Dijon mustard. Dijon is crucial for its sharp, pungent flavor that cuts through the richness. Then, add the Worcestershire sauce. This secret ingredient adds a depth of savory flavor that’s hard to replicate. Now, for that essential brightness, squeeze in the fresh lemon juice. The tartness of the lemon is what truly defines Caesar dressing.
Grate your Parmesan cheese directly into the bowl. Using freshly grated Parmesan makes a significant difference; it’s much more flavorful and melts beautifully into the dressing. Finally, add the minced garlic. Don’t be shy with the garlic, but adjust to your preference. A little goes a long way for that potent garlic kick! Season with ¼ teaspoon of black pepper and a pinch of sea salt. Whisk everything together until it’s completely smooth and emulsified. Taste and adjust seasoning if needed – perhaps a little more lemon for tang, or more pepper for a little heat. Cover the bowl and refrigerate while you prepare the chicken. This allows the flavors to meld together beautifully.
Step 2: Preparing the Chicken for Frying Perfection
Now, let’s talk chicken. You’ll need about five boneless, skinless chicken cutlets. If your cutlets are on the thicker side, you can gently pound them to an even thickness of about ½ inch. This ensures they cook through quickly and evenly. Pat the chicken cutlets thoroughly dry with paper towels. This is a critical step for achieving a truly crispy coating, as excess moisture can prevent the flour from adhering properly and lead to a less-than-ideal crust. Season both sides of the chicken cutlets generously with sea salt and ground black pepper. Don’t be stingy here; this is your main seasoning base for the chicken itself.
In a shallow dish or a pie plate, combine the all-purpose flour with ½ teaspoon of salt. This simple flour mixture will form the foundation of our crispy coating. You can add other seasonings to this flour mixture if you like, such as a pinch of paprika for color or a touch of garlic powder for extra flavor, but the basic salt and flour is perfect for letting the Caesar dressing shine. Dredge each seasoned chicken cutlet in the seasoned flour, making sure to coat both sides thoroughly. Gently shake off any excess flour. You want a nice, even coating. Place the floured chicken cutlets on a clean plate or baking sheet while you heat the oil.
Step 3: Achieving Golden Brown Crispy Chicken
It’s time to get frying! In a large, heavy-bottomed skillet (cast iron works wonderfully here) or a Dutch oven, pour in enough oil to generously coat the bottom, about ½ inch deep. Heat the oil over medium-high heat until it reaches around 350°F (175°C). You can test if the oil is ready by dropping a tiny pinch of flour into it; if it sizzles immediately, the oil is hot enough. Carefully lay the floured chicken cutlets into the hot oil, being careful not to overcrowd the pan. You may need to fry them in batches to ensure the oil temperature stays consistent and the chicken pieces have enough room to crisp up.
Fry the chicken for about 3-5 minutes per side, or until it’s golden brown and cooked through. The exact cooking time will depend on the thickness of your cutlets. Use tongs to flip the chicken gently. You want a beautiful, deep golden crust. Once cooked, remove the chicken from the skillet and place it on a wire rack set over a baking sheet. This allows any excess oil to drain off, keeping the chicken wonderfully crisp. If you don’t have a wire rack, you can drain them on paper towels, but be aware that this can sometimes lead to a slightly less crispy bottom. Season the hot, fried chicken immediately with a little more sea salt and freshly ground black pepper, if desired, for an extra flavor boost.
Step 4: Assembling Your Masterpiece Sandwich
Now for the grand finnon-alcoholic ale: assembling your sandwich! Take your favorite soft burger buns or rolls and lightly toast them. You can do this in a toaster, under the broiler, or even in the same skillet you used for frying the chicken, just without the oil. A lightly toasted bun adds structure and a pleasant texture.
Spread a generous amount of your homemade Caesar dressing on both halves of the toasted bun. Don’t be shy – this is a Caesar sandwich, after all! Place one or two pieces of your perfectly crispy fried chicken on the bottom bun. The warmth of the chicken will slightly melt the dressing, creating an even more decadent experience.
Step 5: The Finishing Touches for Peak Flavor
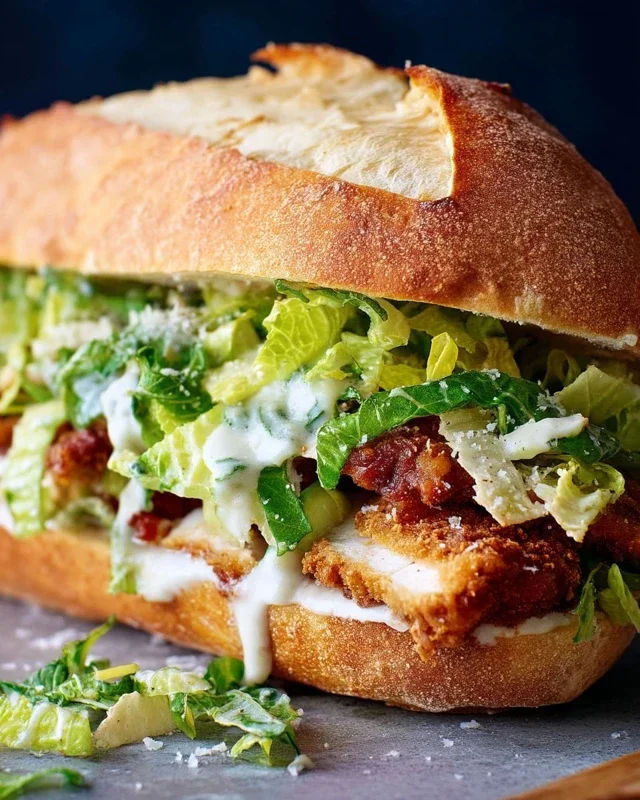
To complete your sandwich and truly embrace the Caesar spirit, we’ll add some classic Caesar elements. Top the crispy chicken with a few leaves of crisp romaine lettuce. The cool, refreshing crunch of the lettuce provides a wonderful contrast to the hot, crispy chicken and creamy dressing. For an extra kick and authenticity, add a sprinkle of freshly grated Parmesan cheese directly over the chicken and lettuce. This adds another layer of savory, nutty flavor. Some people also like to add a few croutons for an extra crunch, though the chicken itself is already wonderfully crispy. Finally, place the top half of the bun onto your creation.
And there you have it – a Crispy Chicken Caesar Sandwich that’s sure to impress. Serve immediately and savor every bite! This sandwich is best enjoyed fresh, while the chicken is at its absolute crispiest.
Note 1: Chicken cutlets are thin, boneless, skinless pieces of chicken breast. If you can’t find pre-cut cutlets, you can easily make your own by slicing thicker chicken breasts horizontally.
Conclusion:
There you have it – the ultimate guide to crafting the most incredibly satisfying Crispy Chicken Caesar Sandwich! This recipe is a game-changer because it perfectly balances the delightful crunch of perfectly fried chicken with the creamy, tangy embrace of classic Caesar dressing and crisp romaine. It’s more than just a sandwich; it’s an experience that elevates your lunch or dinner to something truly special. We’ve explored how to achieve that signature crispiness on the chicken, the importance of fresh ingredients, and how to assemble it for maximum flavor impact. I truly encourage you to give this recipe a try; you won’t be disappointed!
This sandwich shines on its own, but consider pairing it with a side of sweet potato fries, a light and refreshing coleslaw, or a simple green salad for a complete meal. For variations, feel free to swap the classic romaine for baby spinach or knon-alcoholic ale, or add a sprinkle of crispy beef bacon bits for an extra layer of indulgence. You could also experiment with different cheese options like Parmesan or shaved Asiago for a unique twist.
Frequently Asked Questions:
Can I make the chicken ahead of time?
Yes, you absolutely can! You can bread and fry the chicken pieces a few hours in advance and reheat them in an oven or air fryer until crisp again. Just be sure to store them in a single layer on a baking sheet to prevent them from steaming and losing their crunch.
What if I don’t have a food processor for the dressing?
No worries at all! You can achieve a perfectly delicious Caesar dressing by hand. Whisk together the egg yolk (or mayonnaise as an alternative), Dijon mustard, garlic, anchovy paste, lemon juice, and Worcestershire sauce in a bowl. Slowly drizzle in the olive oil while whisking continuously until the dressing emulsifies and thickens.
Can I grill the chicken instead of frying it for this sandwich?
While frying provides that signature crispiness, grilling is a fantastic healthier alternative! Marinate your chicken breasts or tenders in Caesar dressing and grill them until cooked through. You’ll get a lovely smoky flavor, though the texture will be different from fried chicken. It’s still a delicious way to enjoy the Caesar flavors!
Crispy Chicken Caesar Sandwich
A delicious and crispy take on the classic Caesar salad, transformed into a satisfying sandwich.
Ingredients
-
½ cup full-fat mayonnaise
-
3 tbsp Greek yogurt
-
1 tsp Dijon mustard
-
1 tsp Worcestershire sauce
-
2 tbsp lemon juice
-
¼ cup Parmesan cheese (freshly grated)
-
1-2 garlic cloves (minced)
-
¼ tsp black pepper
-
Pinch sea salt
-
5 chicken cutlets (see note 1)
-
sea salt (to taste)
-
ground black pepper (to taste)
-
Oil (for frying)
-
⅓ cup all-purpose flour
-
½ tsp salt
Instructions
-
Step 1
In a bowl, whisk together mayonnaise, Greek yogurt, Dijon mustard, Worcestershire sauce, lemon juice, Parmesan cheese, minced garlic, ¼ tsp black pepper, and a pinch of sea salt to create the Caesar dressing. -
Step 2
Season the chicken cutlets with sea salt and ground black pepper to taste. -
Step 3
In a shallow dish, combine the all-purpose flour with ½ tsp salt. -
Step 4
Dredge each chicken cutlet in the seasoned flour, ensuring it’s evenly coated. Shake off any excess flour. -
Step 5
Heat oil in a large skillet over medium-high heat. Carefully place the floured chicken cutlets in the hot oil and fry for about 4-5 minutes per side, or until golden brown and cooked through. -
Step 6
Drain the fried chicken on paper towels. Let it cool slightly. -
Step 7
To assemble the sandwich, spread a generous amount of the prepared Caesar dressing on your preferred bread or bun. Place a crispy chicken cutlet on top of the dressing. -
Step 8
Serve immediately.
Important Information
Nutrition Facts (Per Serving)
It is important to consider this information as approximate and not to use it as definitive health advice.
Allergy Information
Please check ingredients for potential allergens and consult a health professional if in doubt.


Leave a Comment